
How to Build a Knowledge Base with Open WebUI on Glows.ai
This tutorial walks you through renting a GPU on Glows.ai to run Open WebUI, connecting both local and external models, understanding the basic and advanced settings, and calling everything through an API from your own code. The result is a deployment that keeps your data private while still being fully programmable.
This tutorial covers:
- Creating an instance on Glows.ai and launching Open WebUI
- Basic operations: model configuration and knowledge-base Q&A (RAG)
- Calling Open WebUI from your own programs via API
- Connecting external model providers (OpenAI, Anthropic, etc.)
- Advanced features: Skills and Sub-agents
Open WebUI is a self-hosted, open-source AI chat platform. It runs local open-source models (such as Llama or Qwen) through inference engines like Ollama, while also connecting to external cloud services such as OpenAI and Anthropic, letting you mix models from different sources in a single interface. It's more than a chat UI — it also includes built-in knowledge-base Q&A (RAG), custom assistants, and an API-compatible layer, so it can serve as the AI infrastructure behind your own applications.
Let's walk through a hands-on demonstration of Open WebUI on Glows.ai.
Log In to Open WebUI
Launch an Instance
First, create an instance on Glows.ai. You can refer to the instance creation tutorial.
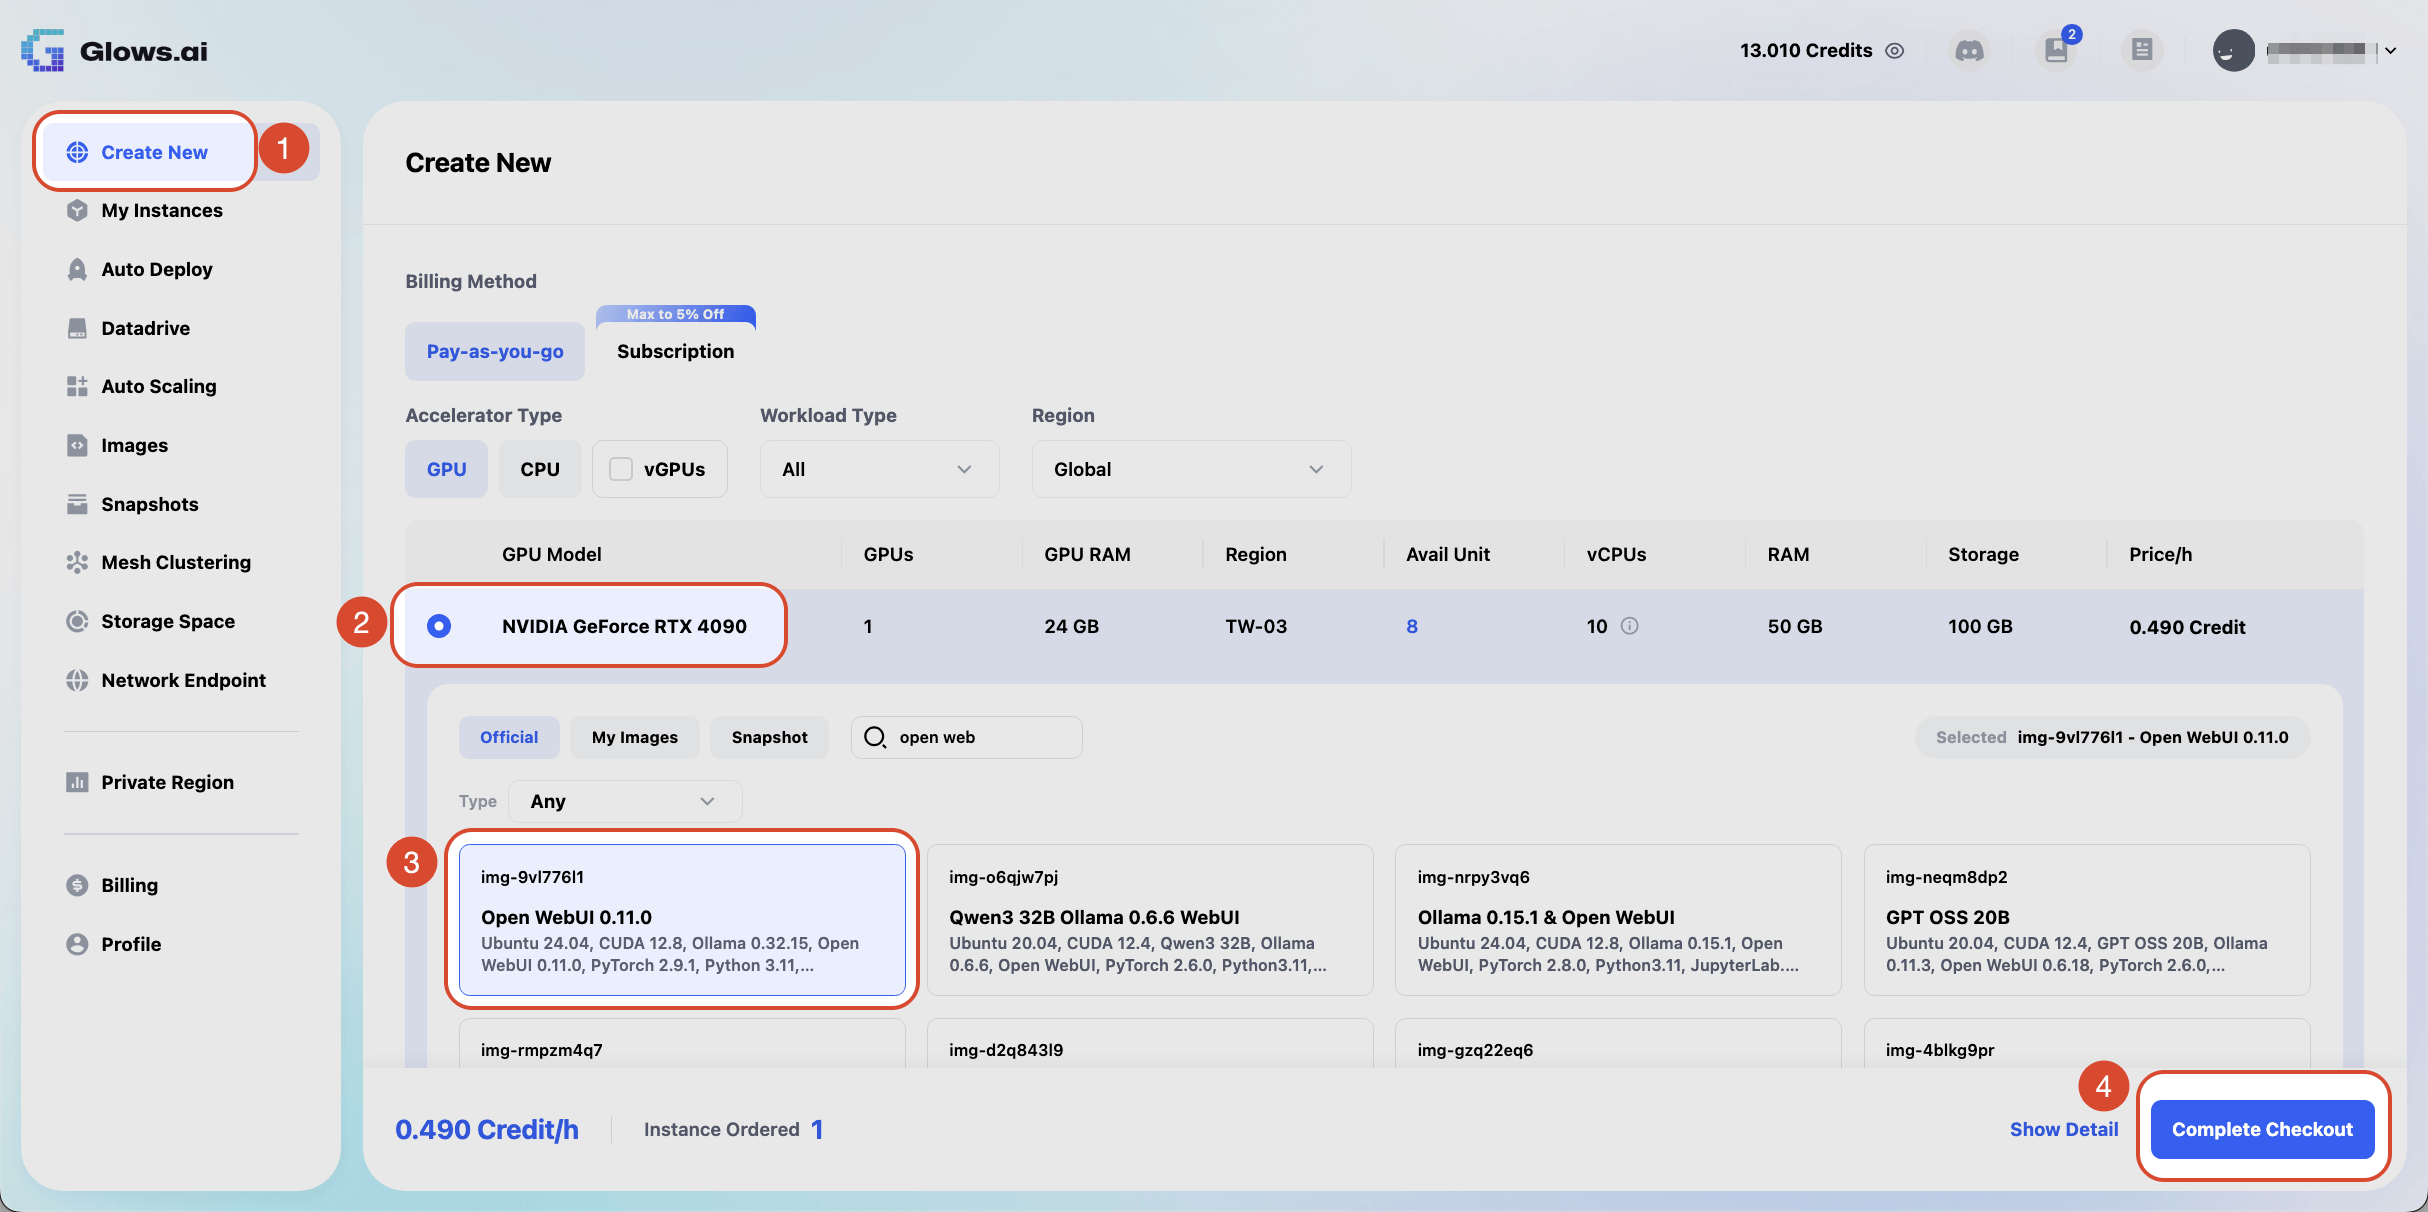
- Click
Create New, then select theNVIDIA GeForce RTX 4090GPU. Choose the image with Open WebUI version 0.11.0 — in this walkthrough we use theimg-9vl776l1 - Open WebUI 0.11.0image. ClickComplete Checkoutto launch the instance.
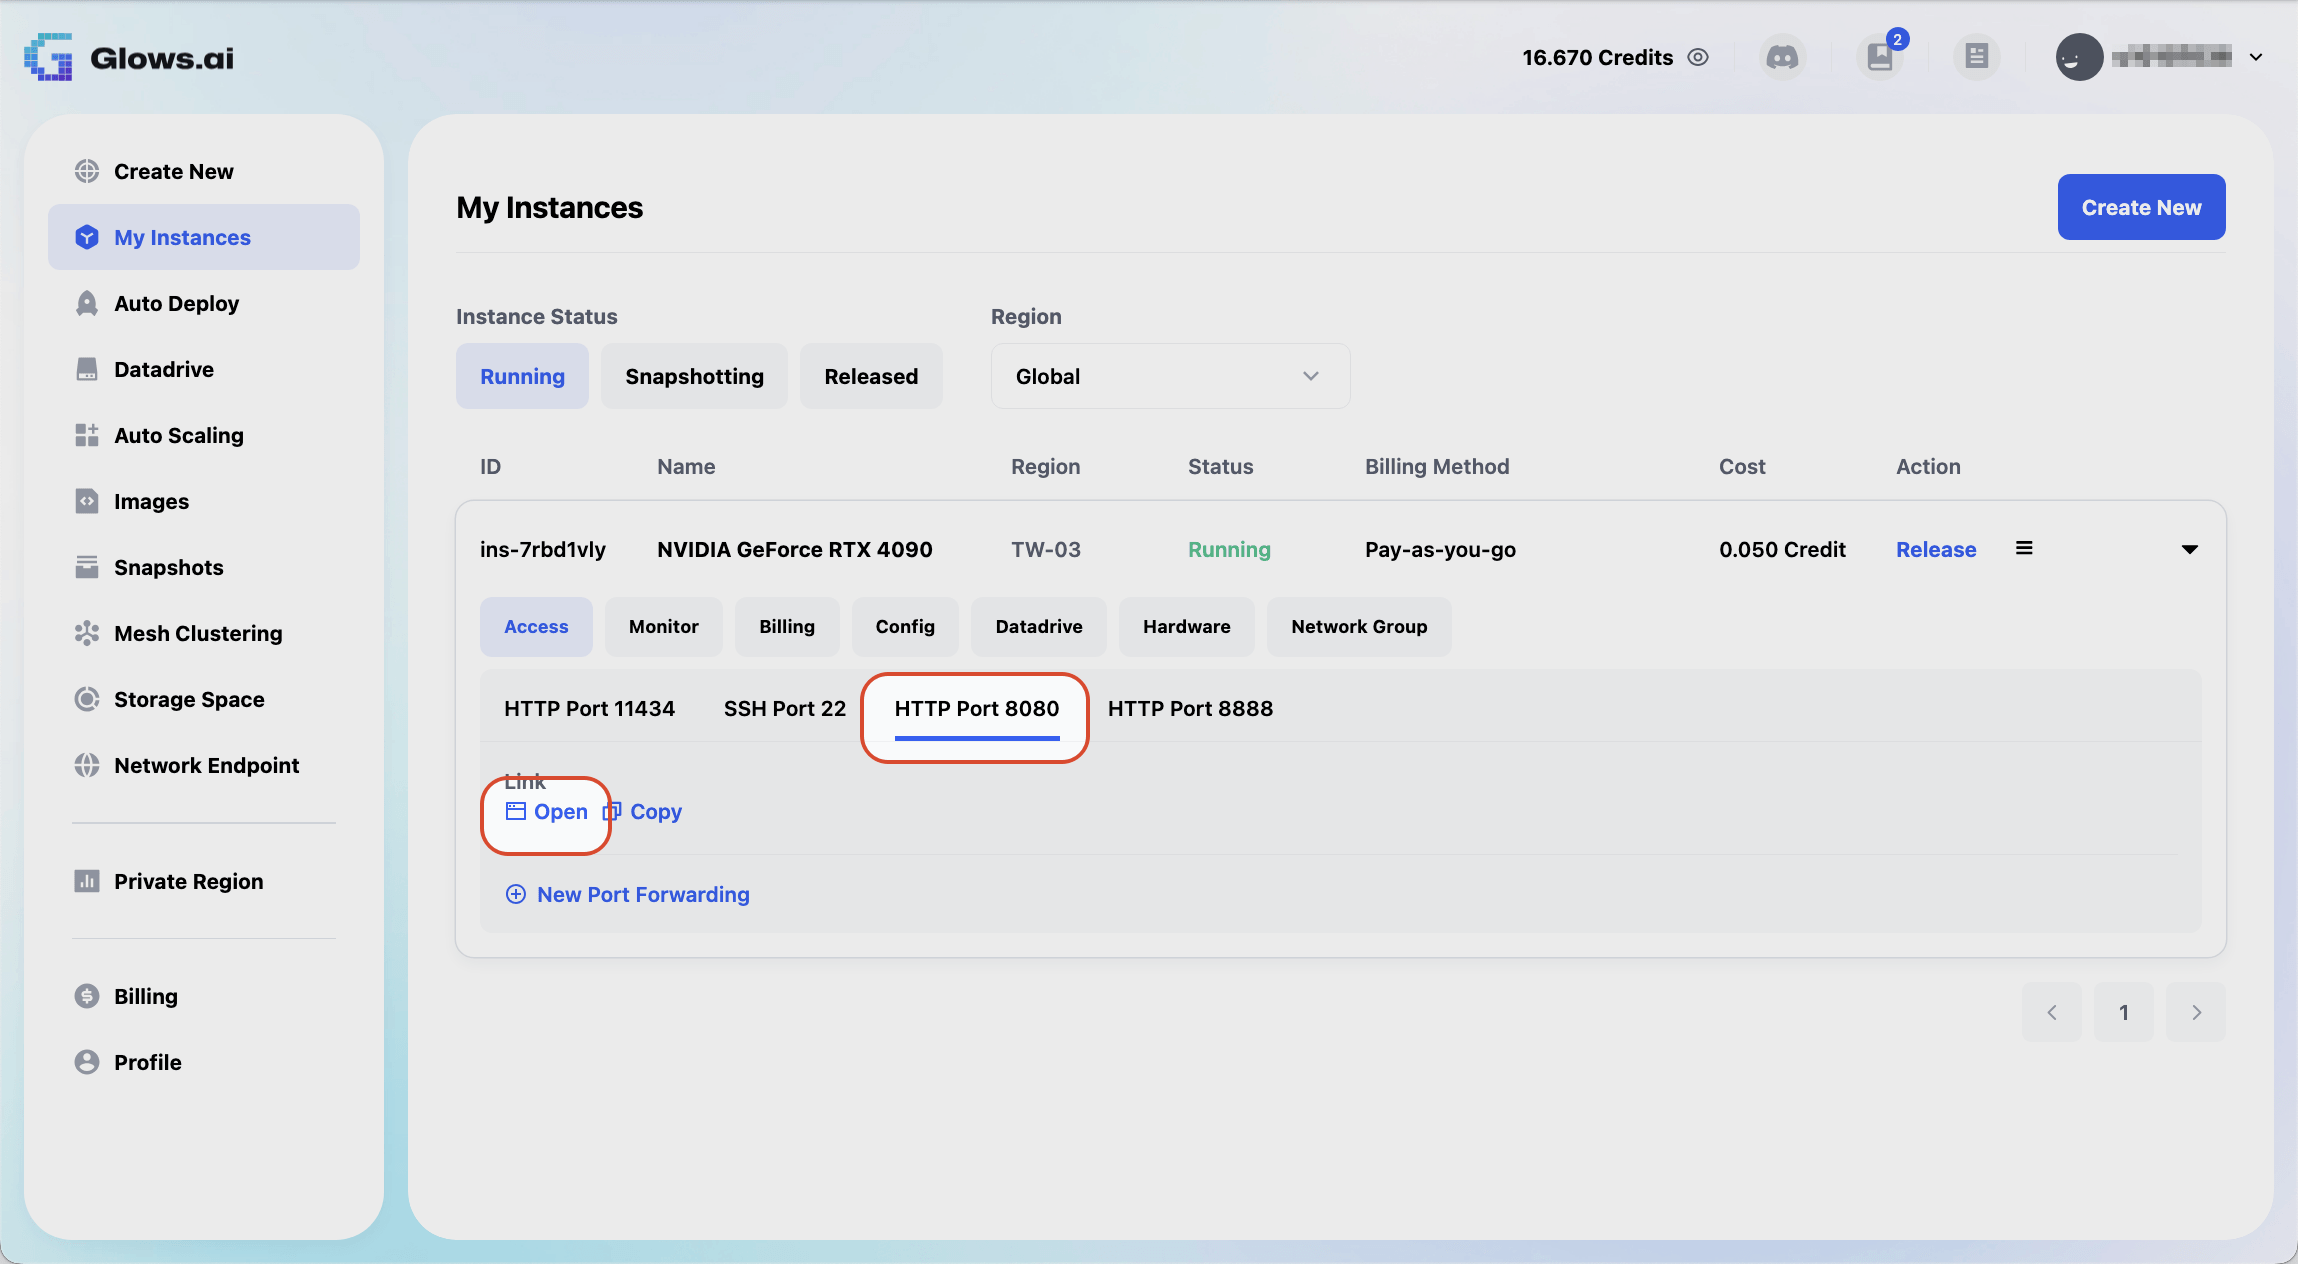
- Once the machine has launched successfully, click
Port 8080, then clickOpento enter the Open WebUI interface.
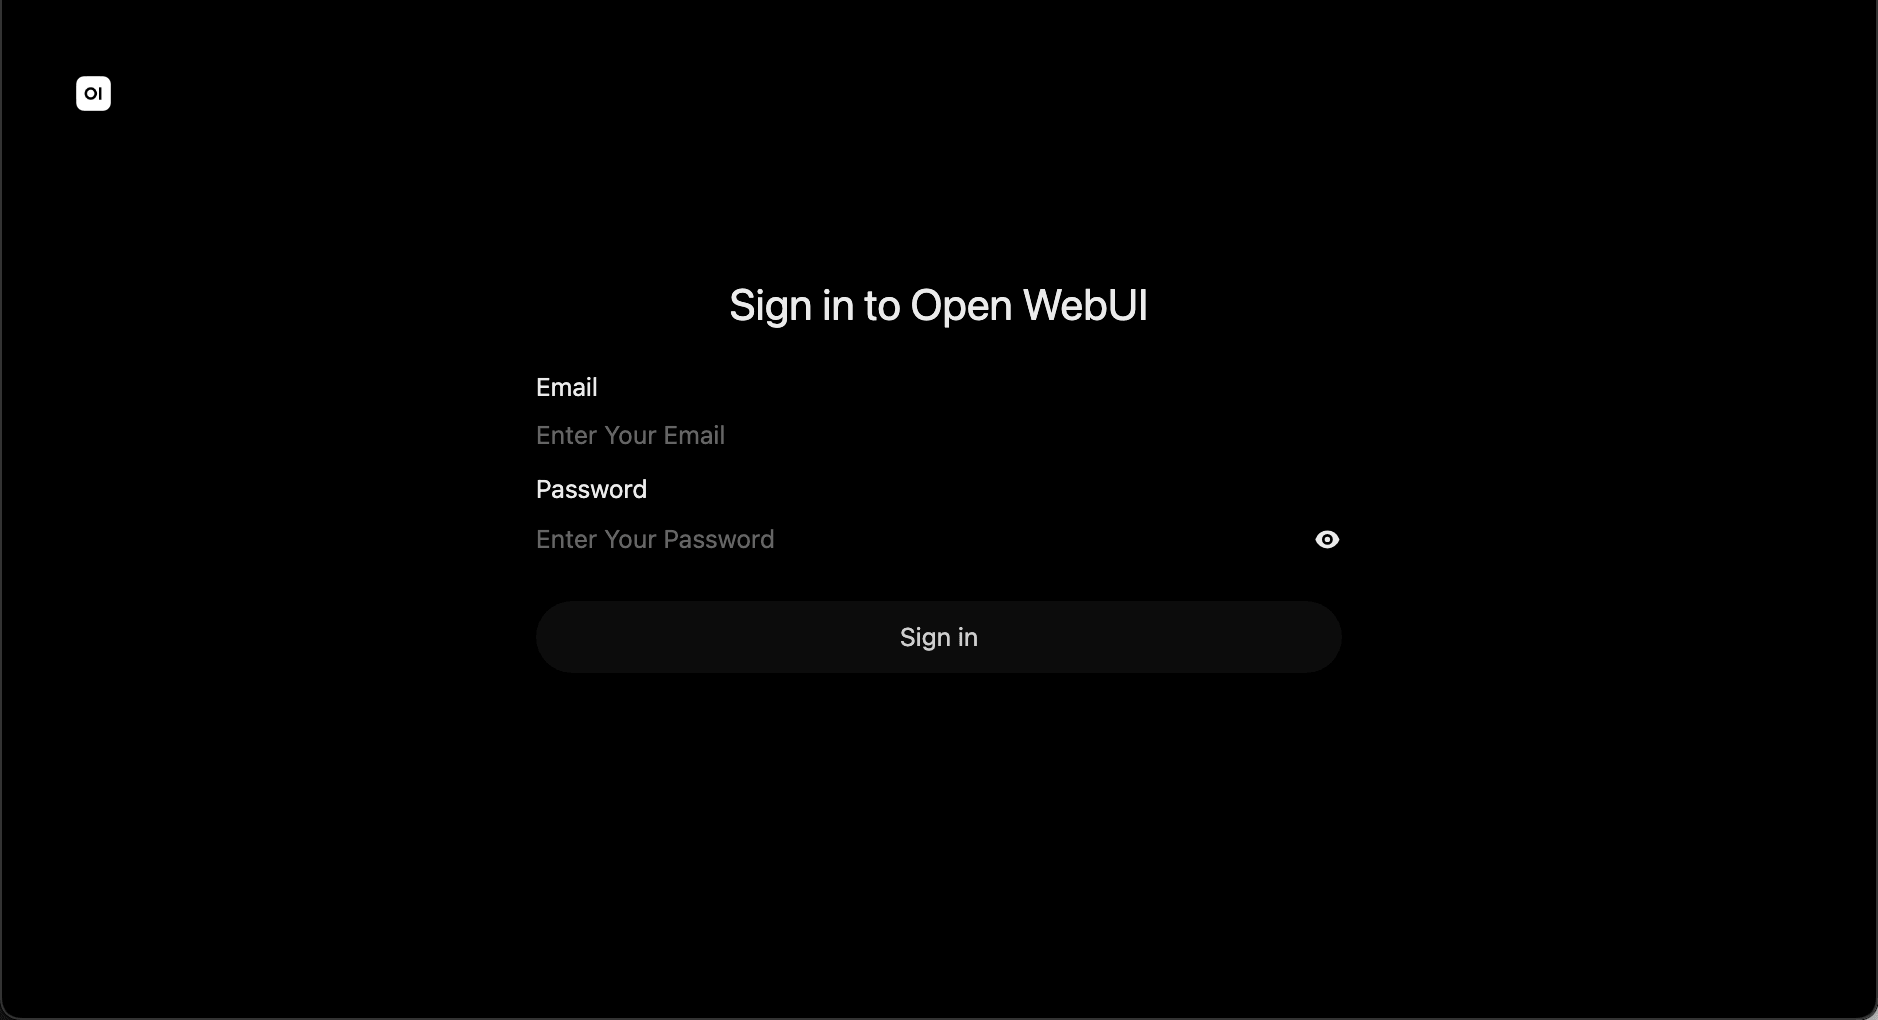
- You can now log in from the Open WebUI window. If this is your first time opening it, you'll need to register an administrator account.
Set Up a RAG Knowledge Base
What Is RAG
RAG (Retrieval-Augmented Generation) works by first processing your internal data (product documents, SOPs, internal guidelines, etc.) with embedding technology and storing it long-term in a knowledge base. When you ask a question, the AI searches the knowledge base for the documents you uploaded, finds relevant content, and uses it as a reference when answering.
In a typical AI conversation, the AI can only answer based on what it remembers from that conversation. Pasting all your reference material directly into the chat means re-pasting it every time, and none of it is retained once the conversation ends — so knowledge can never accumulate. RAG solves exactly this problem.
Create a RAG Knowledge Base
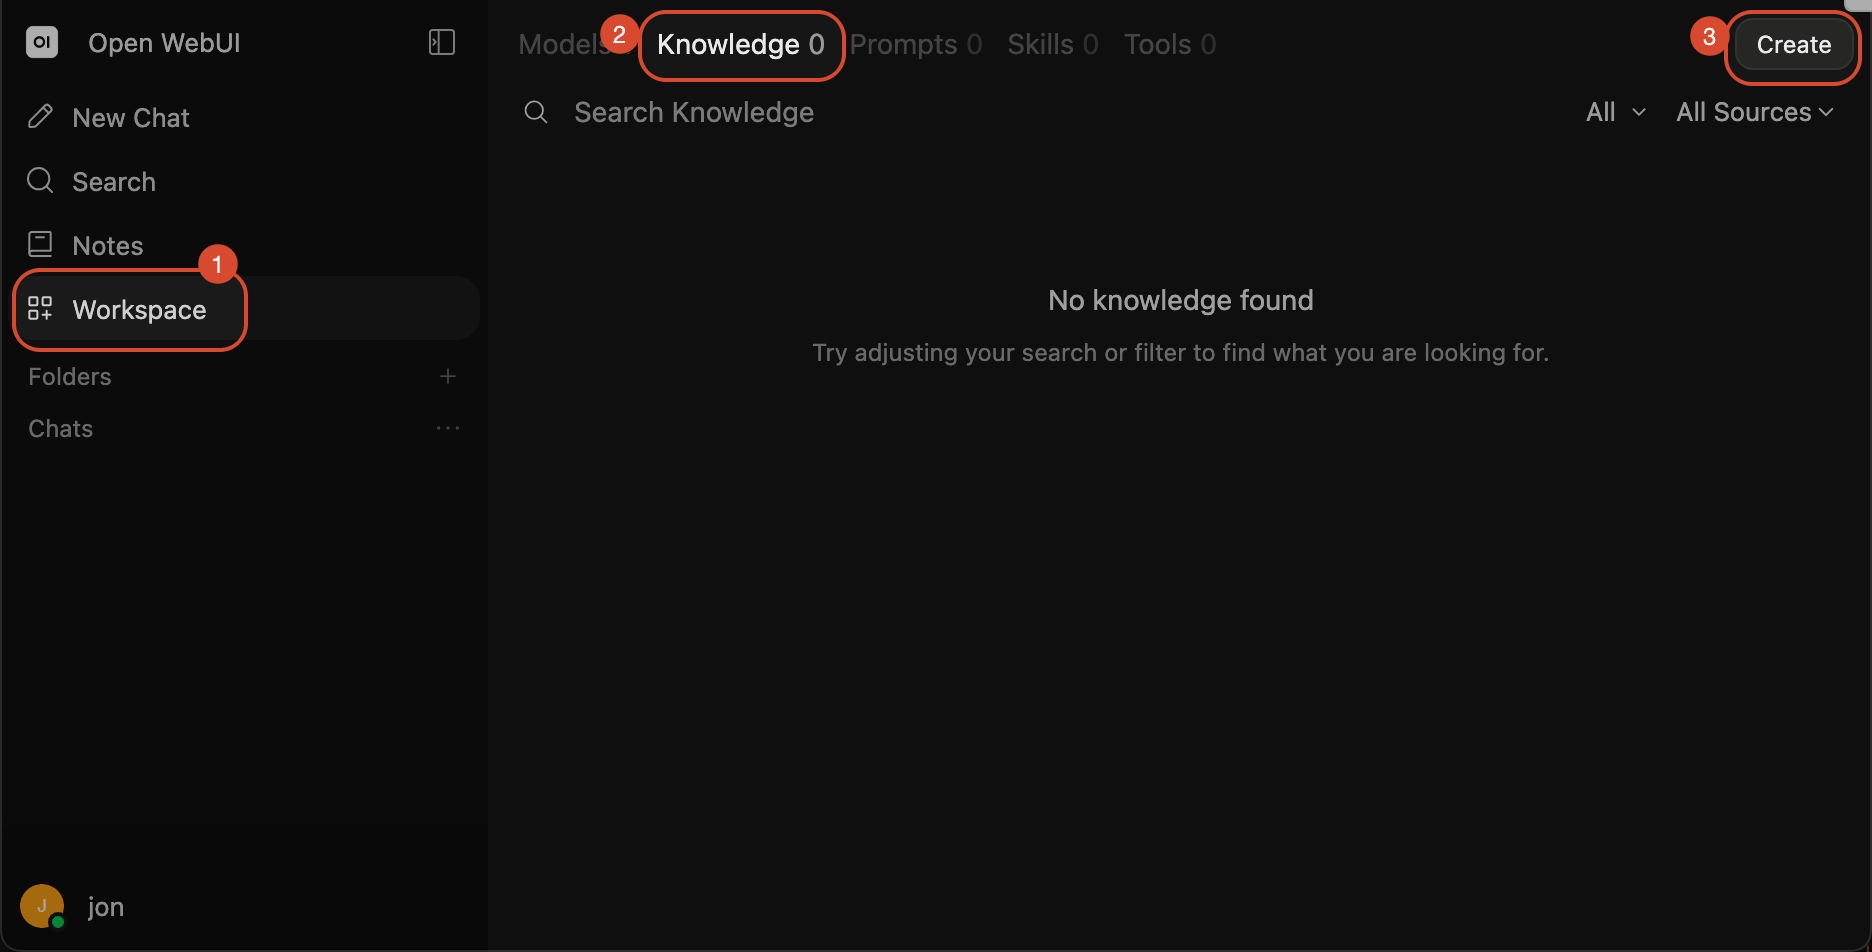
- Click
Workspaceon the left, thenKnowledge, thenCreateto start building your knowledge base.
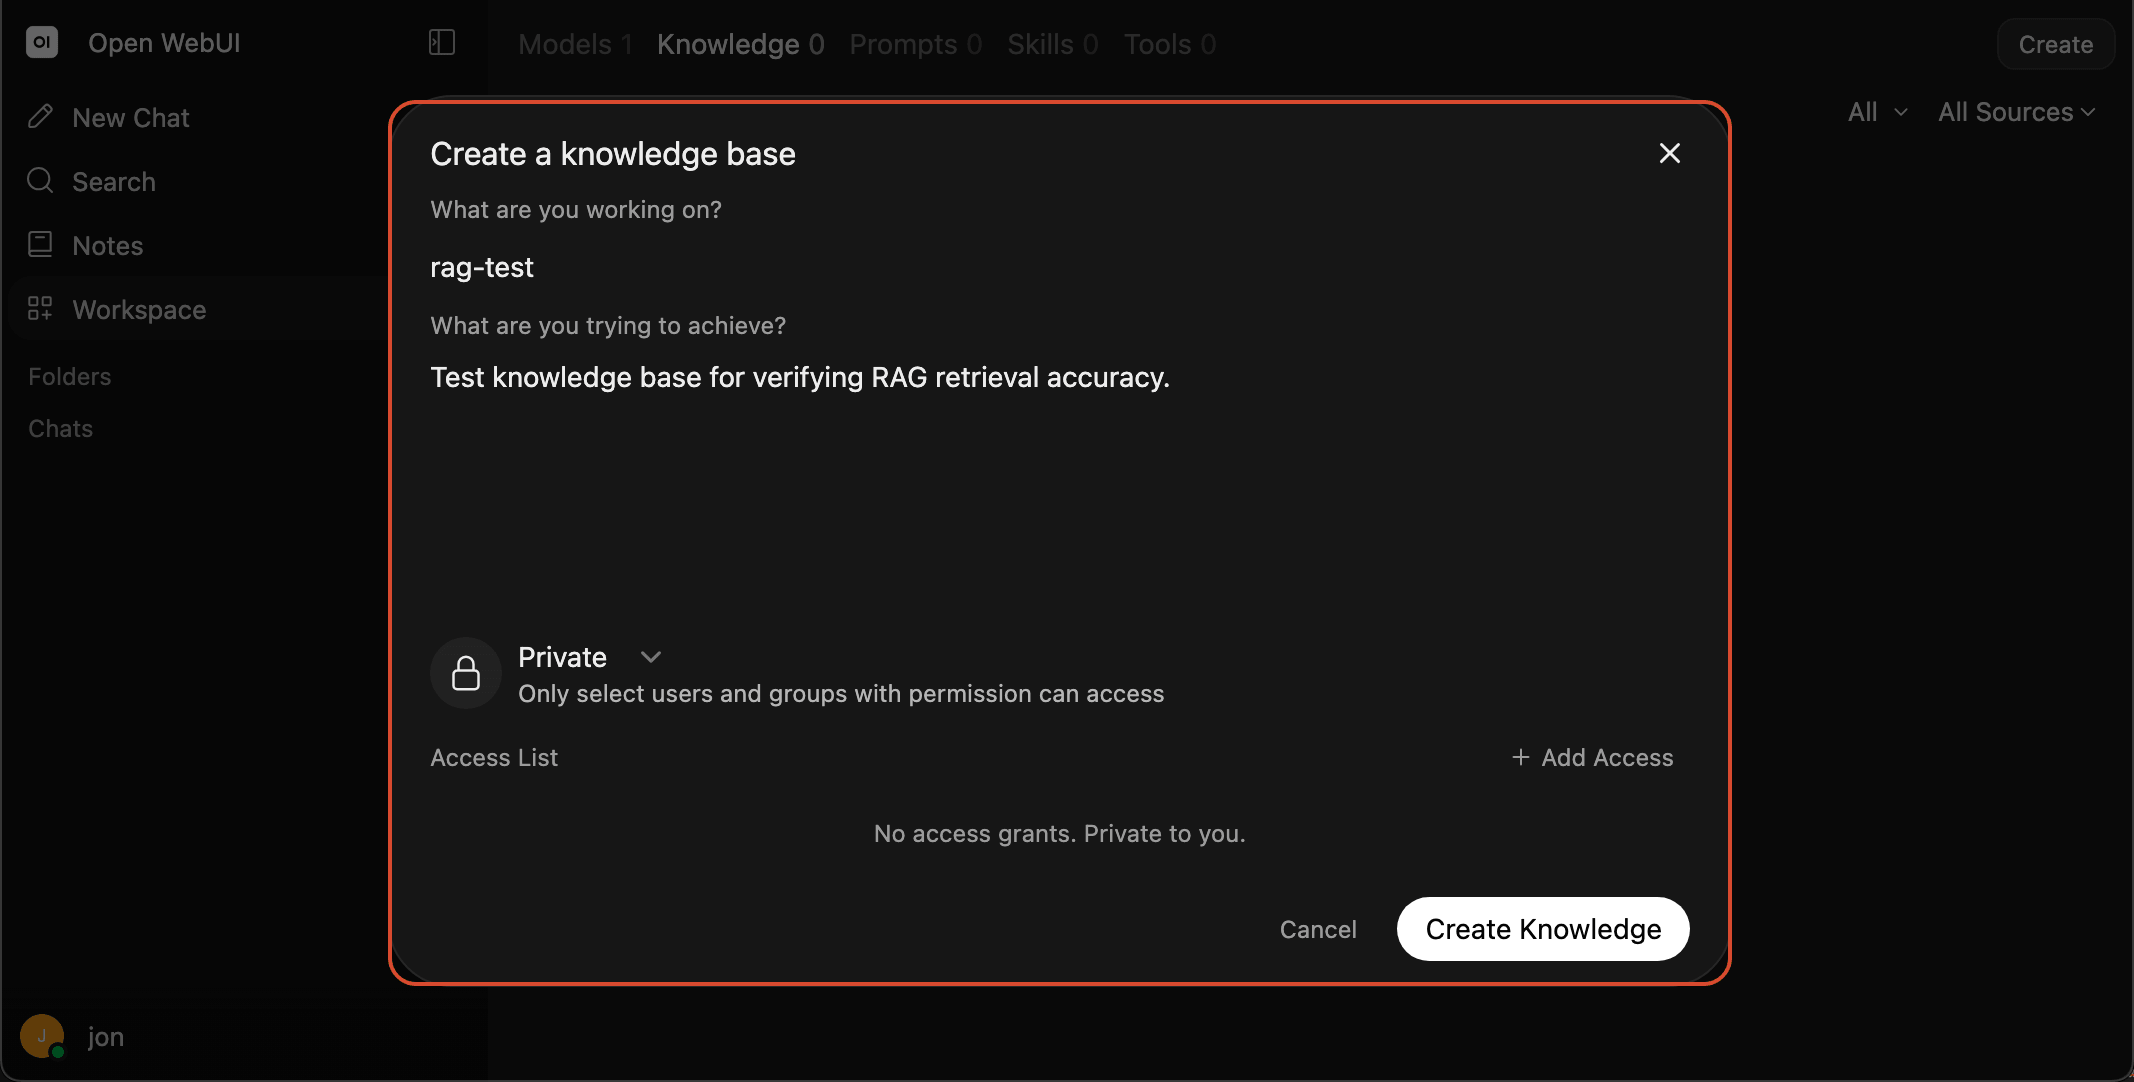
- Enter the basic information for the knowledge base, then click
Create Knowledge.
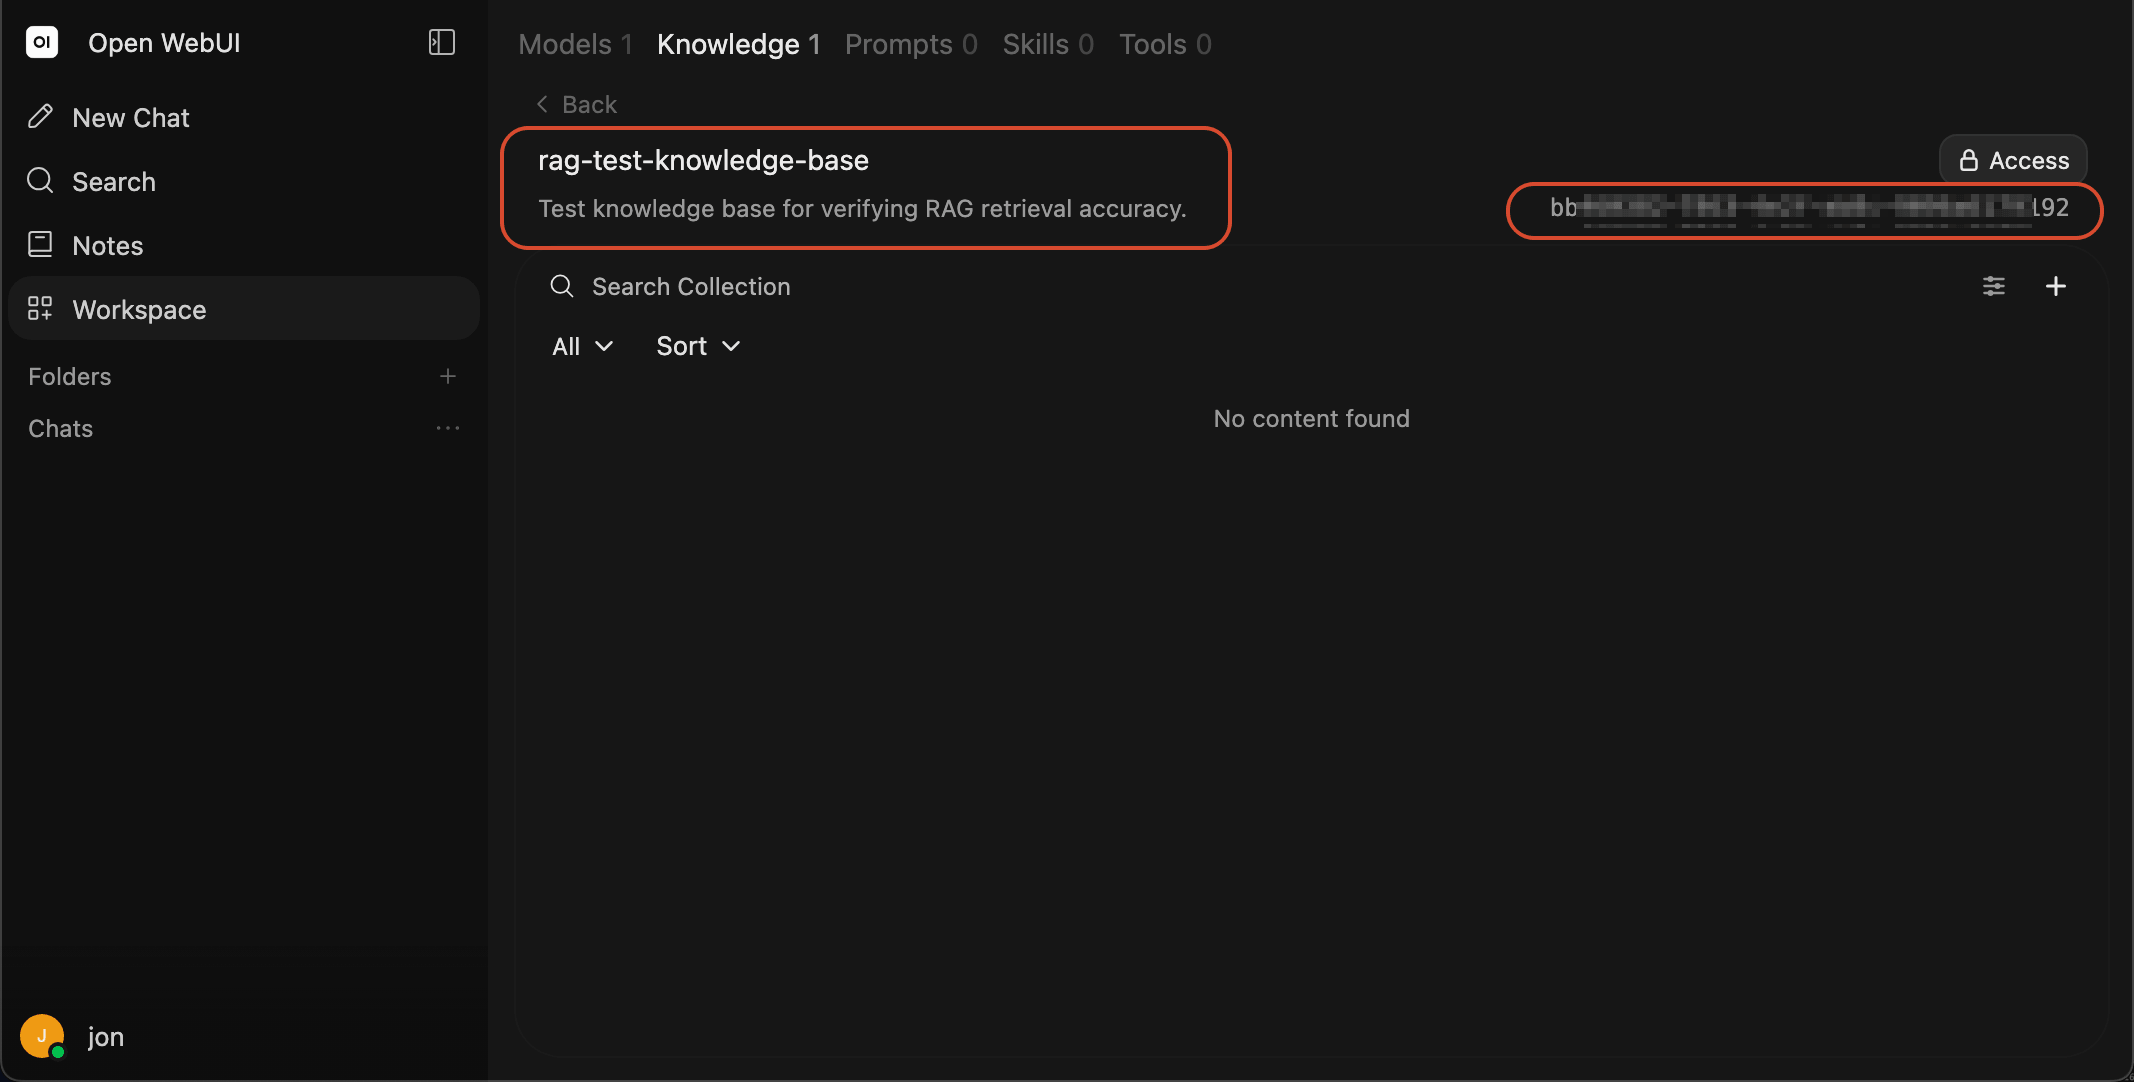
- Once created, you'll see the knowledge base name along with its ID — you'll need this ID later.
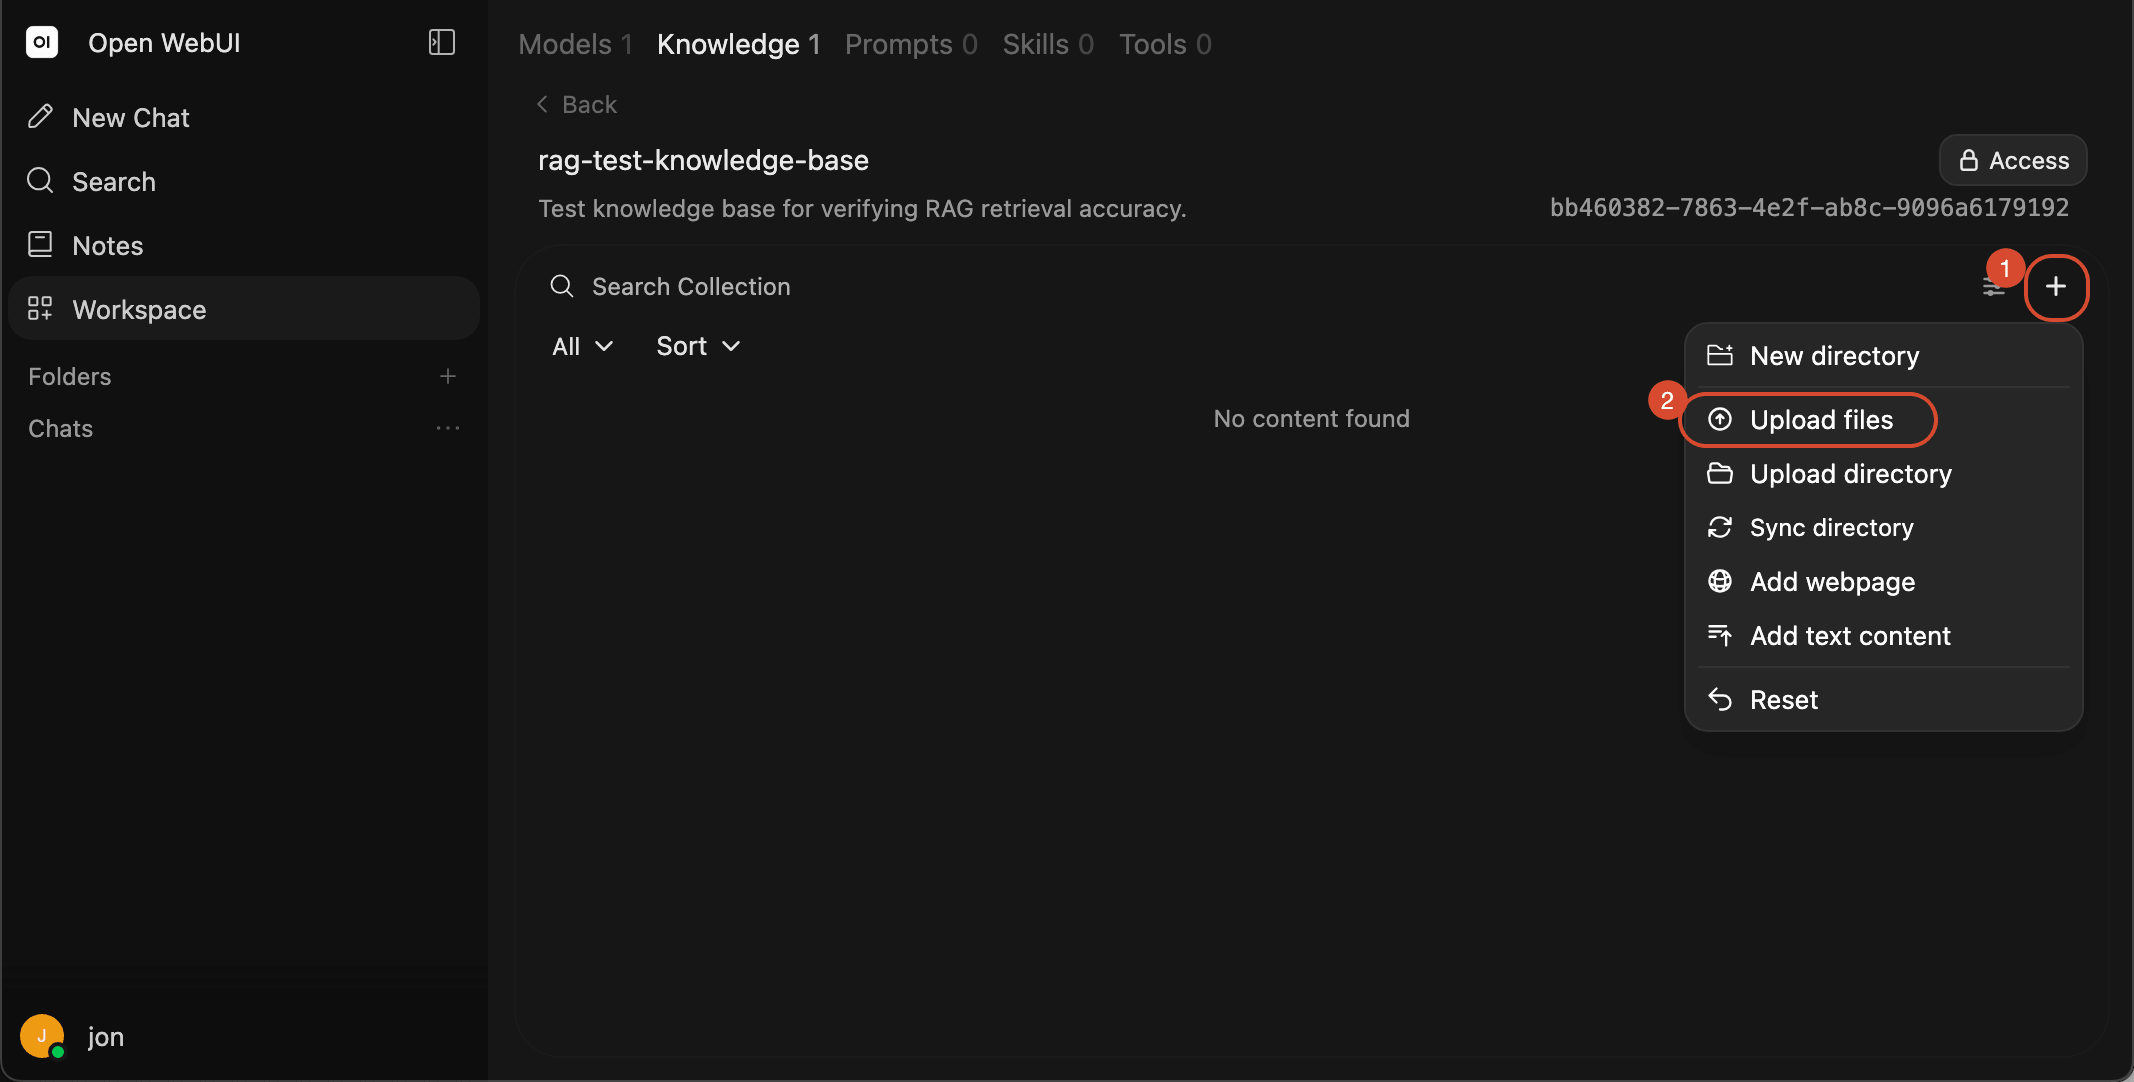
- Next, click
+, then clickUpload files.
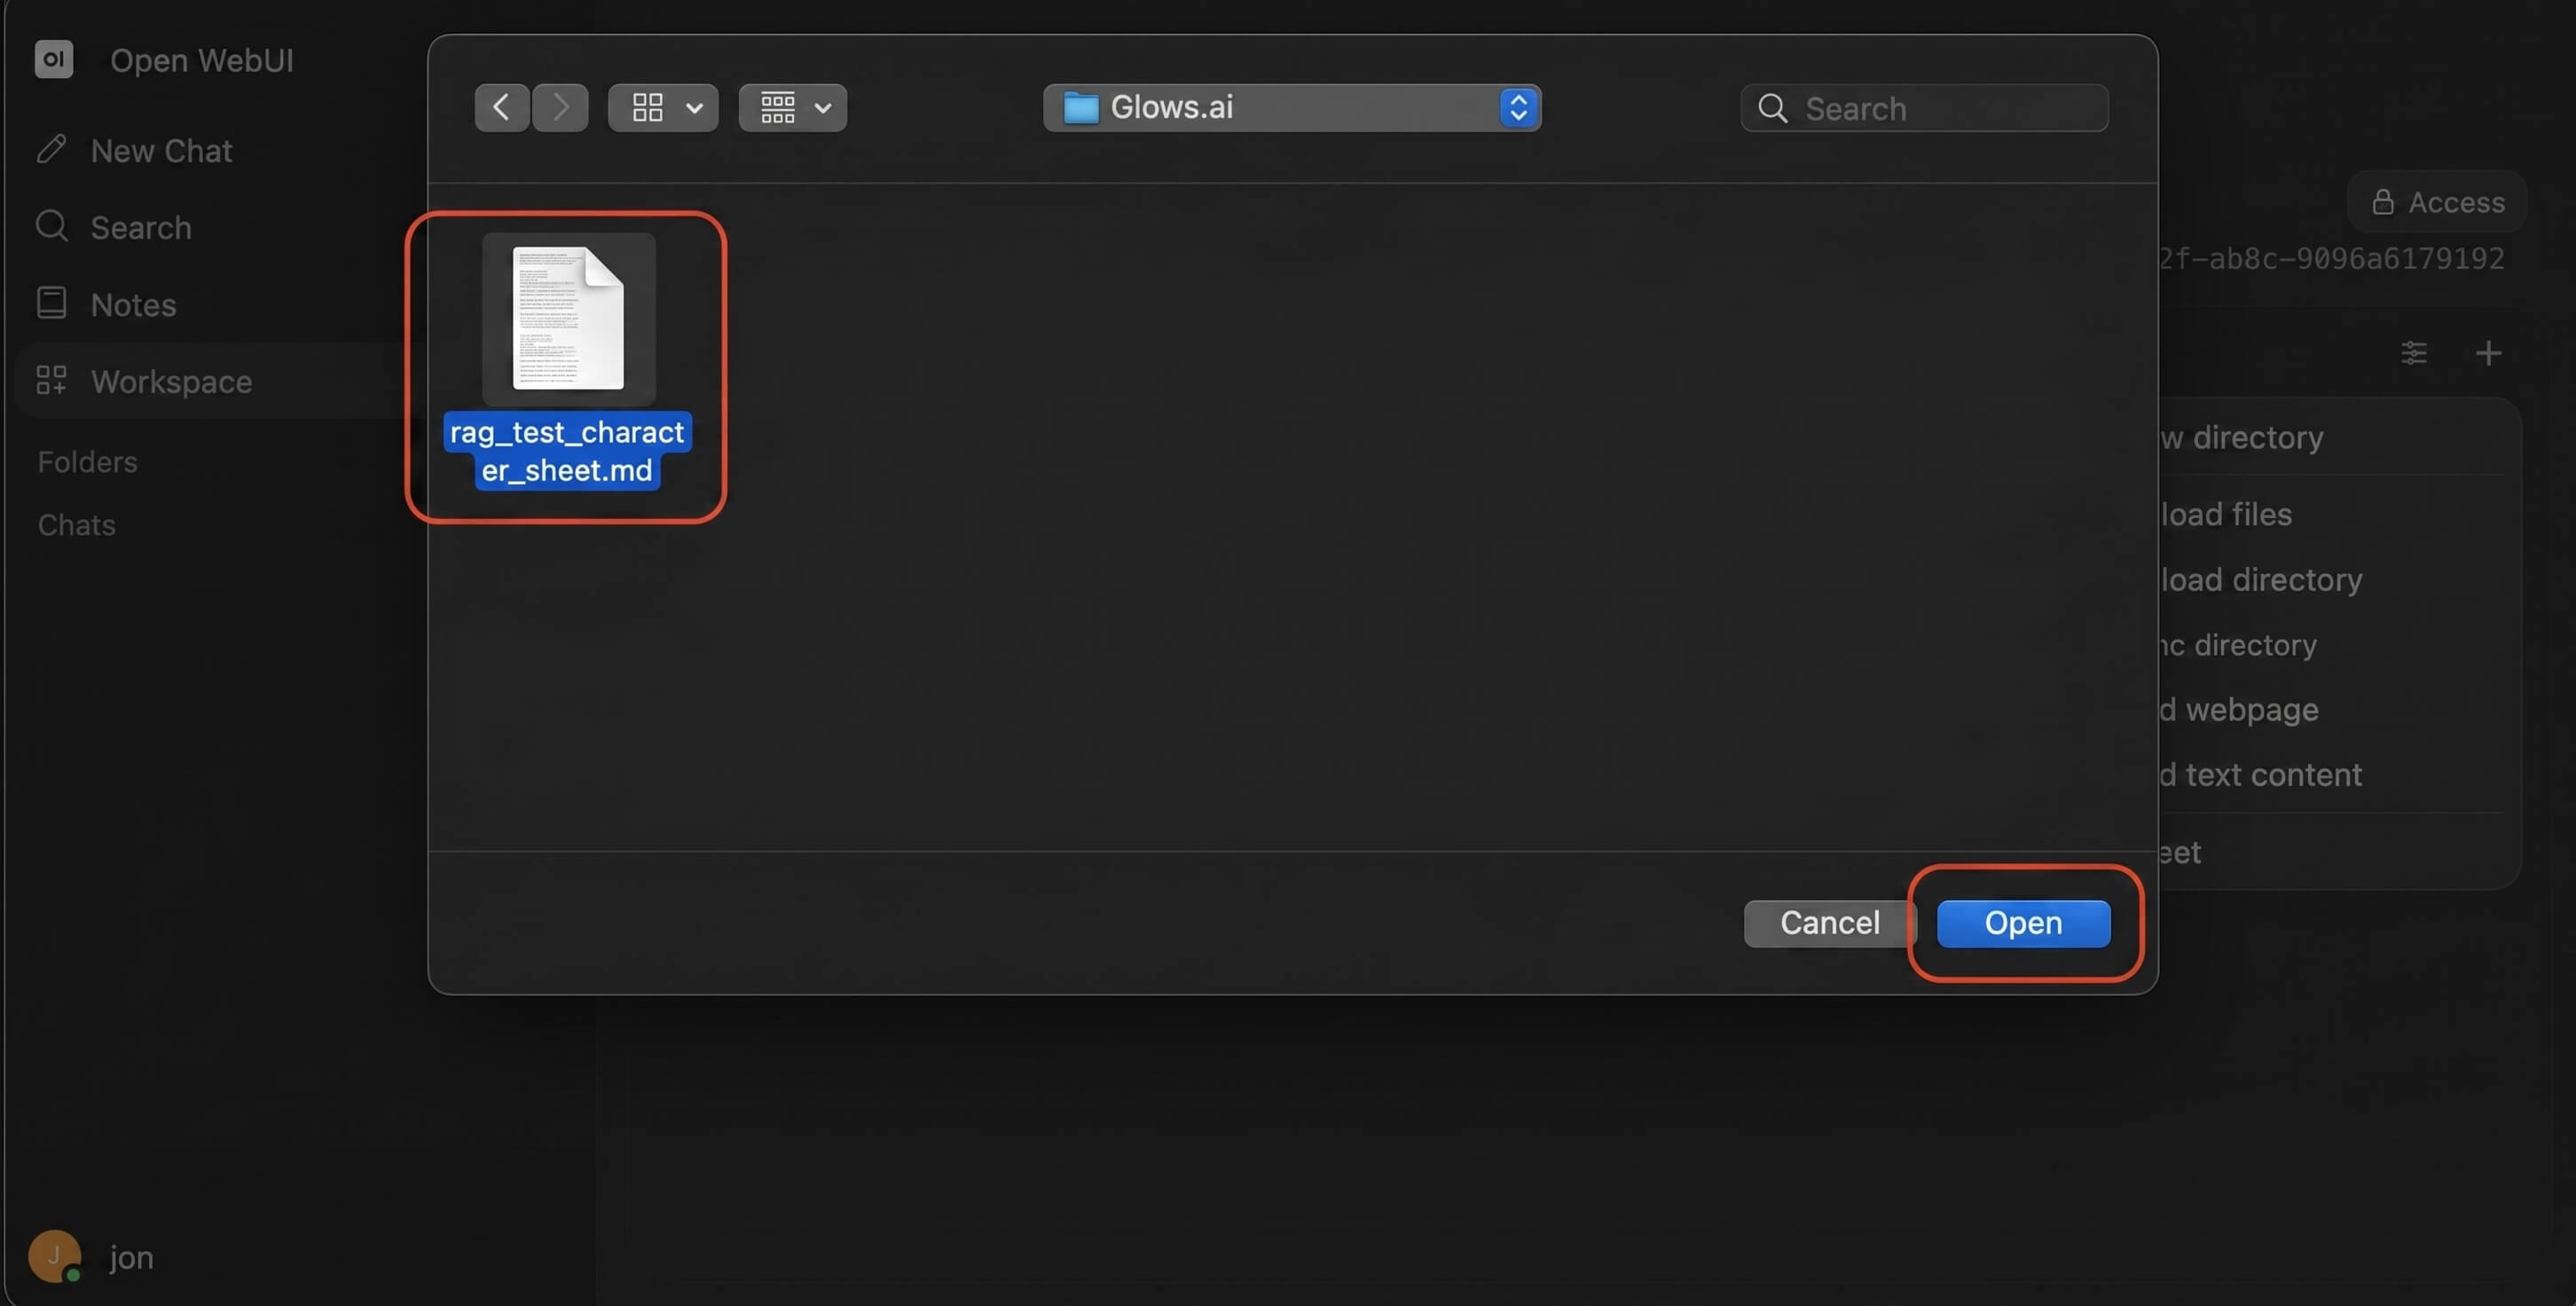
- Select the files you want to use as knowledge-base data. In this example we use a fictional story as the source text.
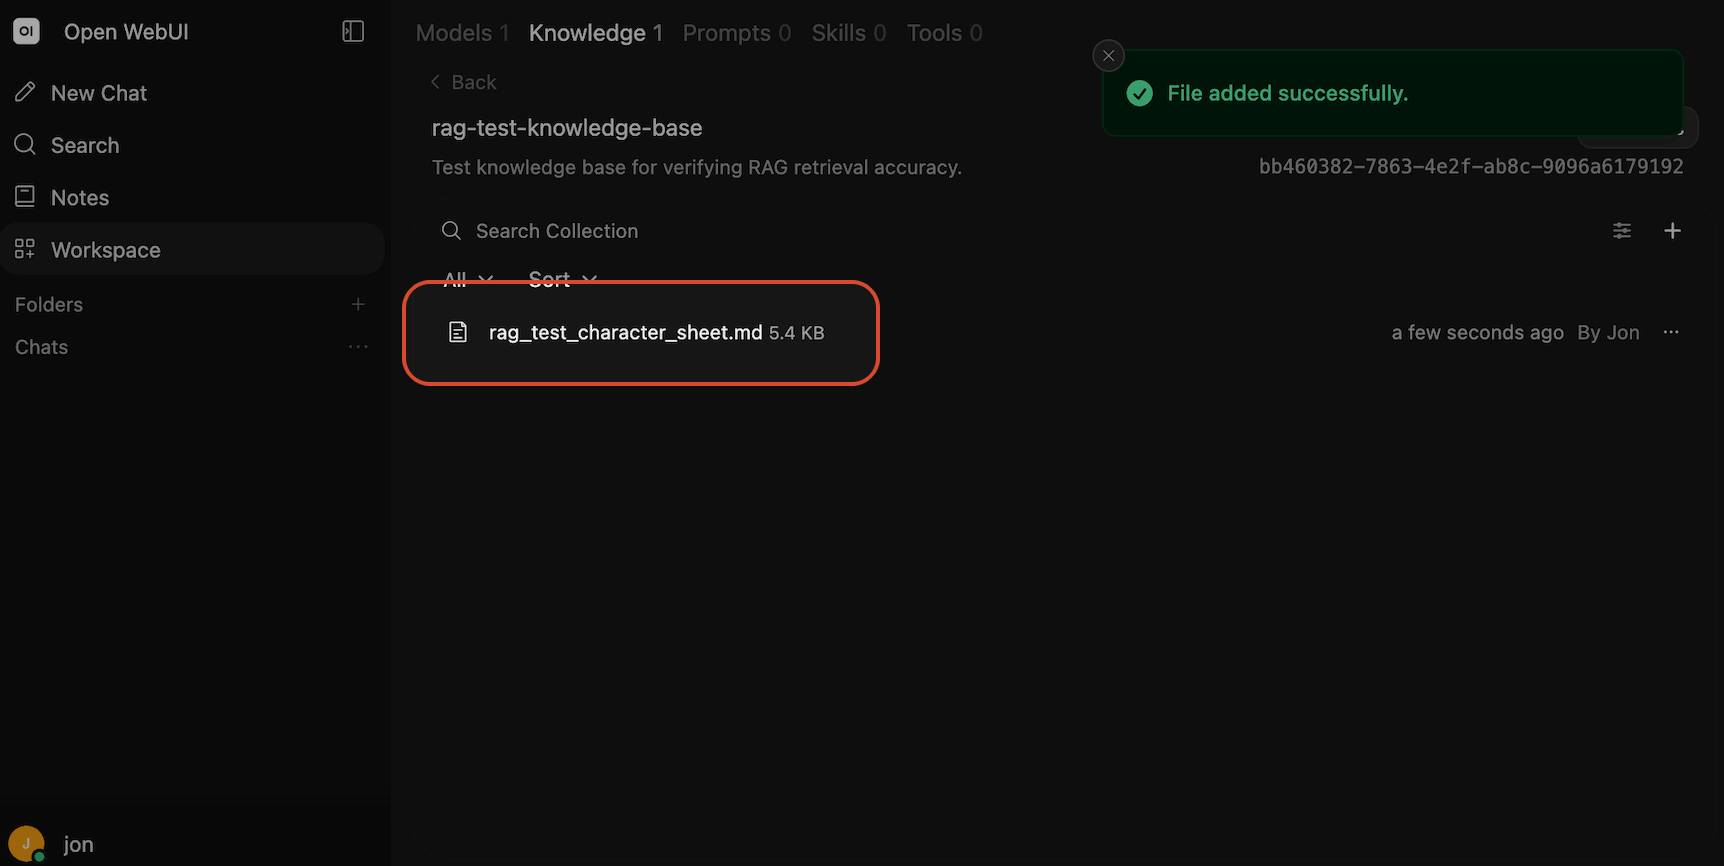
- After the upload, you'll see the file listed, confirming it has been successfully embedded into the knowledge base.
Bind the Knowledge Base to a Model
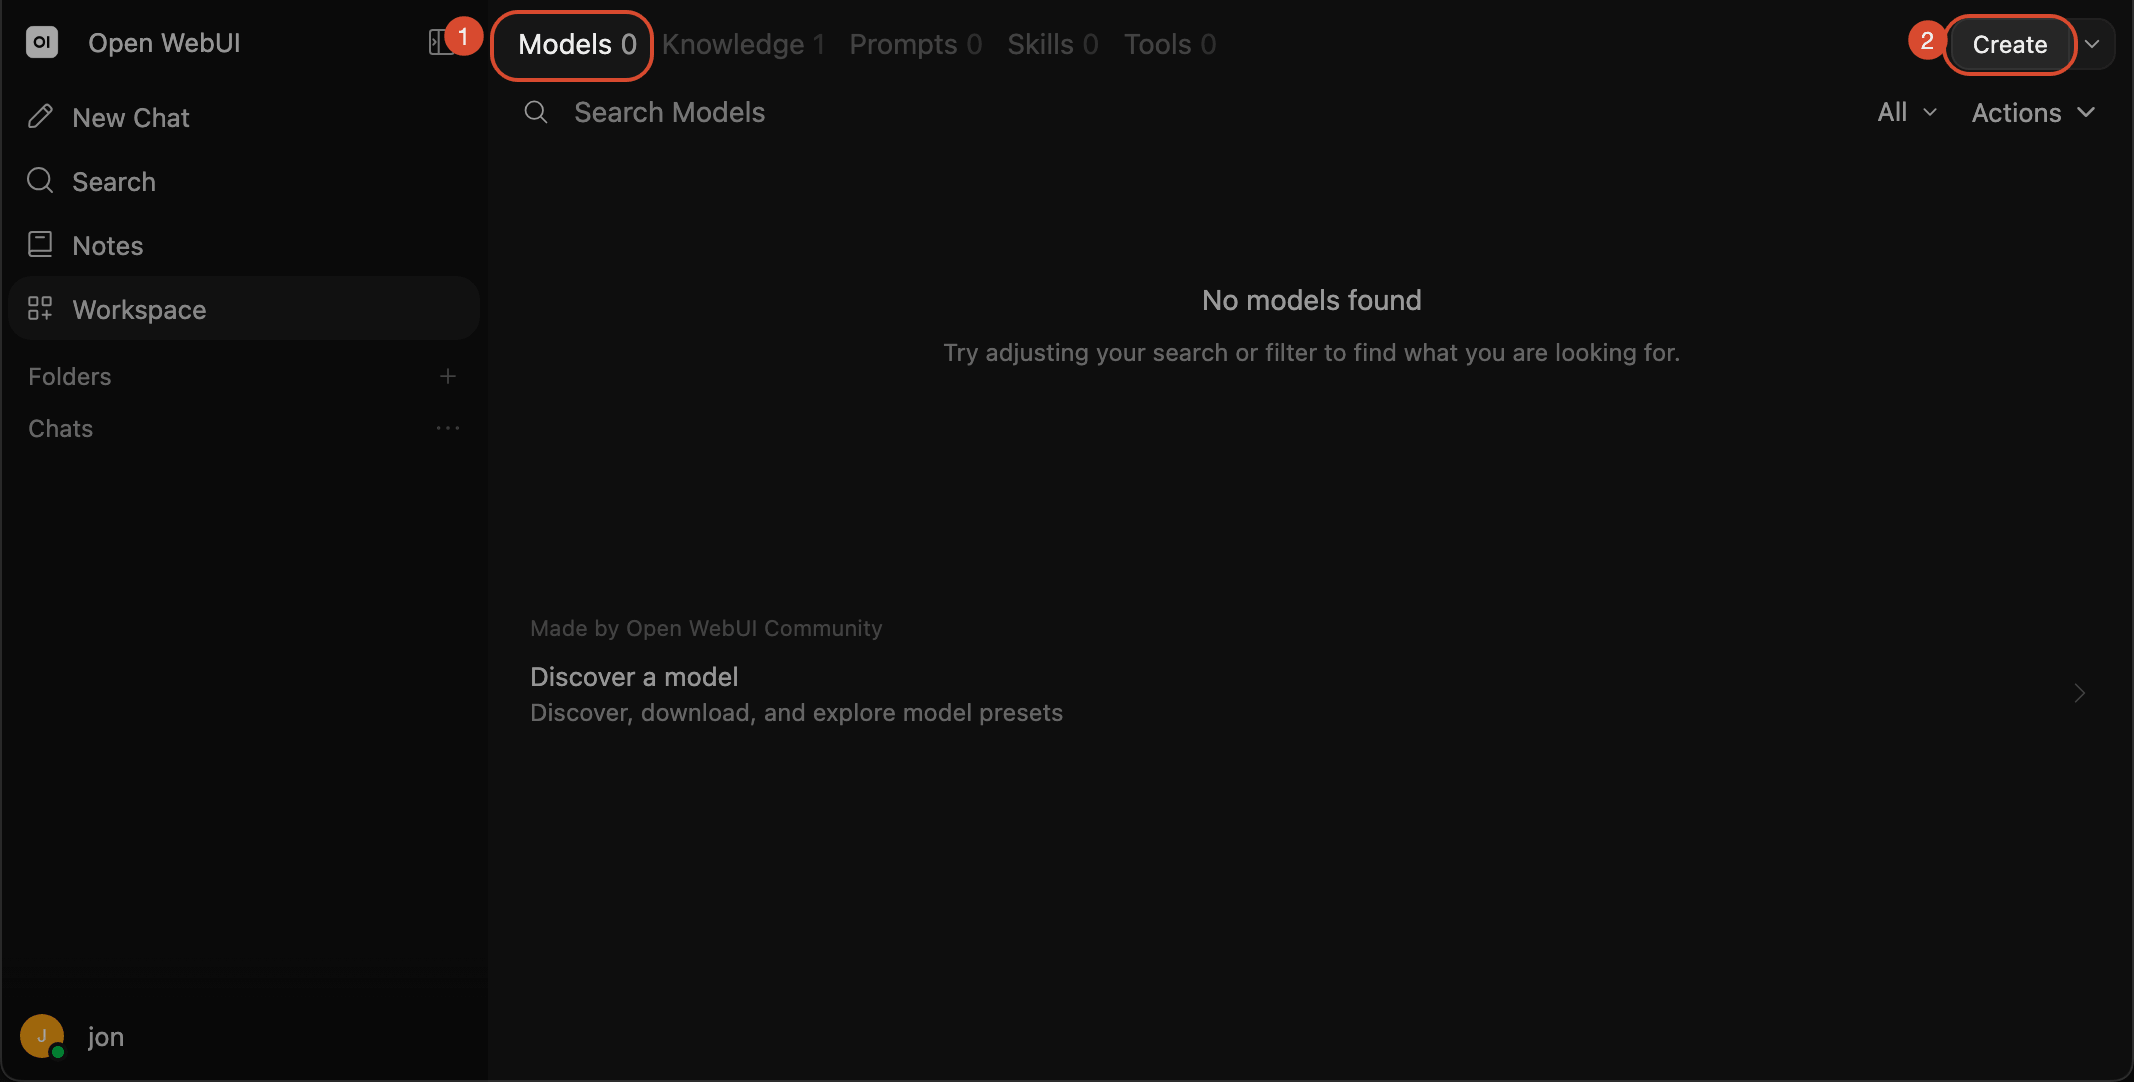
- For the AI to draw on this knowledge base, you need to create a new model and bind the knowledge base to it. Click
Model, then clickCreate.
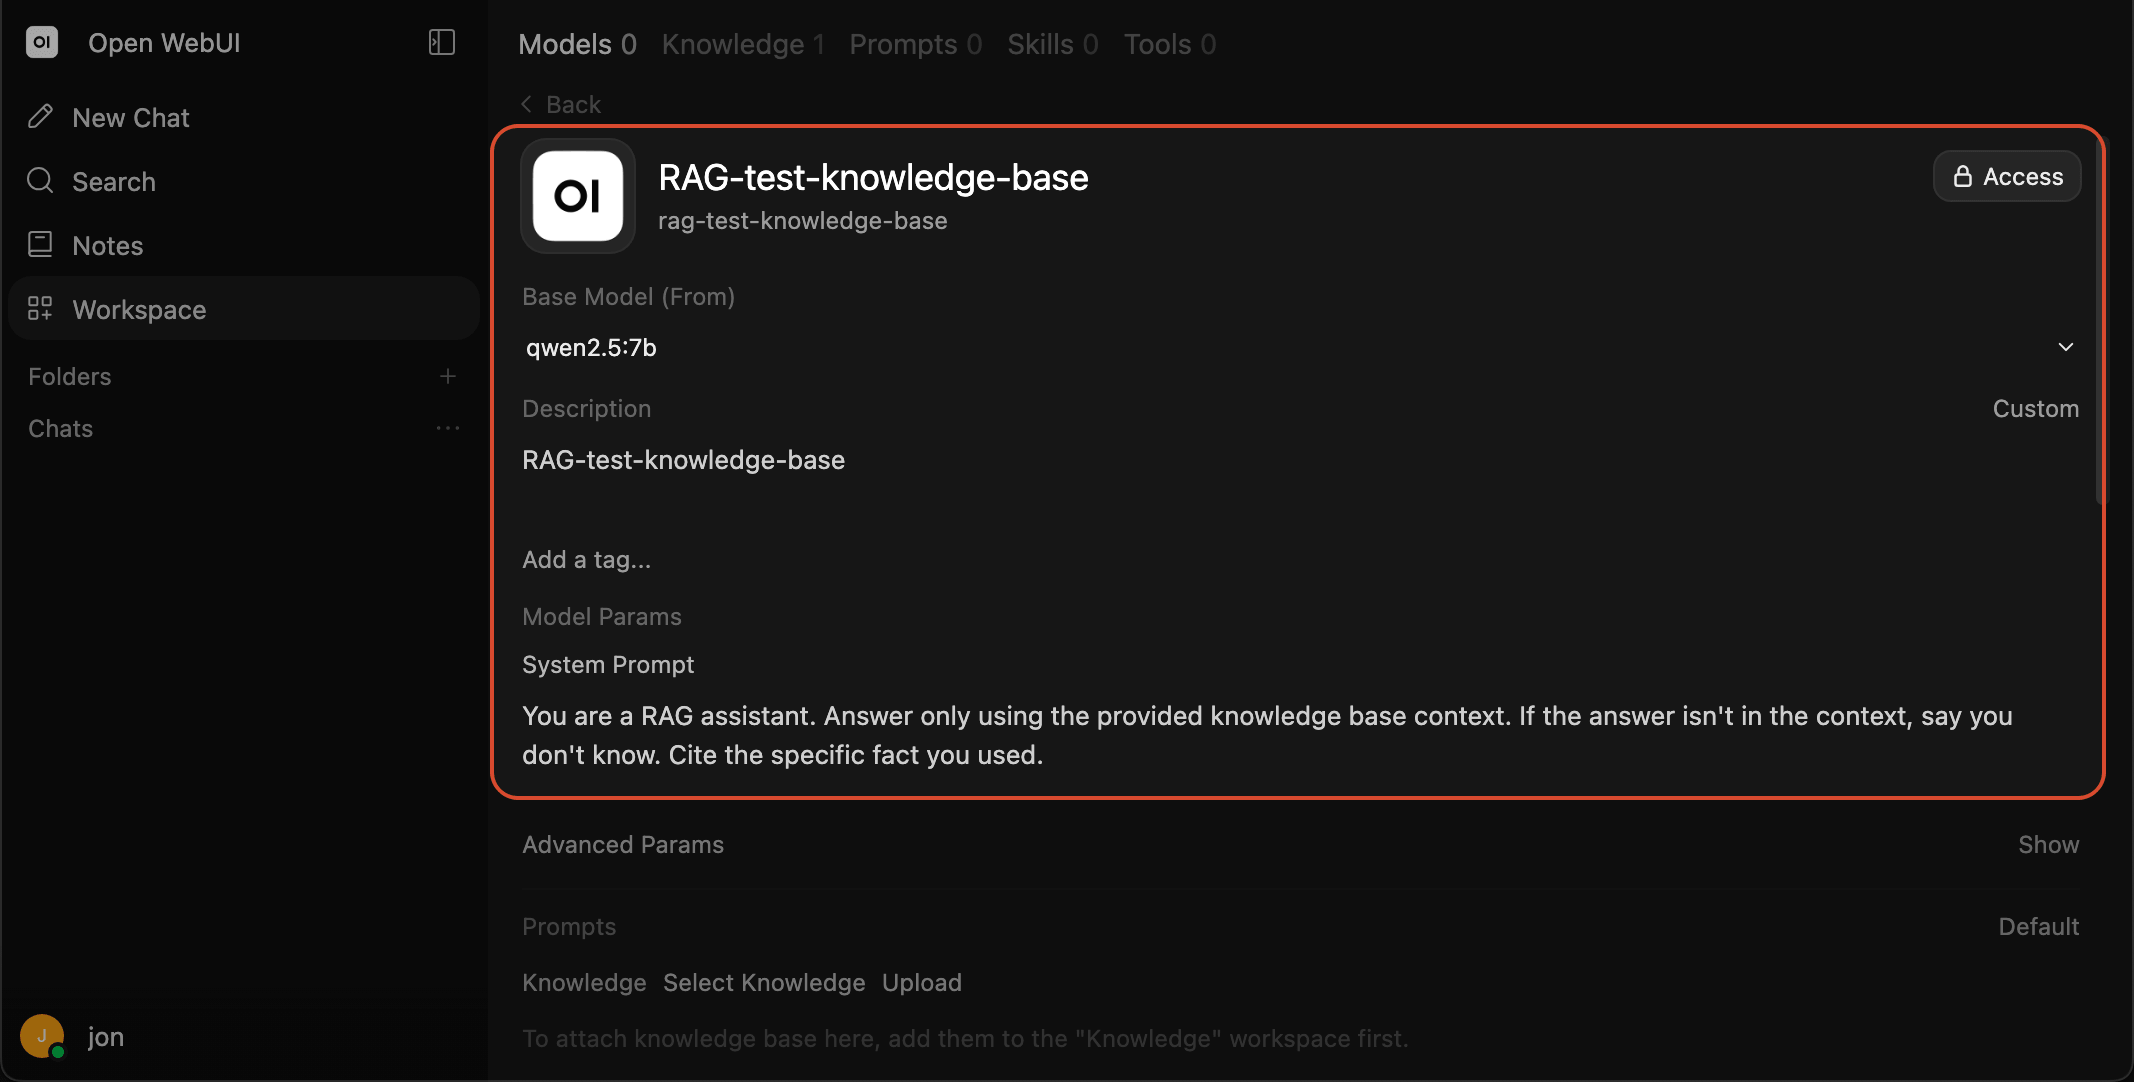
- Enter the model's basic information and its system prompt.
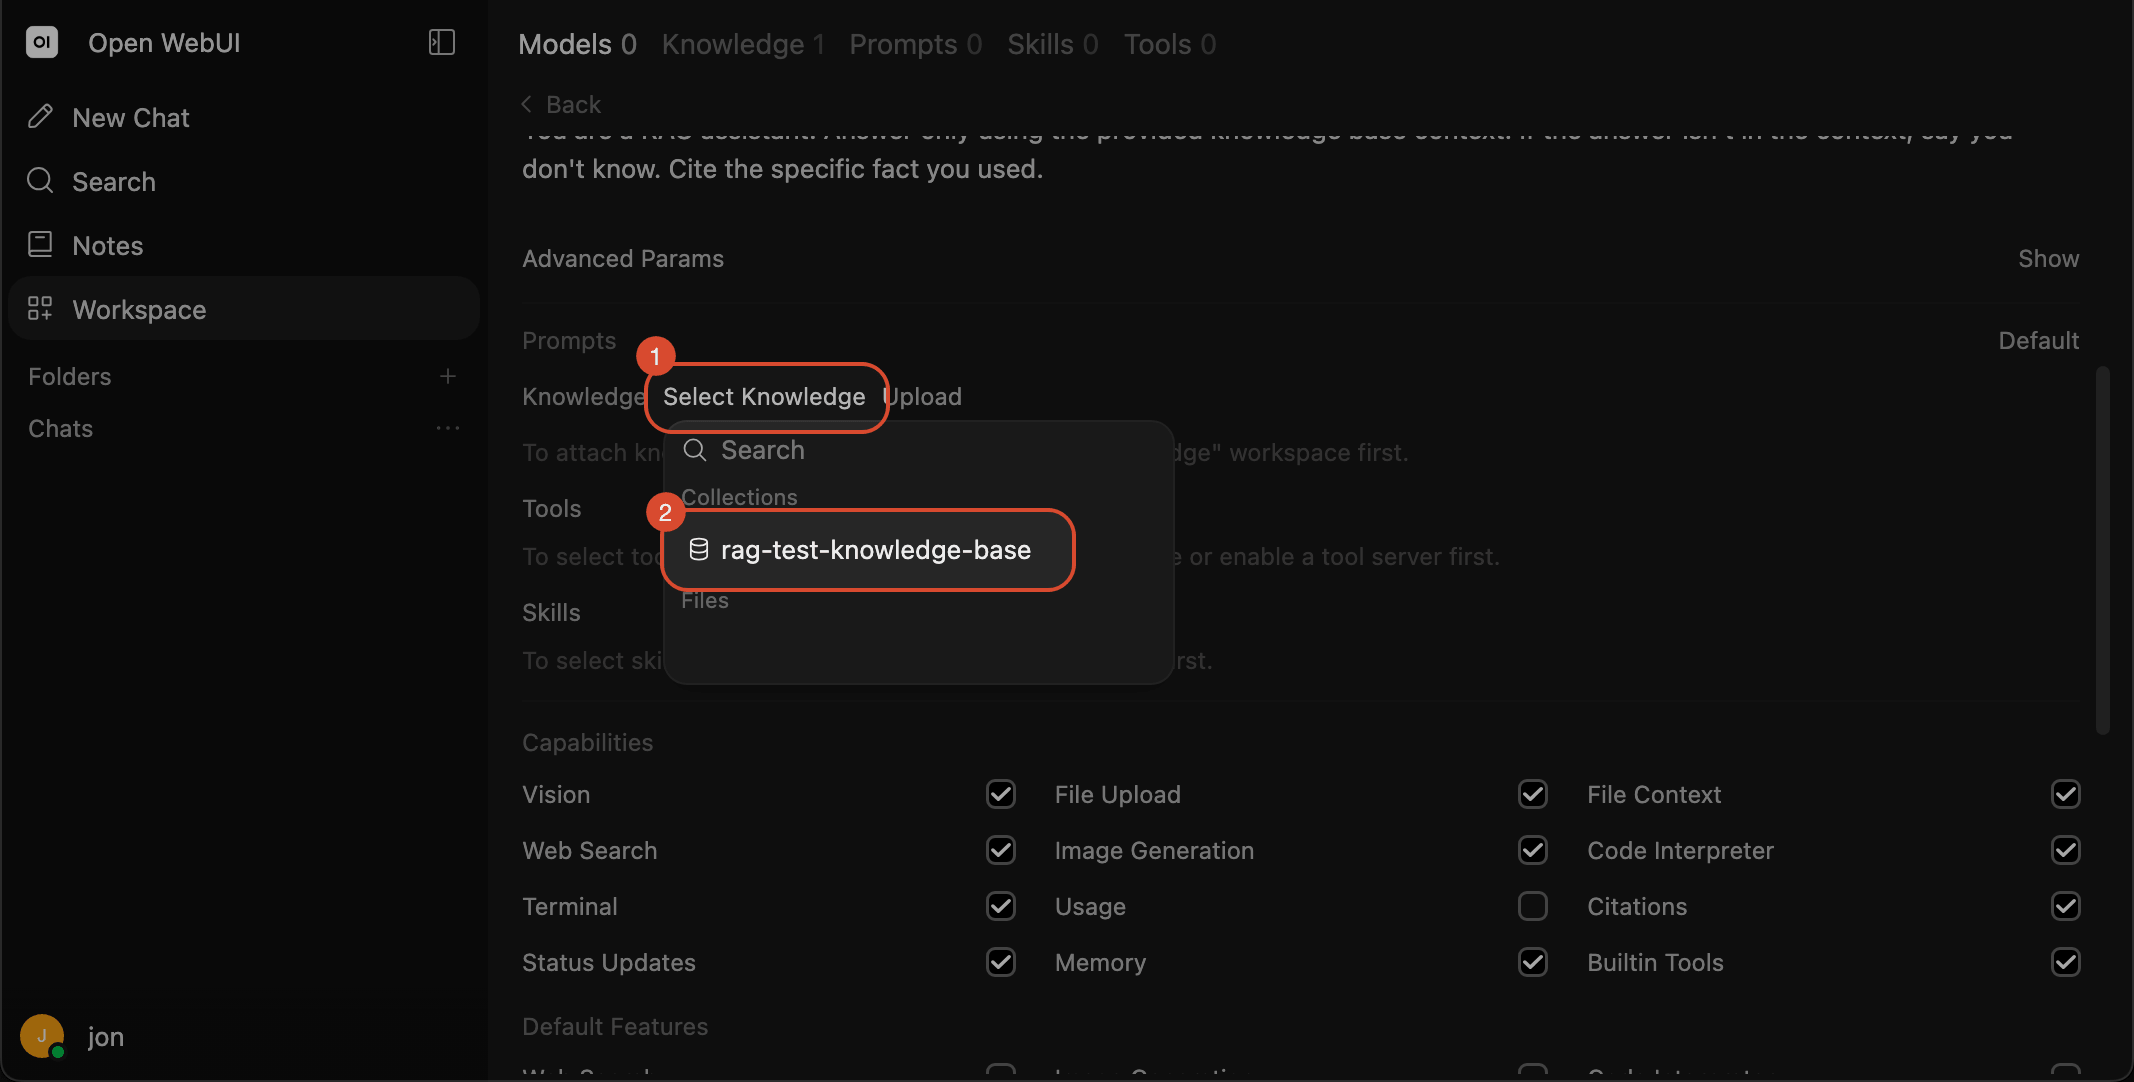
- Below that, select
Select Knowledgeand choose your knowledge base.
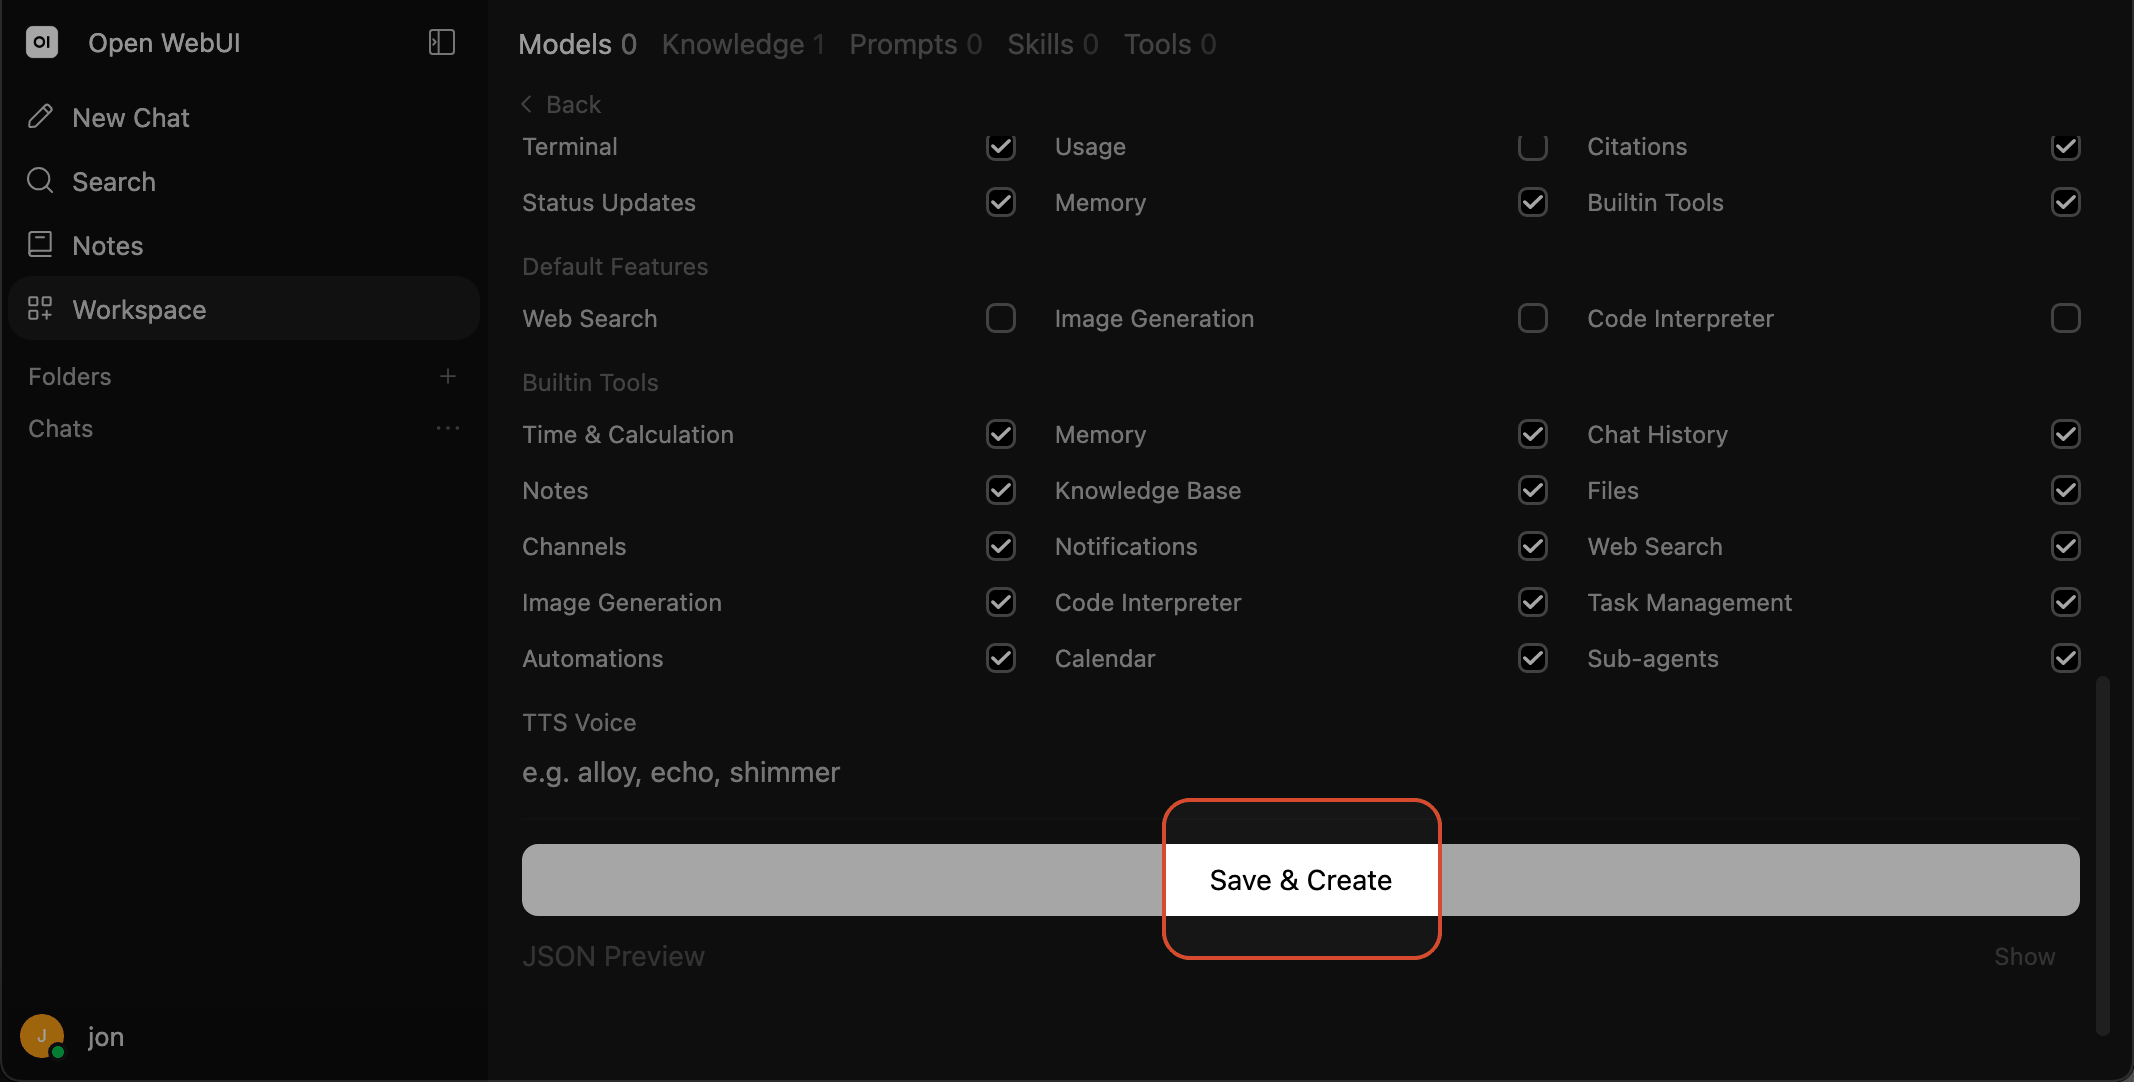
- Once done, click
Save & Create.
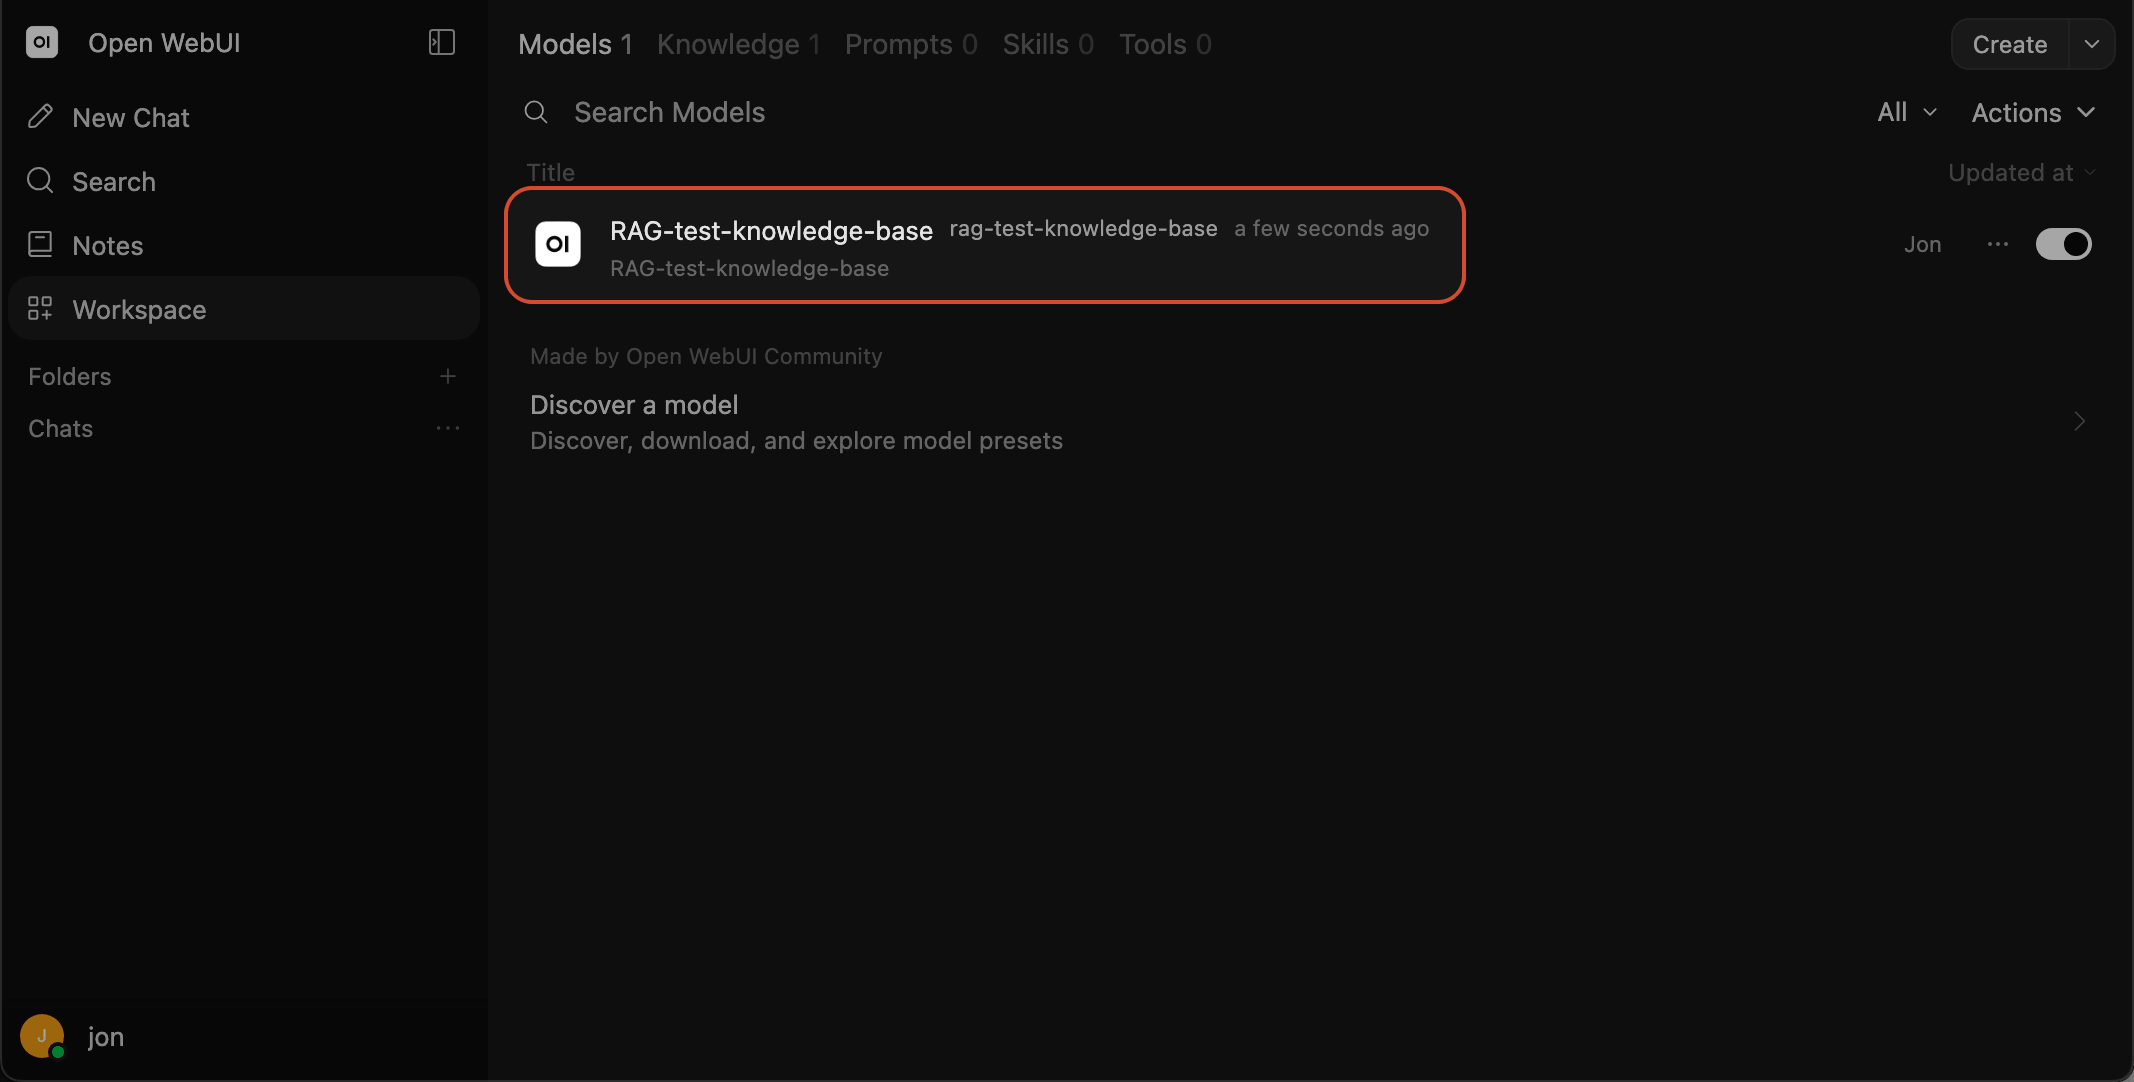
- After creation, you'll see the model listed in the model list.
Let the AI Answer Using Knowledge-Base Data
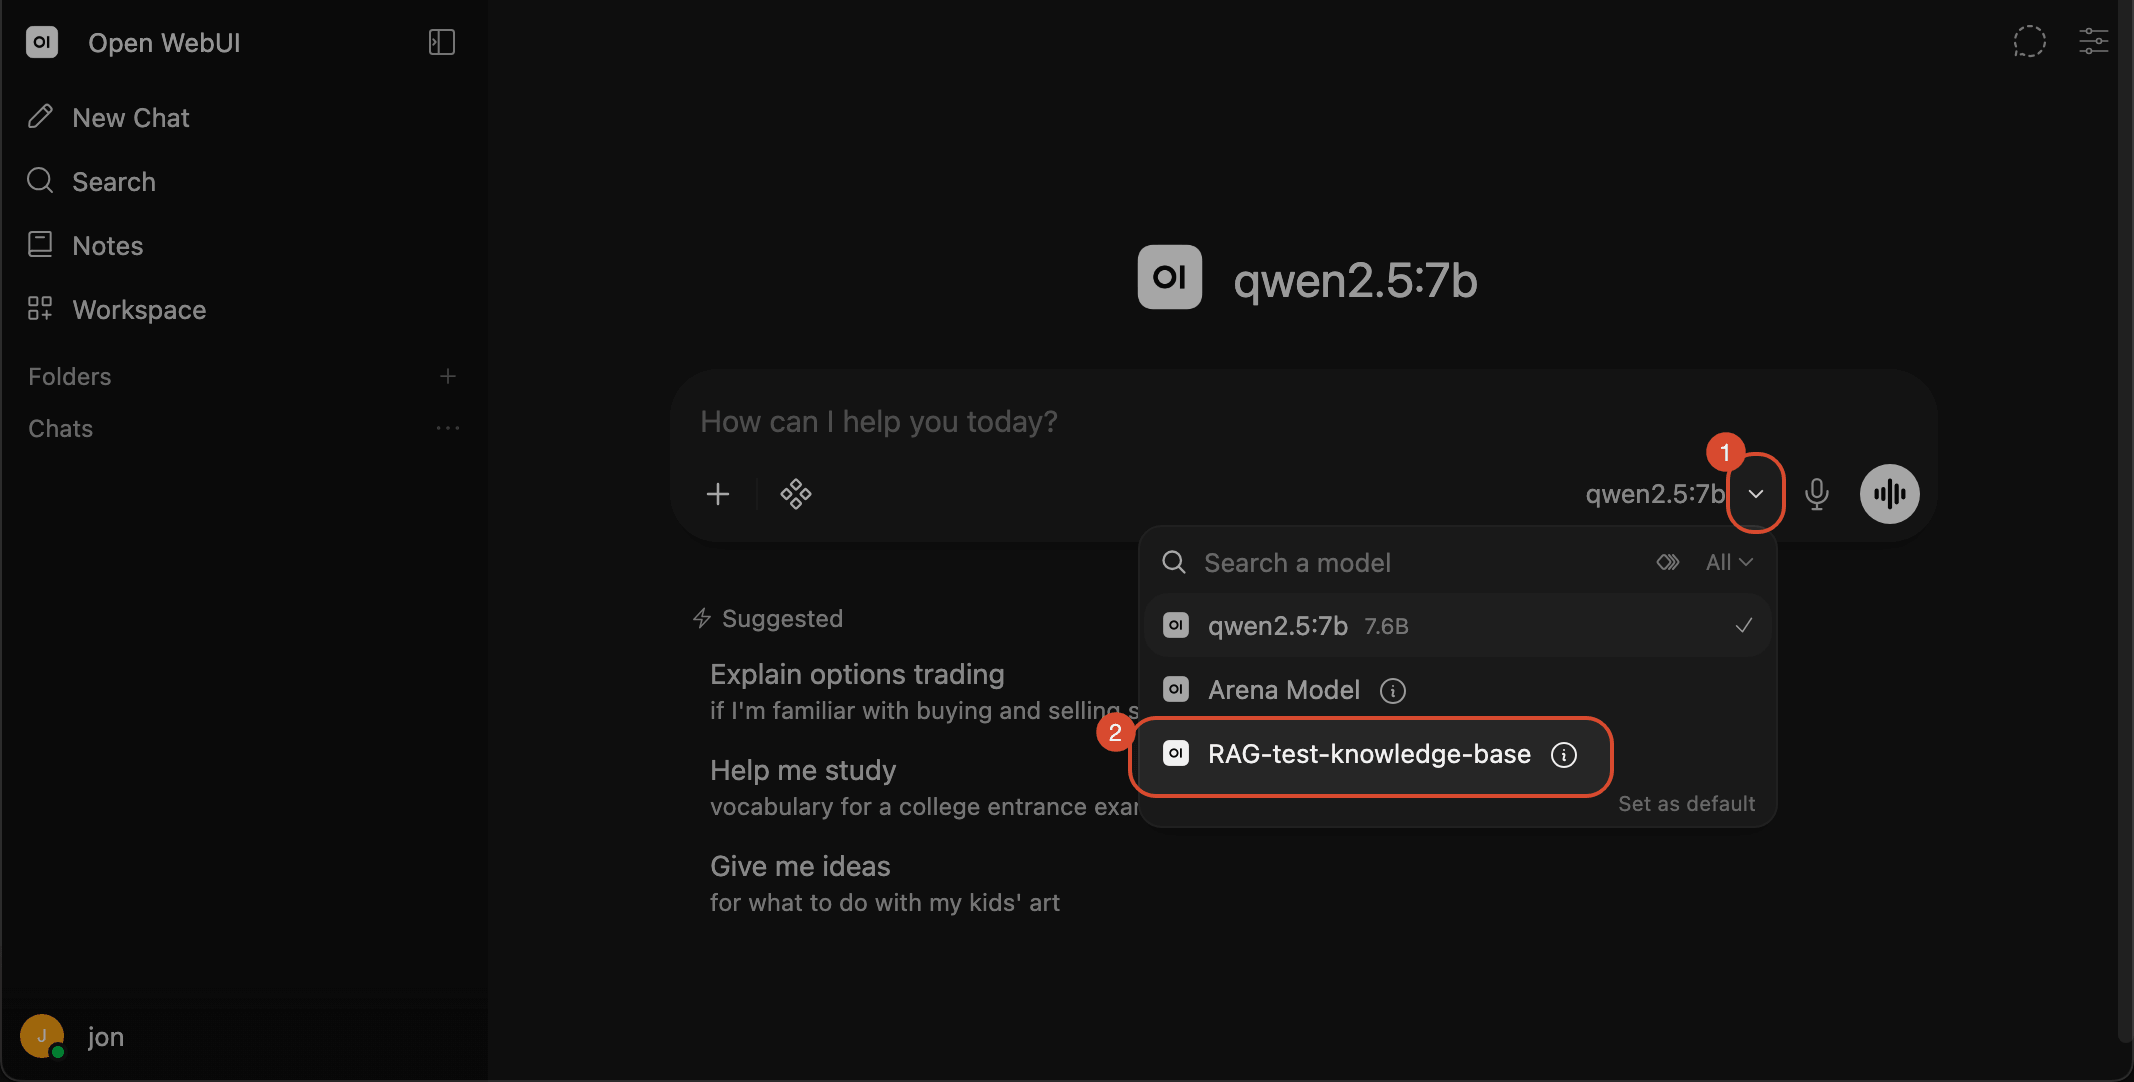
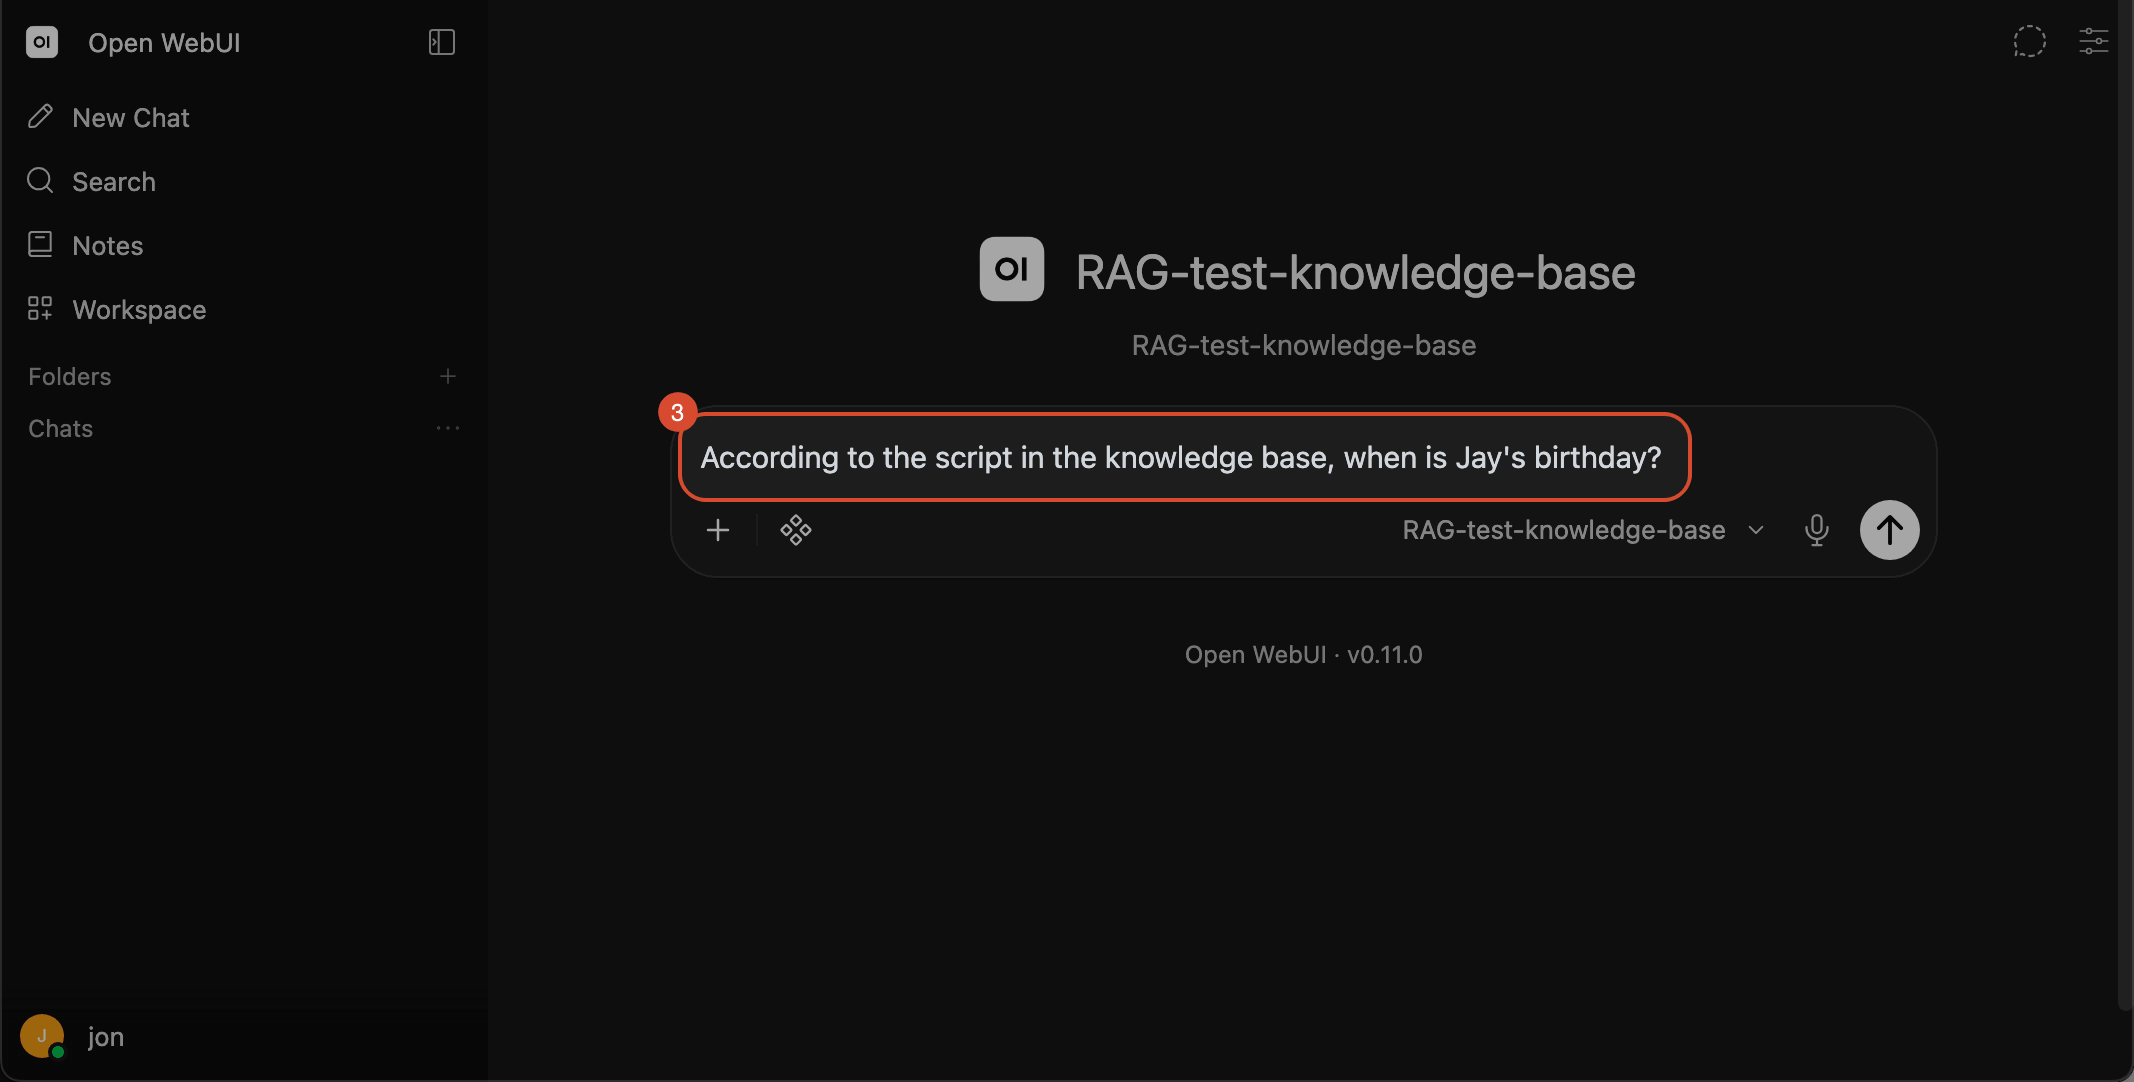
- On the right side of the chat window, select the model you just created, then type a test question to confirm the AI can retrieve data from the knowledge base.
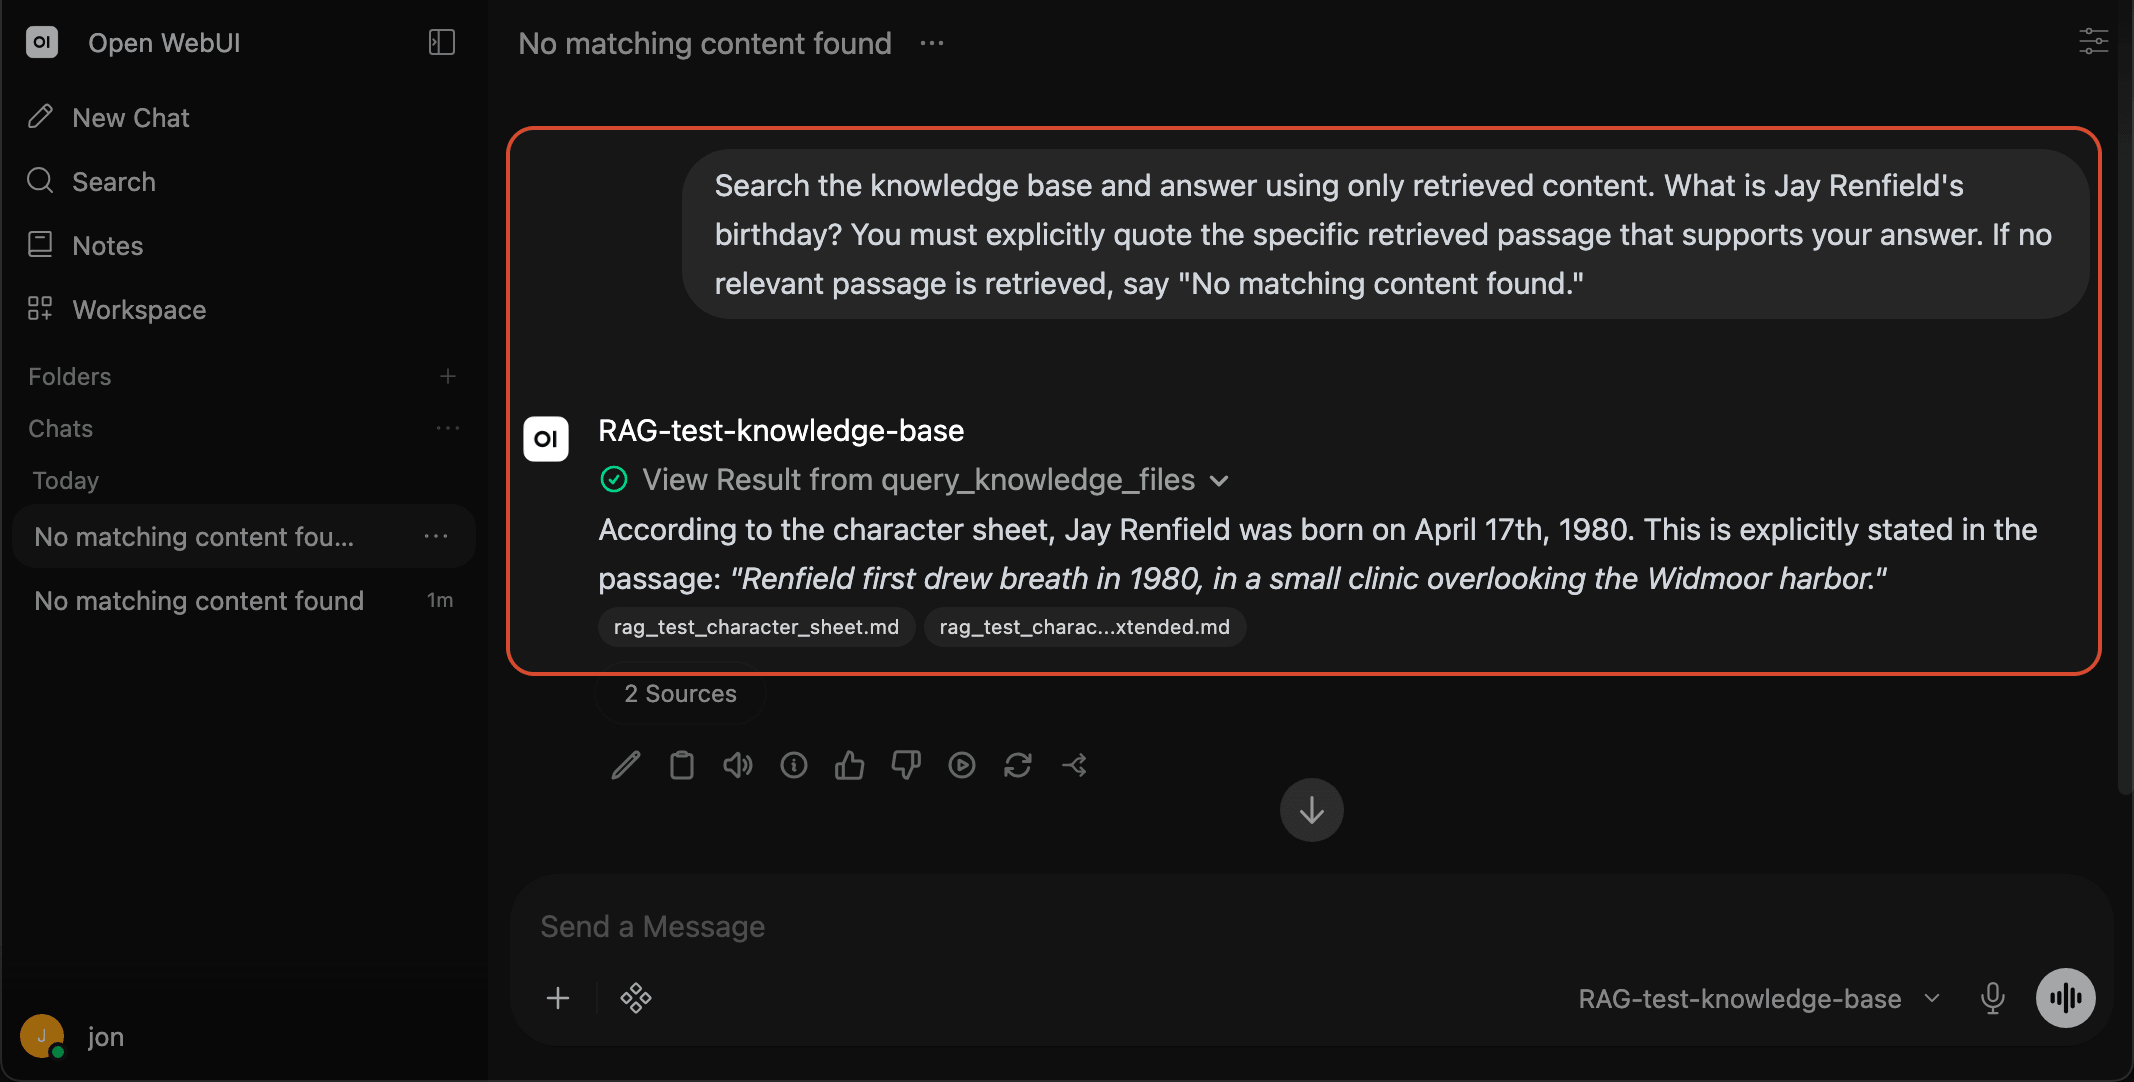
- Test successful — the AI correctly retrieved and answered using data from the knowledge base.
Calling the Knowledge Base via API
Why Use the API
A knowledge base configured through the web UI isn't limited to the chat window — external programs can also call it directly via API, integrating the AI's knowledge-base-backed answers into your own applications instead of relying on manual browser use. An AI with knowledge-base access can be triggered from code, scheduled, or wired into a workflow, without ever needing to manually open a browser.
Get an API Key
To call Open WebUI via API, you first need an API key for authentication, so the system can verify your request is authorized before serving it.
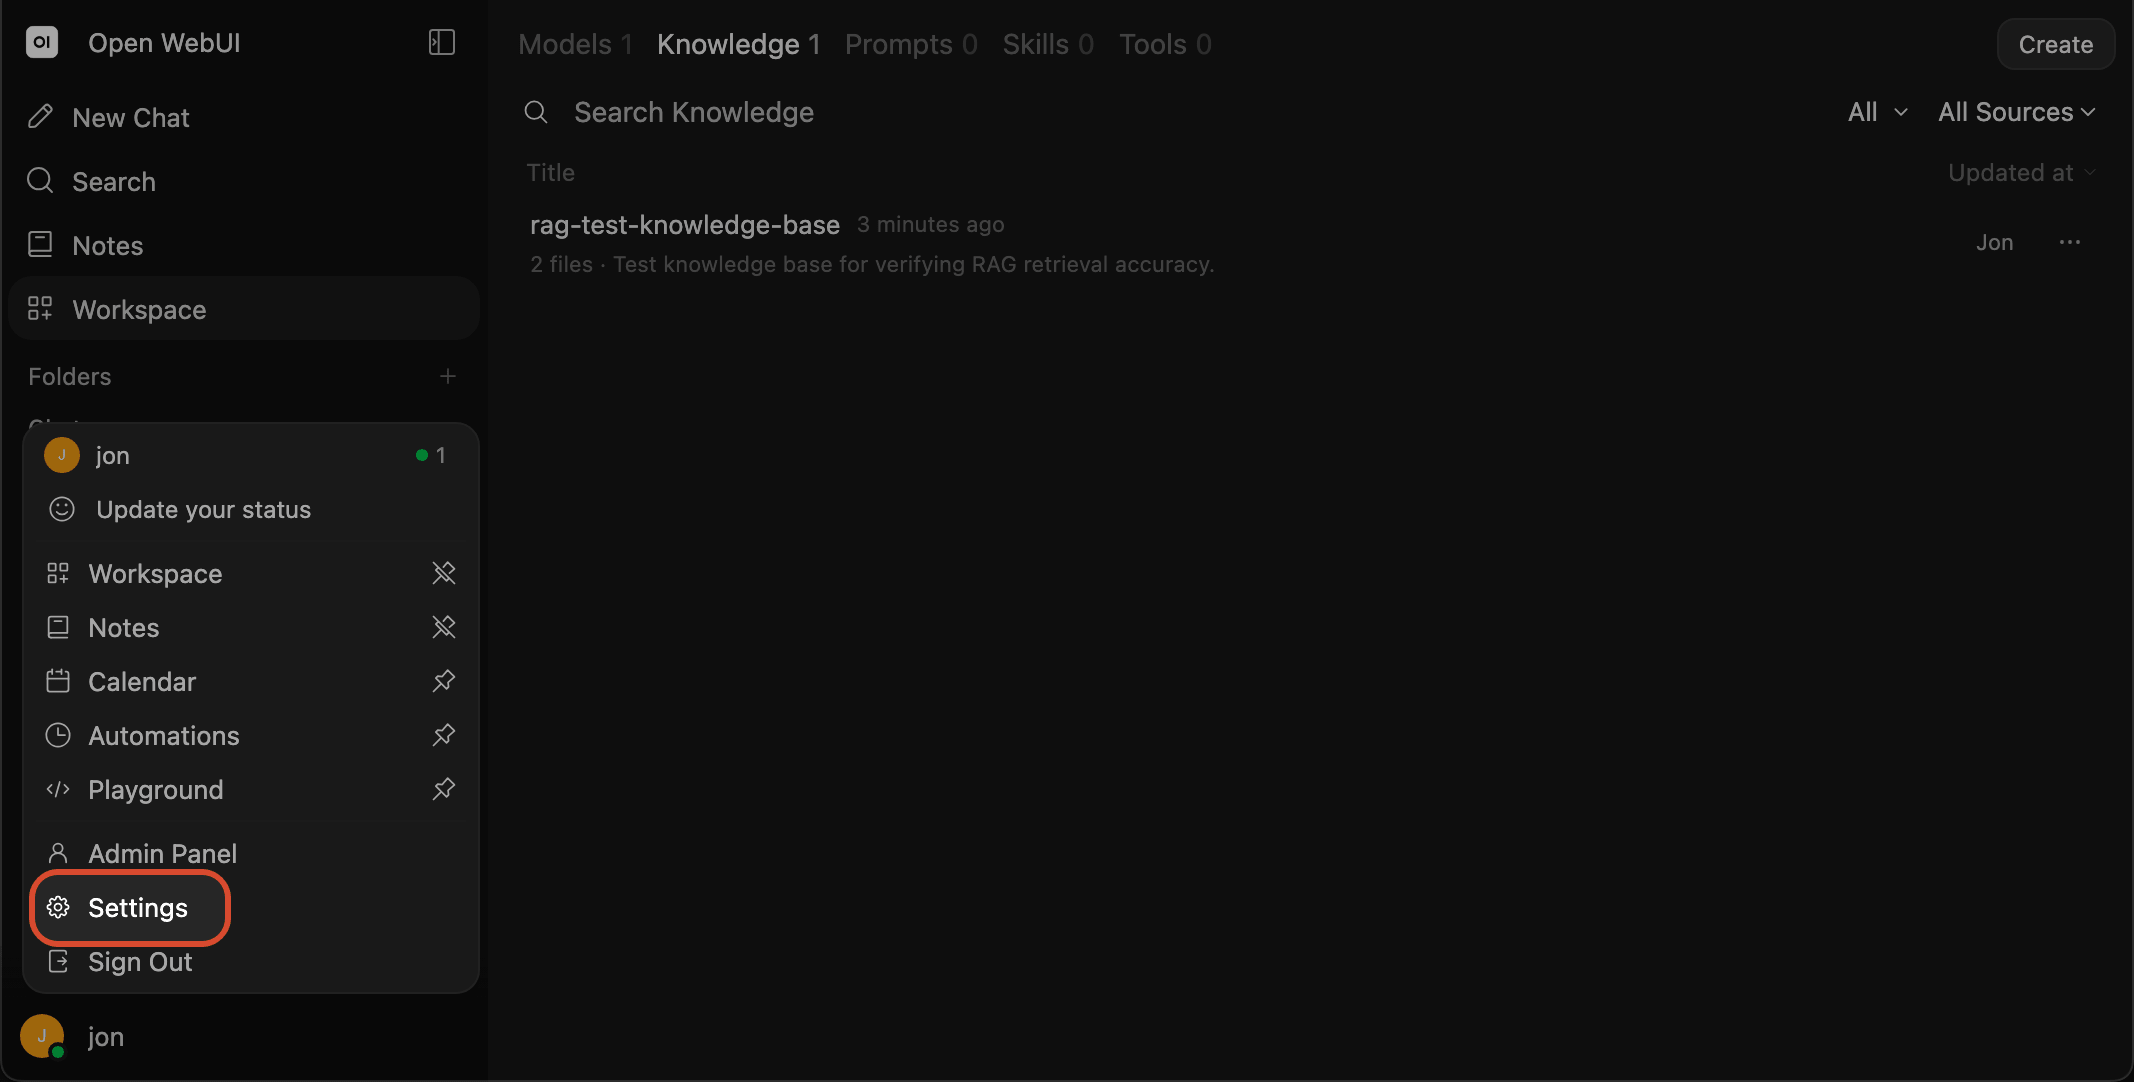
- First, click
Settingsin the bottom left.
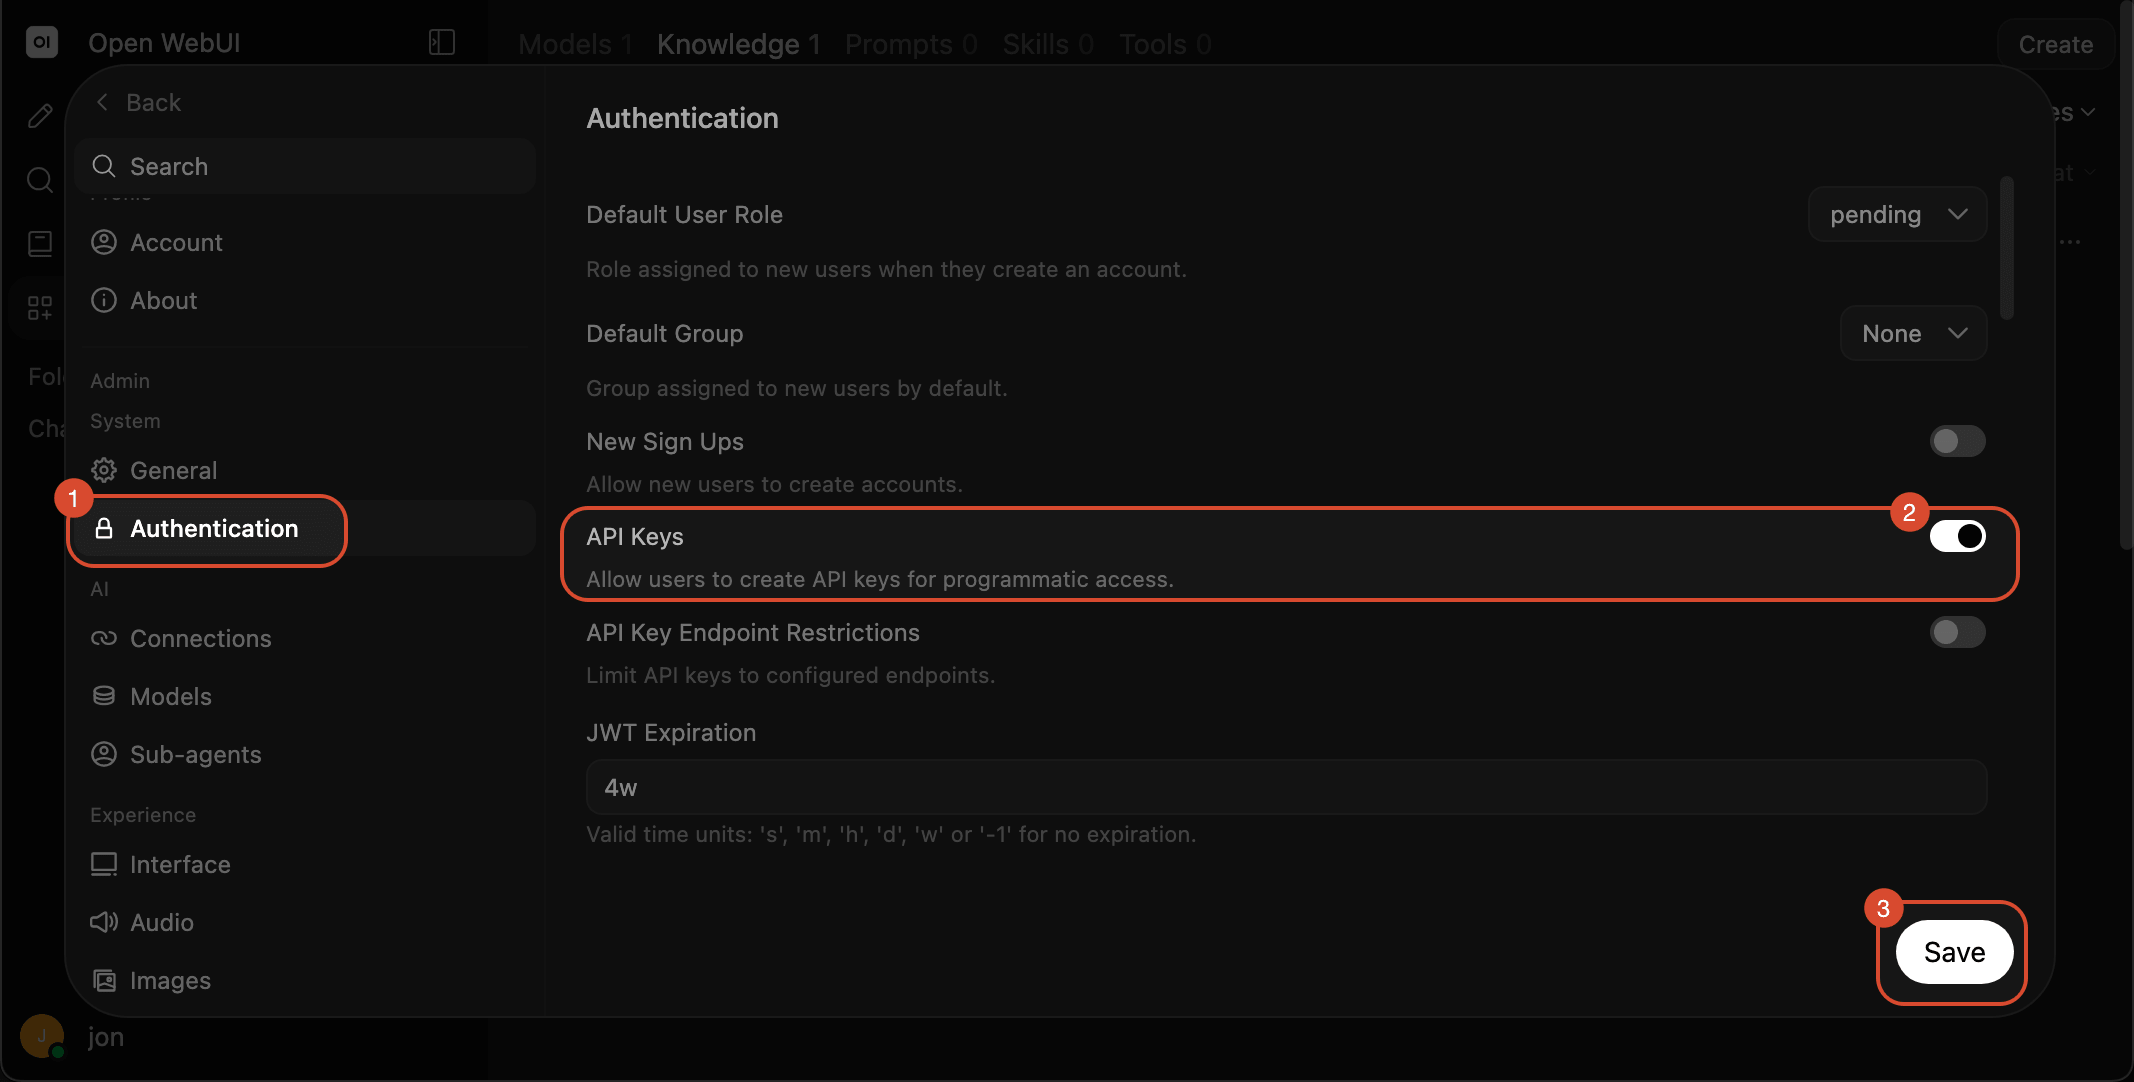
- Click
Authorization, enableAPI Keys, then clickSaveto turn on the API key feature.
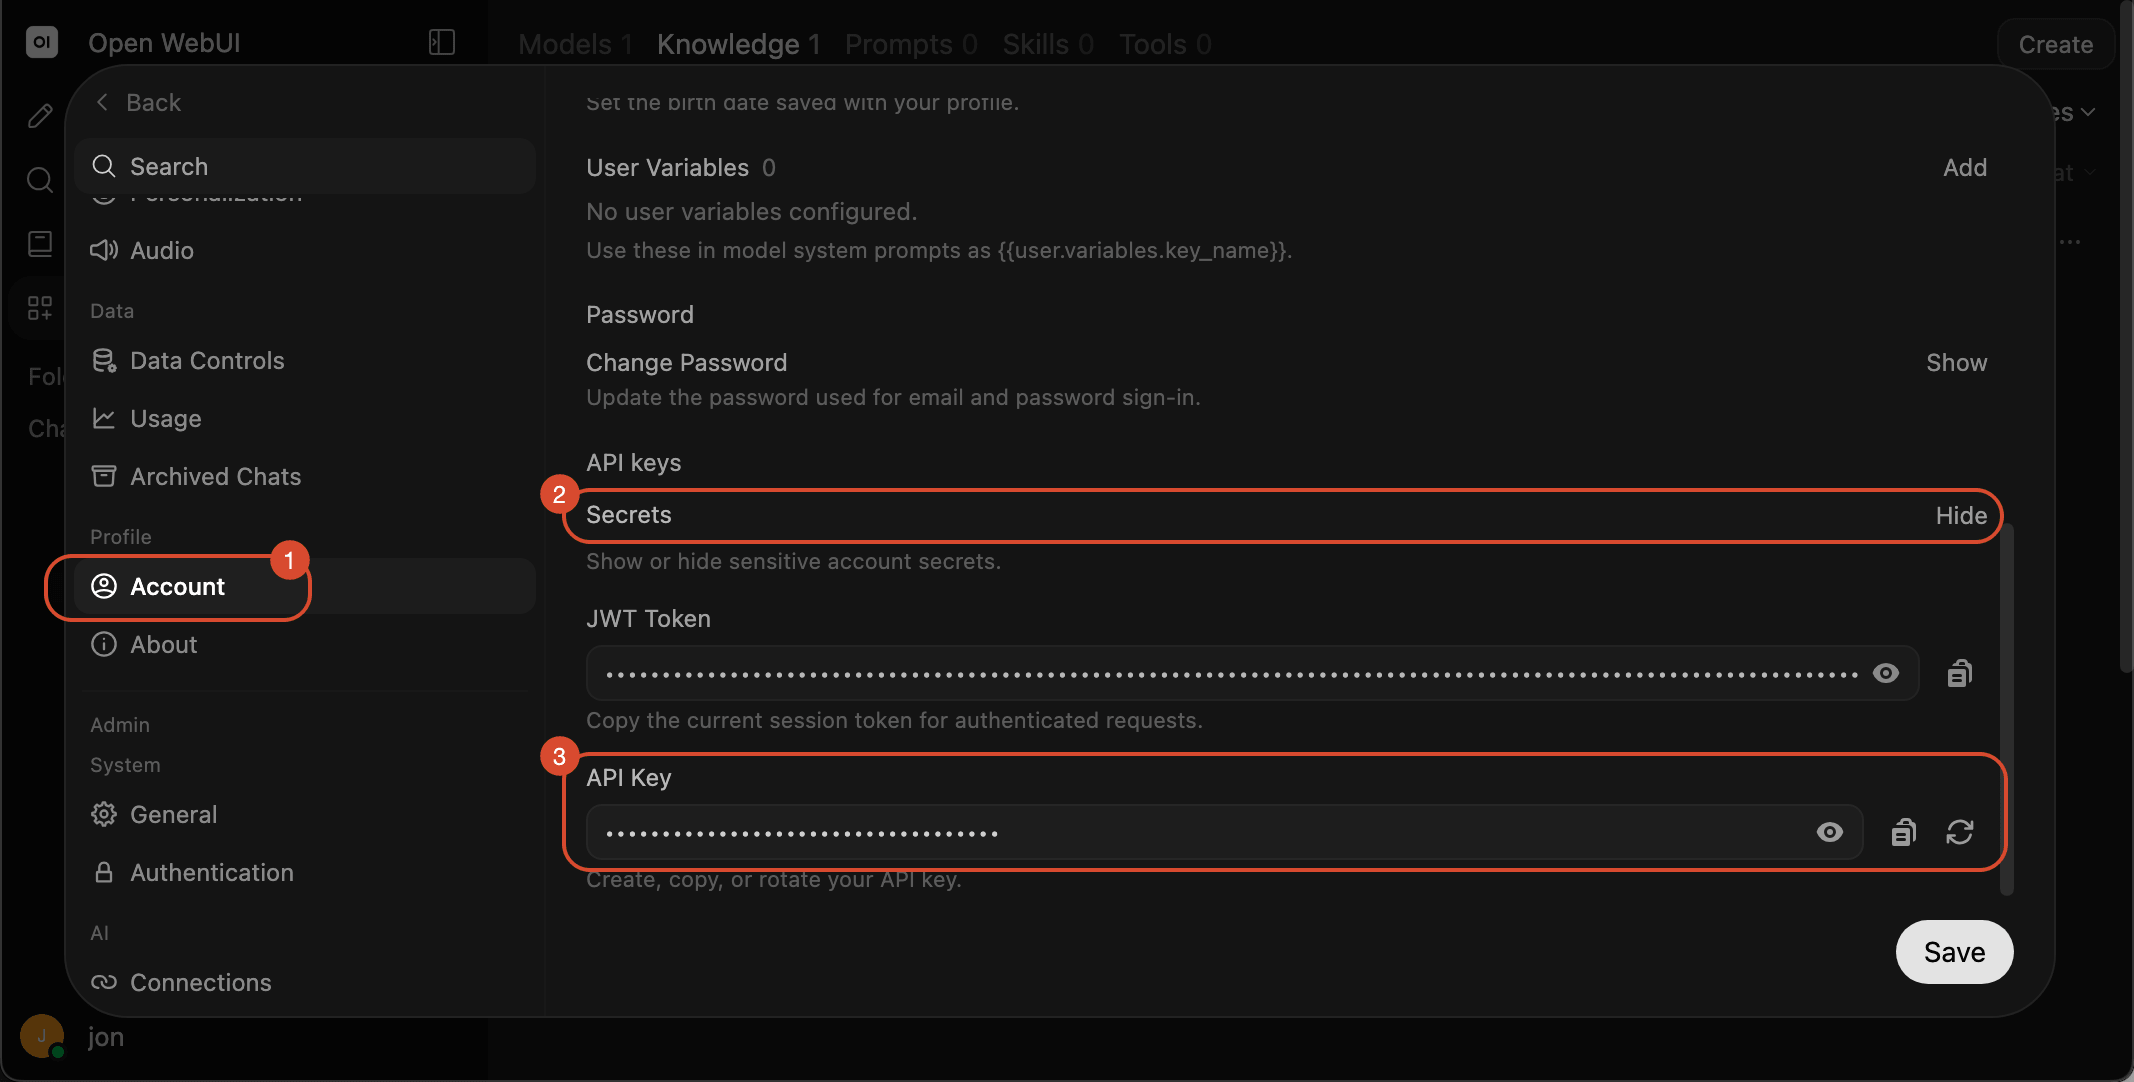
- Click
Accountto retrieve your API key.
Get the Knowledge Base ID
In addition to the API key, you also need the knowledge base's ID when calling the API, so the system knows exactly which document source to use.
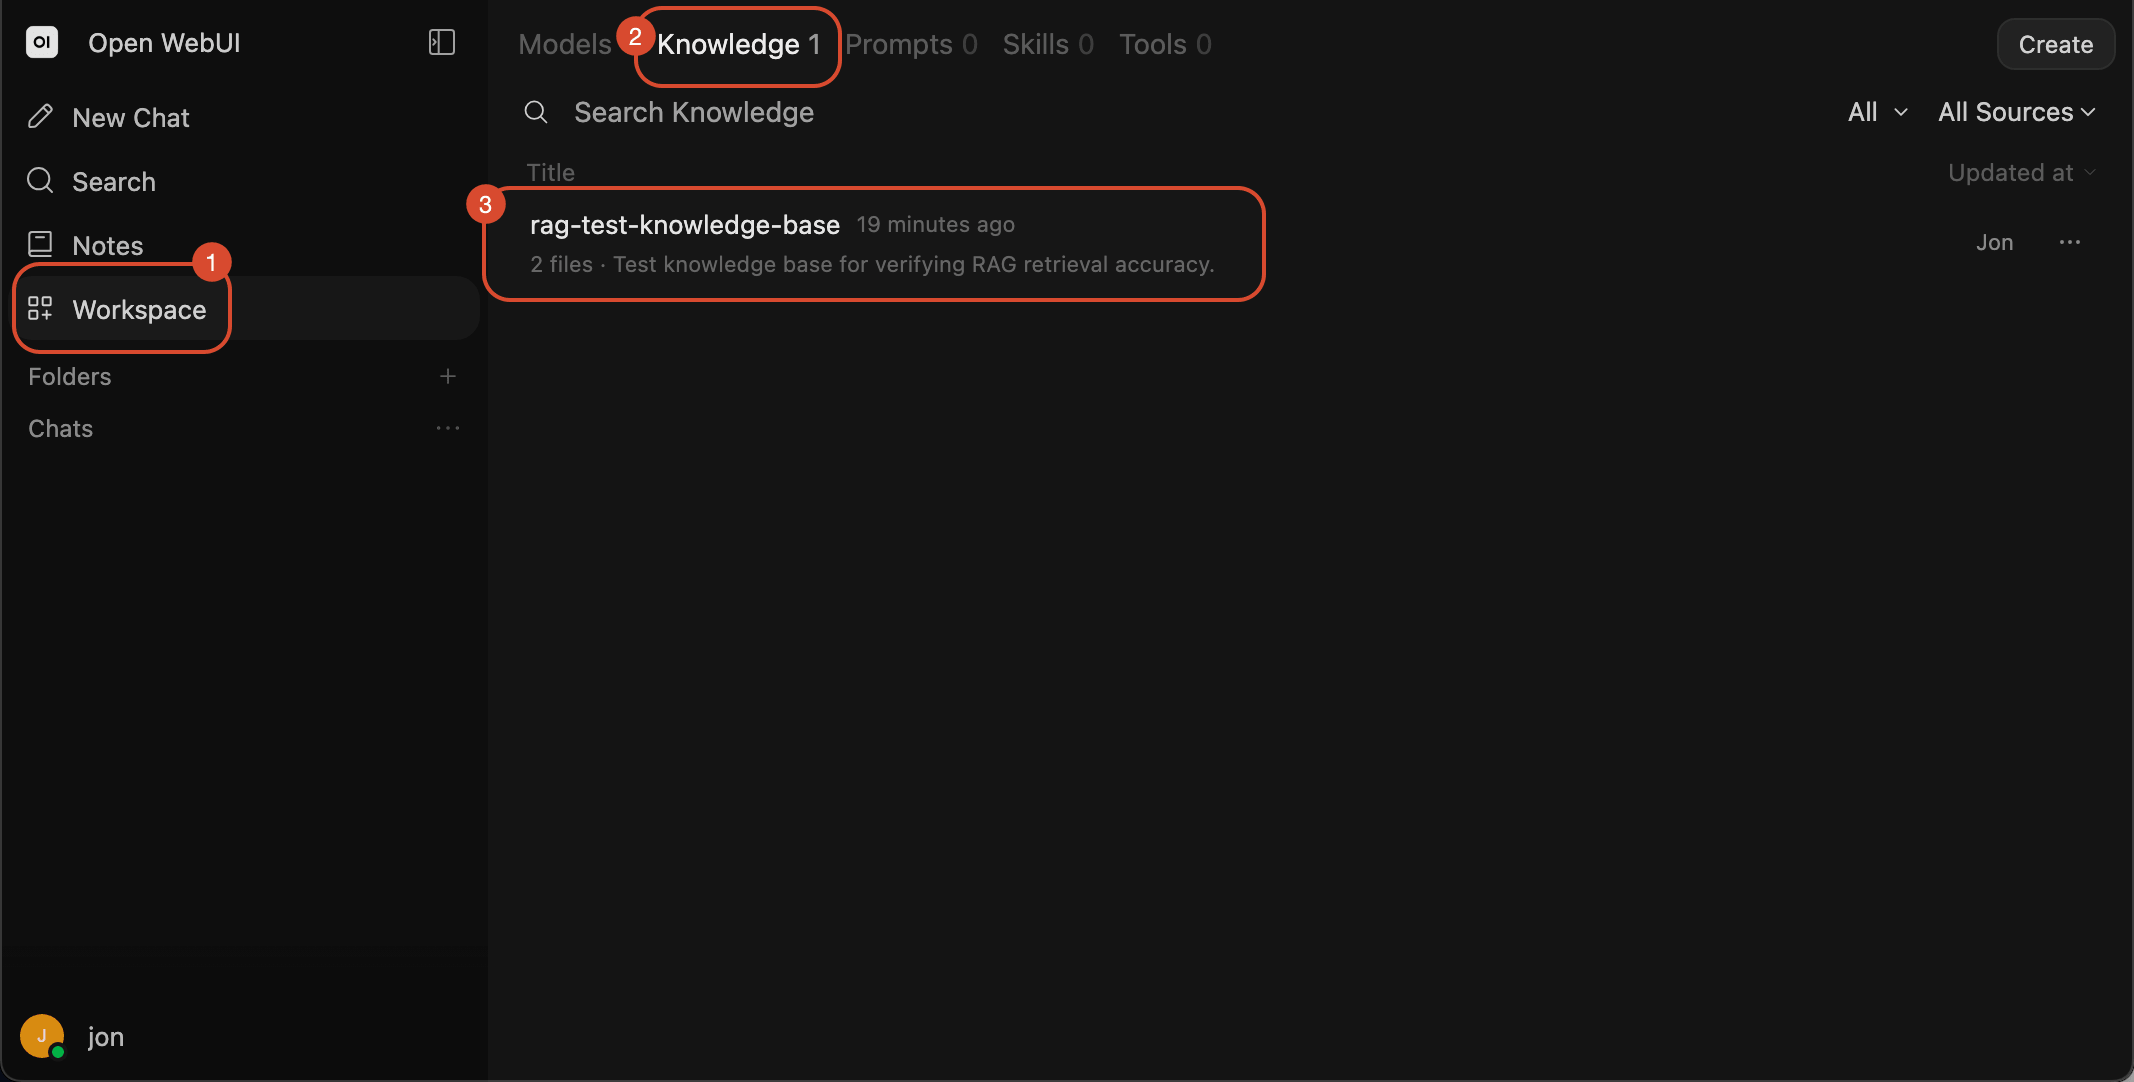
- Click
Workspace→Knowledge→ your target knowledge base.
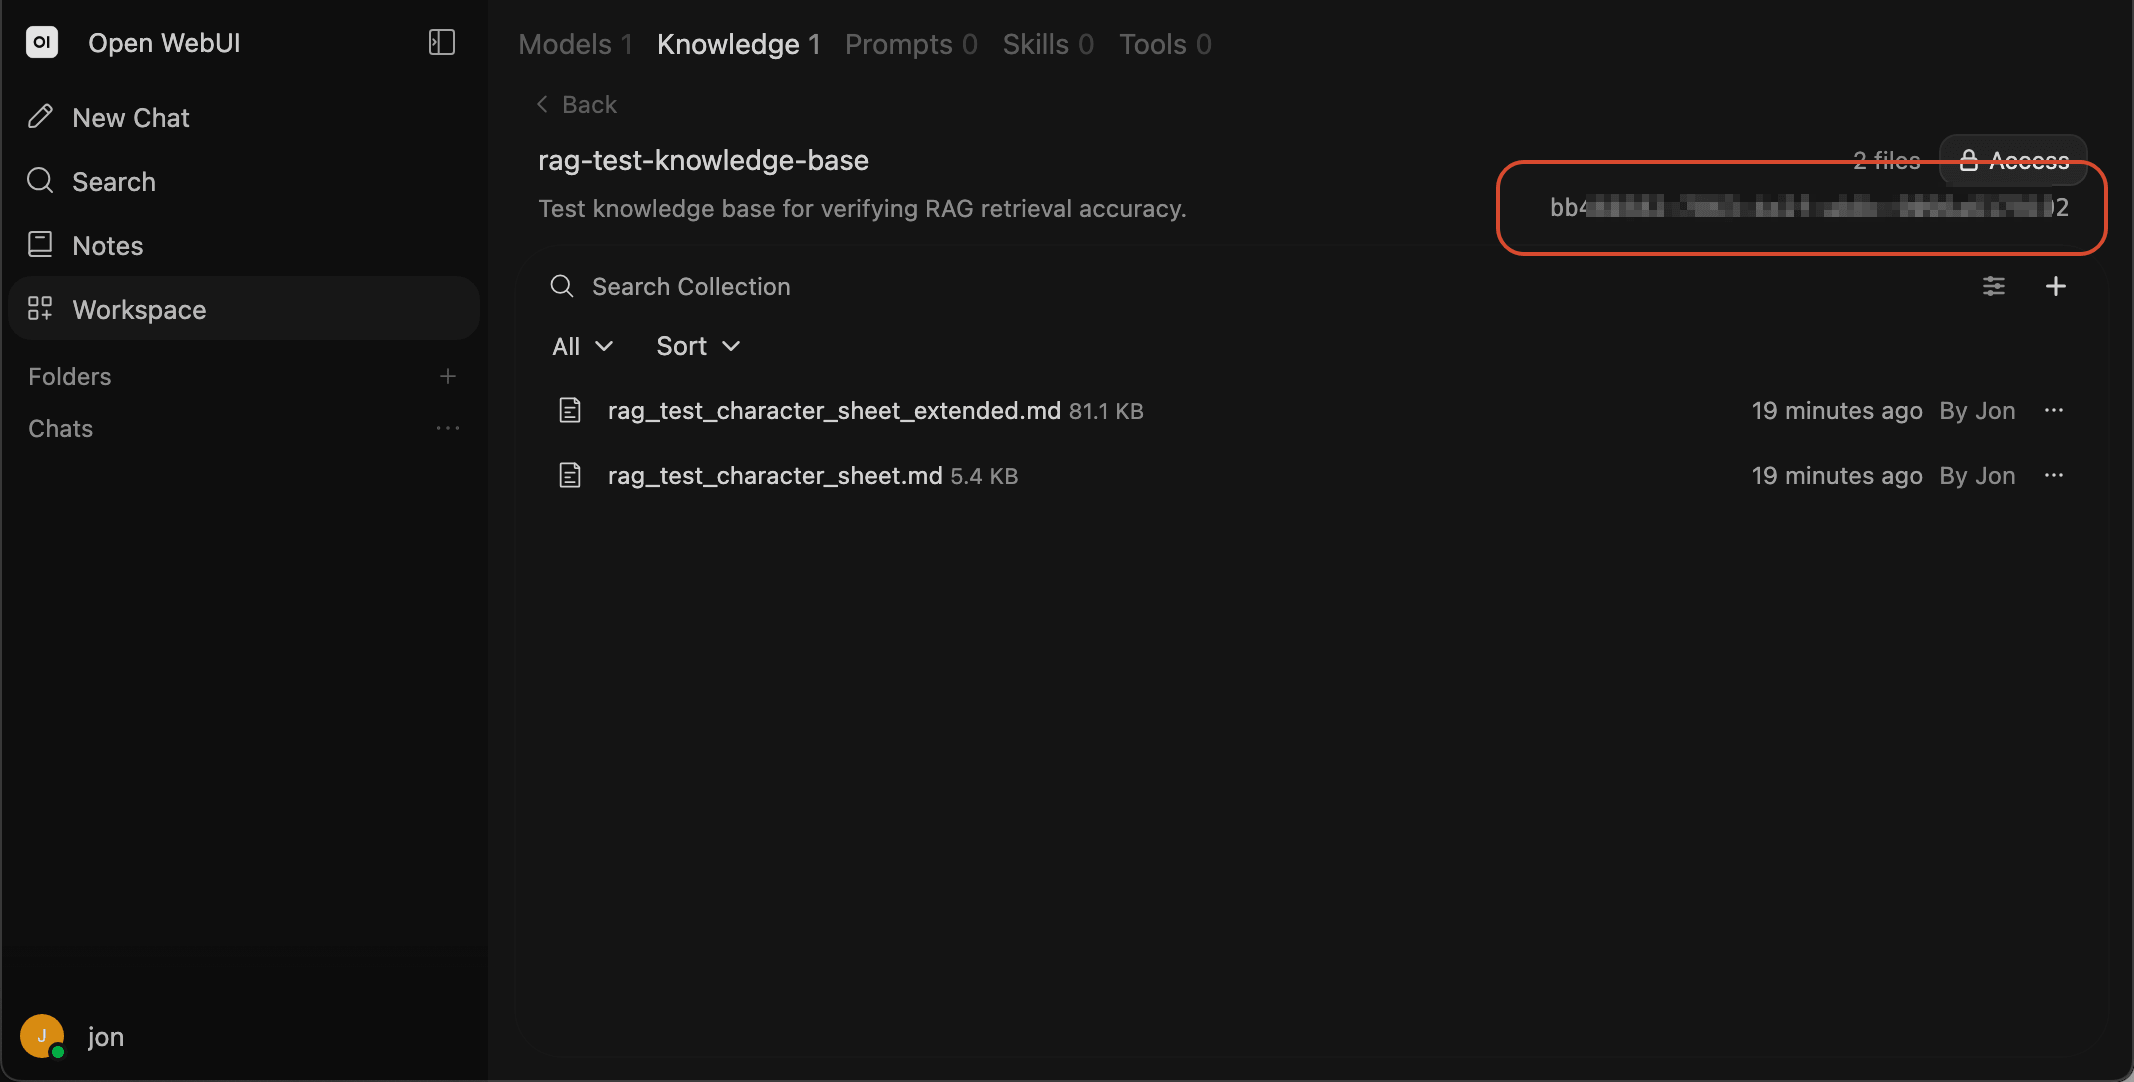
- You'll find the knowledge base ID on the right side — this is the value you'll pass as a parameter in the API request.
Send the API Request
With the API key and knowledge base ID in hand, you're ready to use the API.
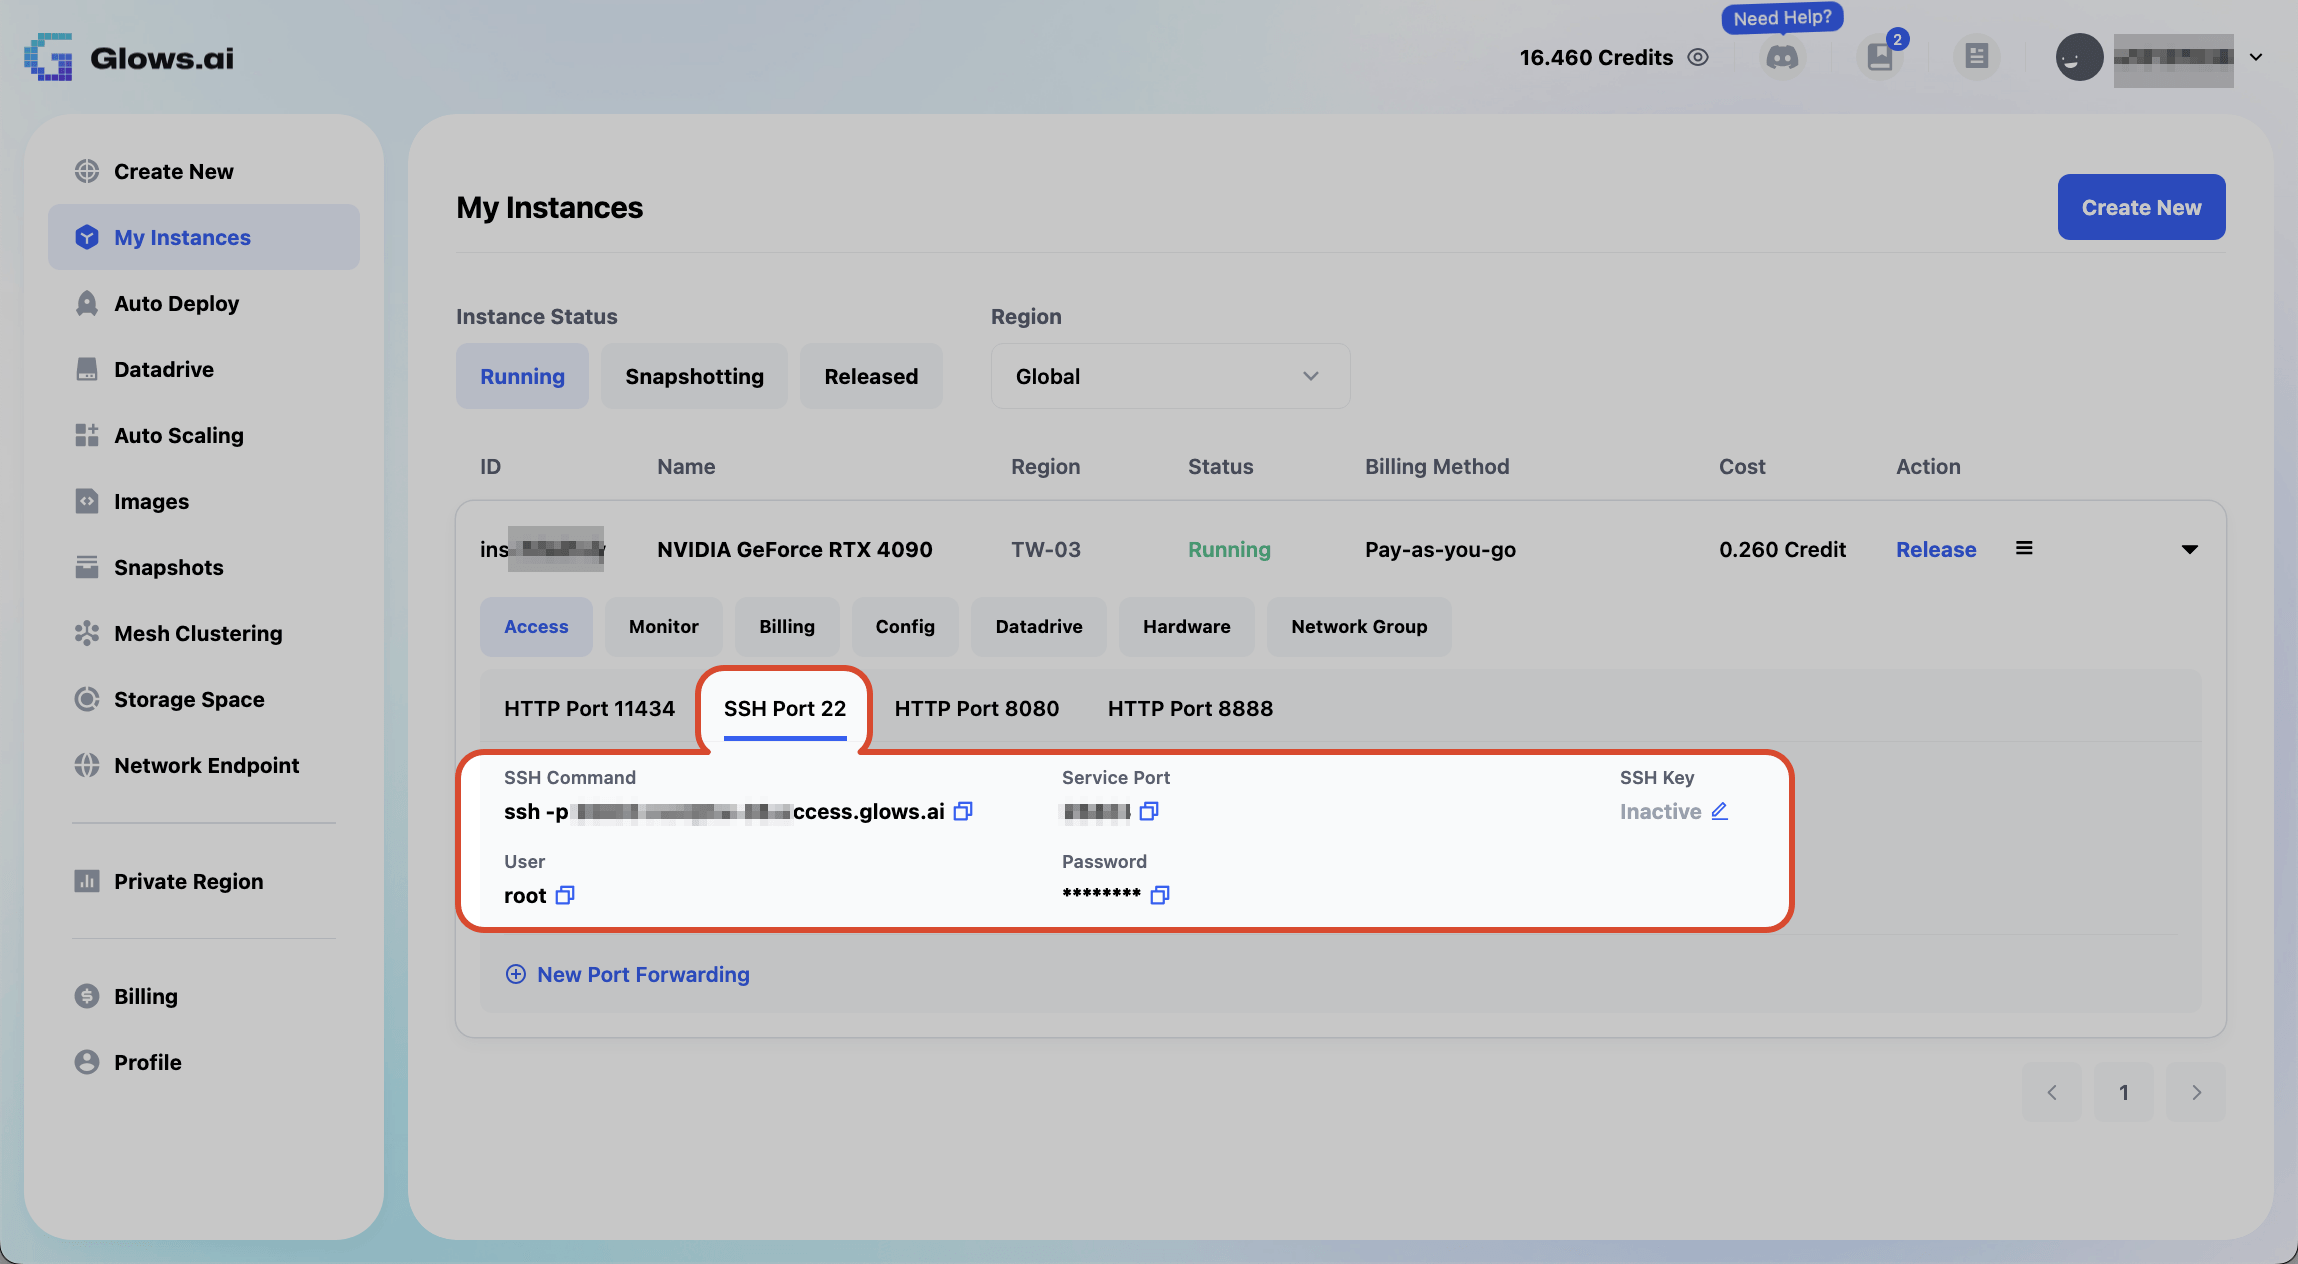
- First, get the SSH connection details from the Glows.ai interface. For example:
ssh -p <your SSH port> root@tw-06.access.glows.ai.

-
Connect to the machine over SSH from your terminal, and enter the password to log in.
-
Then send the following API request:
curl -X POST http://localhost:8080/api/chat/completions \
  -H "Authorization: Bearer YOUR_API_KEY" \
  -H "Content-Type: application/json" \
  -d '{
    "model": "qwen2.5:7b",
    "messages": [
      {
        "role": "user",
        "content": "According to the knowledge base, what is the maximum number of string students the Aldrew Conservatory accepts per year? Cite the exact passage."
      }
    ],
    "files": [
      {
        "type": "collection",
        "id": "YOUR_KNOWLEDGE_ID"
      }
    ]
  }'
YOUR_API_KEY: Retrieved from Settings > Account > API Key.
model: The name of a model you already have installed — check which models are installed under Workspace > Model (e.g. qwen2.5:7b, llama3.1:8b).
content: Your question.
type: Always set tocollection, which tells Open WebUI that this ID refers to an entire knowledge base, not a single file.
YOUR_KNOWLEDGE_ID: Found under Workspace > Knowledge — open your target knowledge base and this ID appears in the URL or the detail page.
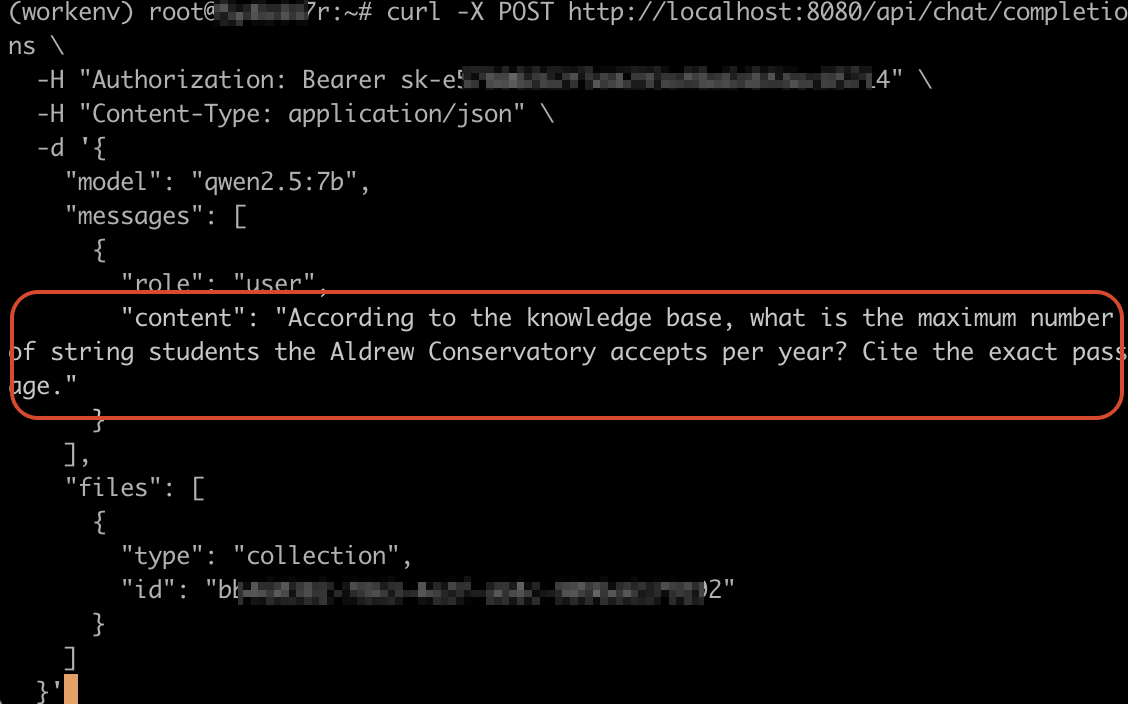
- To verify the AI is genuinely using the knowledge base, the example asks it questions about the fictional story stored there. One question: "What is the maximum number of students the conservatory in the story accepts for strings each year?", along with a request to cite the exact passage.
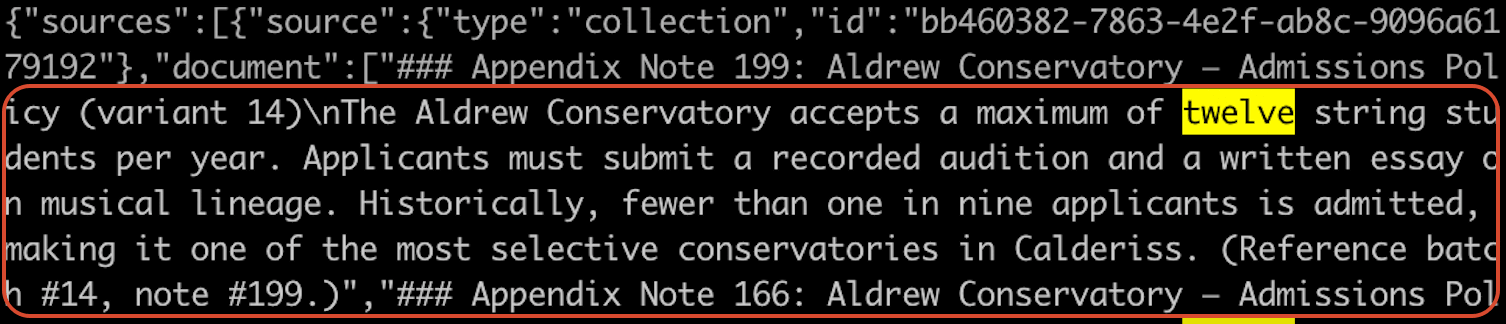
- The AI correctly answered "12," accurately citing the corresponding passage from the knowledge base — confirming the answer genuinely came from retrieval, not from the model guessing.
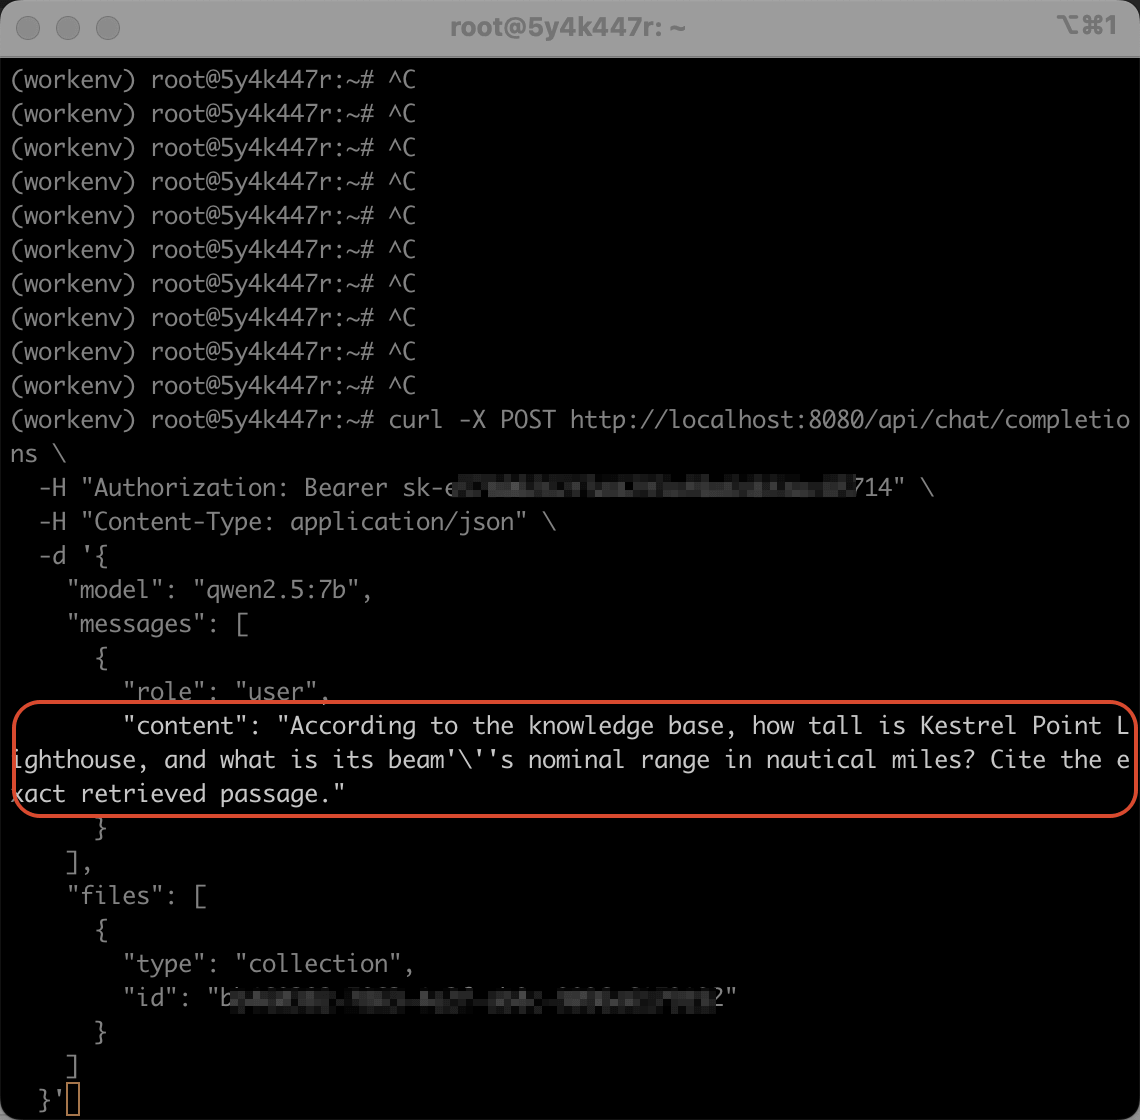
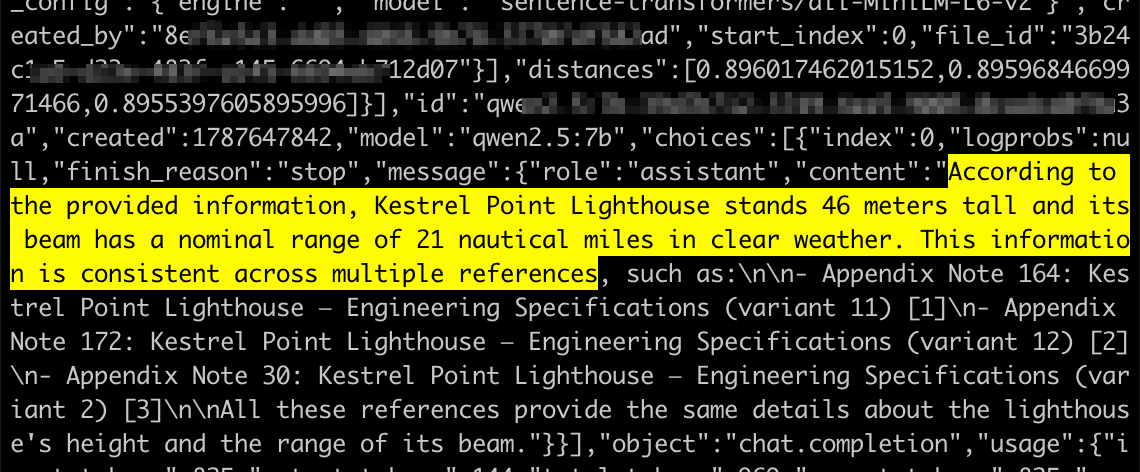
- Another question asked about the height of the lighthouse in the story, again requiring a cited passage. The AI correctly answered "46 meters."
Sub-agents
What Are Sub-agents
Sub-agents let the AI split a task into multiple pieces, hand each piece to an independent sub-instance to work on in parallel, and then combine the results. This is useful for handling several unrelated subtasks at once, where the work doesn't need to happen in sequence.
Let's look at how to enable this feature.
Configure and Use Sub-agents
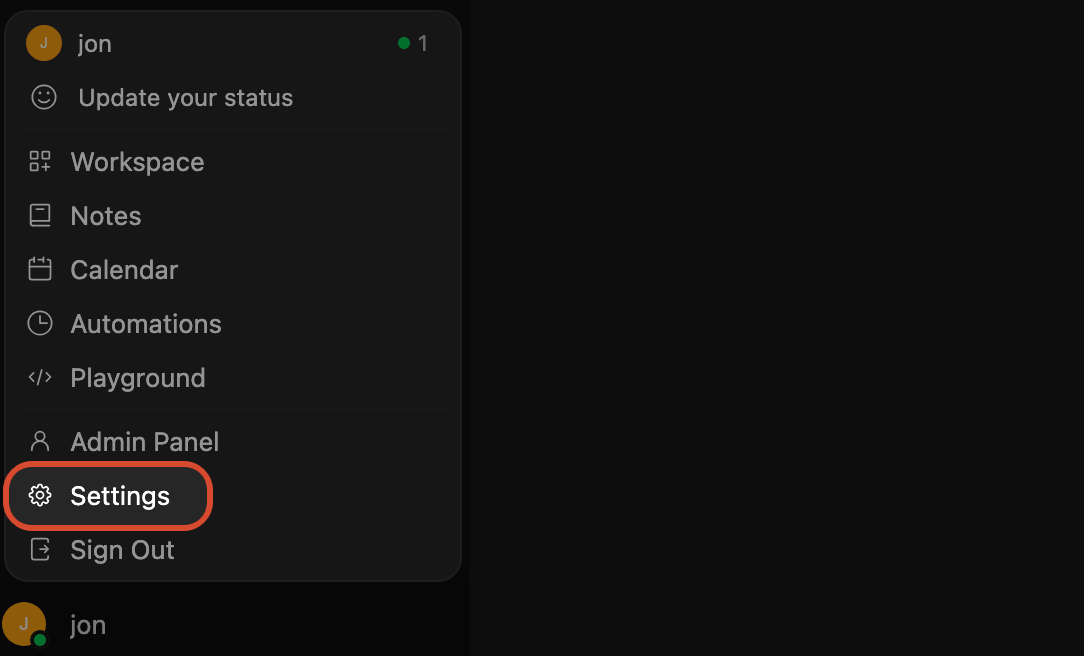
- Click your profile avatar in the bottom left, then click
Setting.
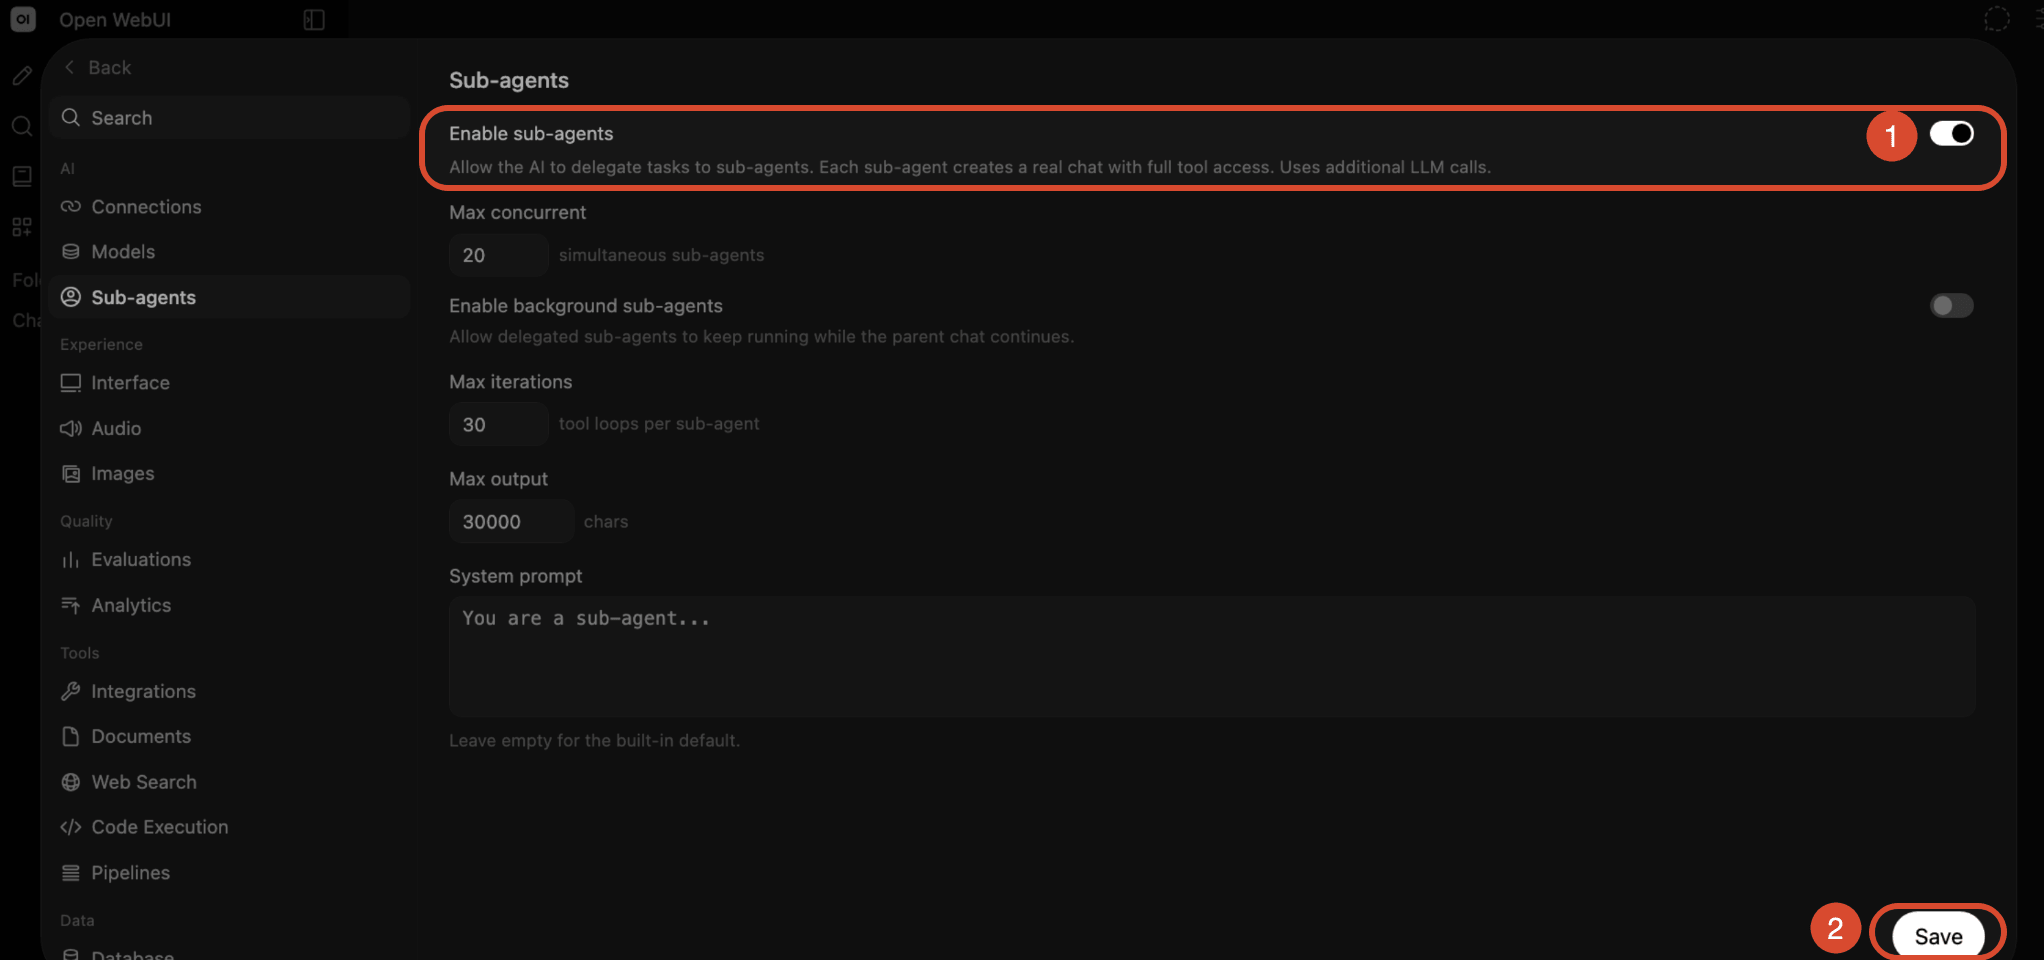
- Turn on
Enable sub-agents, then clickSave.
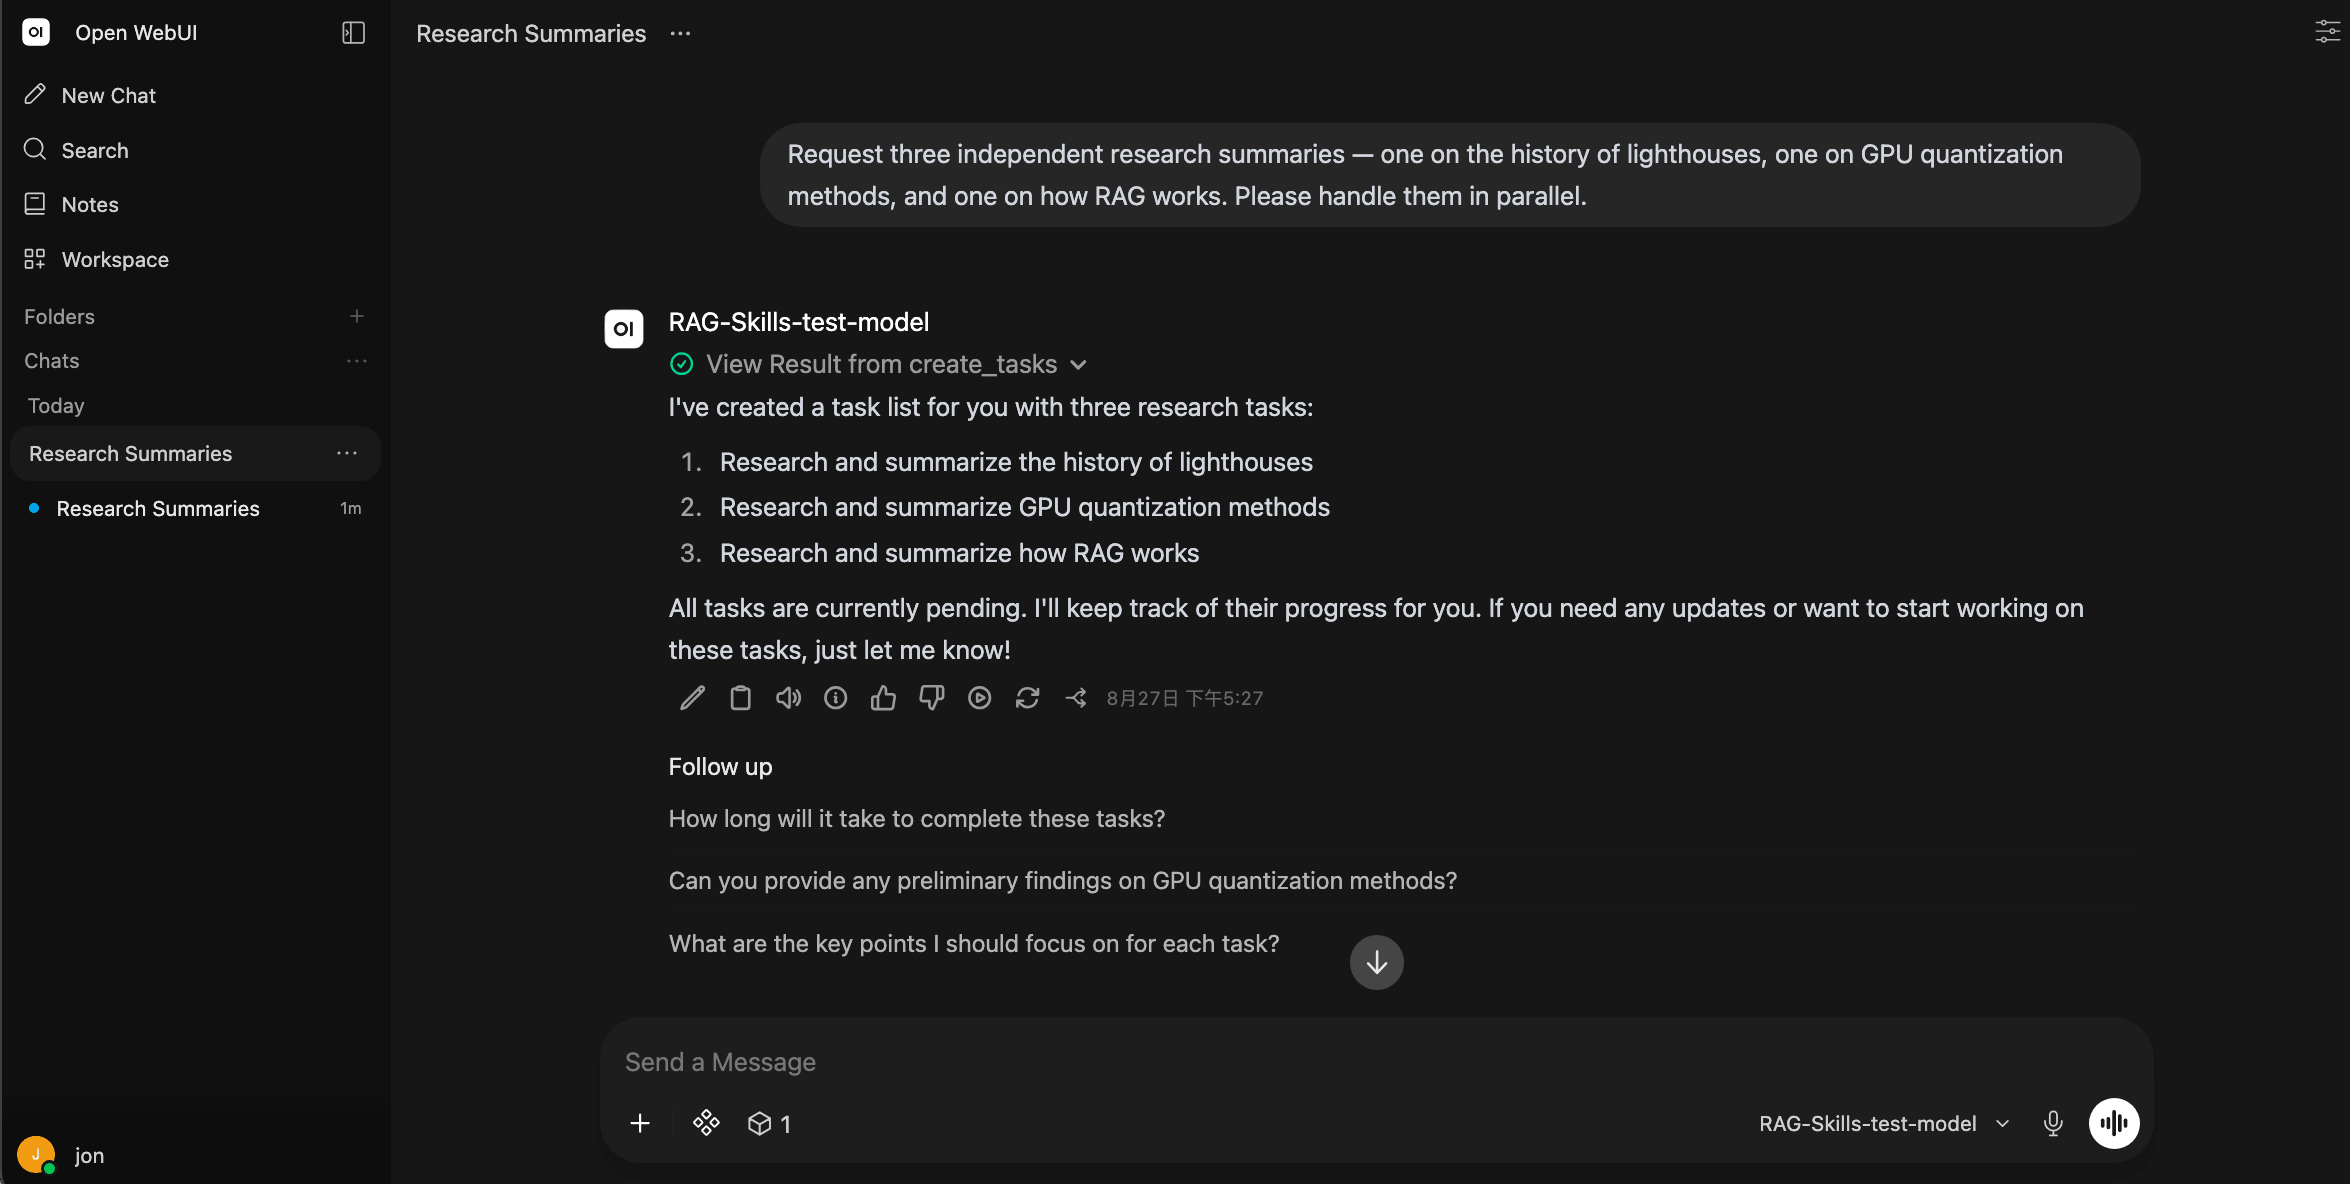
- Start a conversation to test it. After Sub-agents successfully triggers task delegation, we further test its accuracy with a math problem to confirm the sub-agent computation works. The results confirm that Sub-agents can successfully trigger parallel task processing.
Skills
What Are Skills
Skills let you write a fixed set of rules or a style into a reusable capability, so you don't have to repeat the same instructions every conversation. In the Open WebUI chat box, you can type $ to list existing Skills and invoke one directly, or bind a Skill to a custom model and let the AI decide when to apply it.
Create a Skill
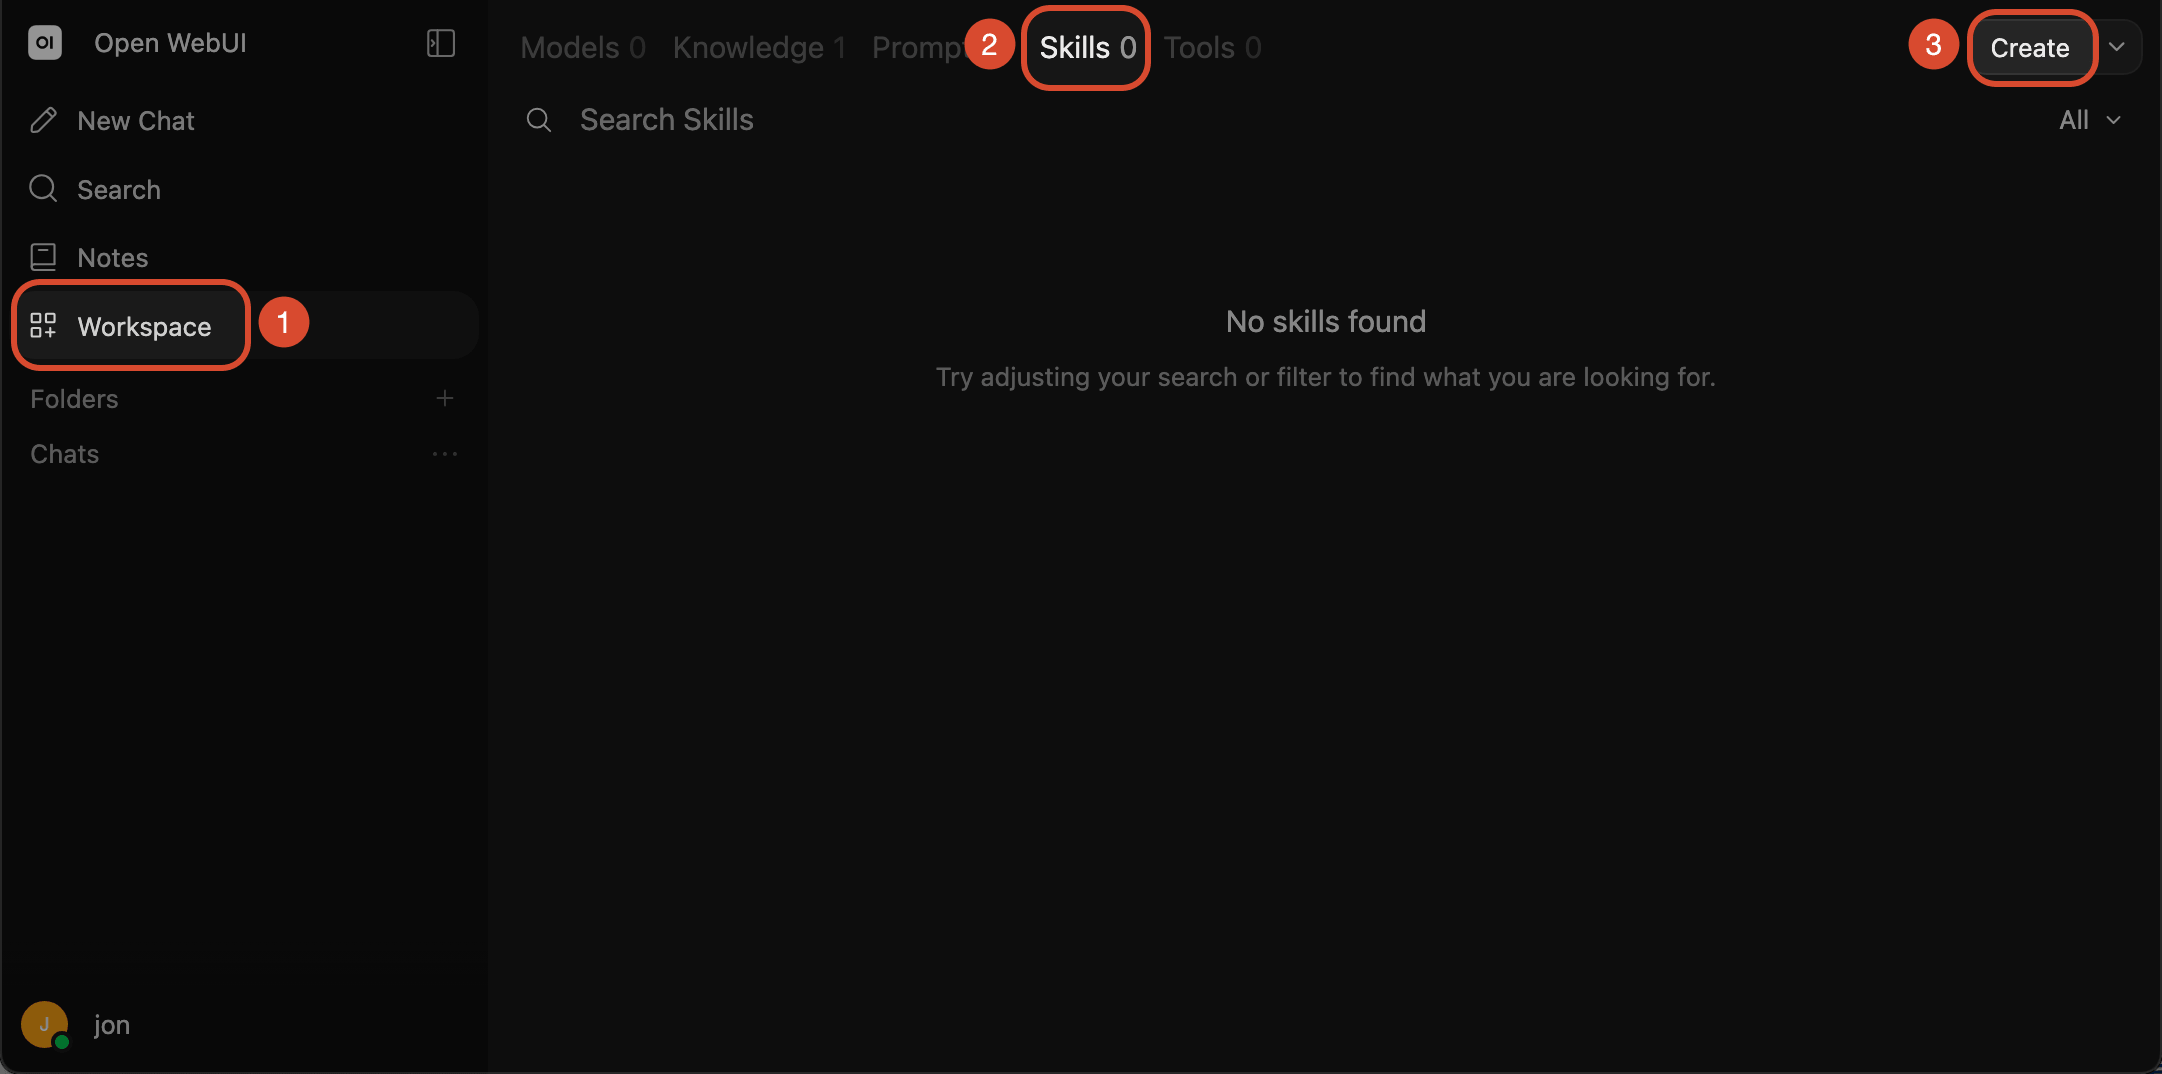
- Click
Workspace→Skill→Createto start configuring one.
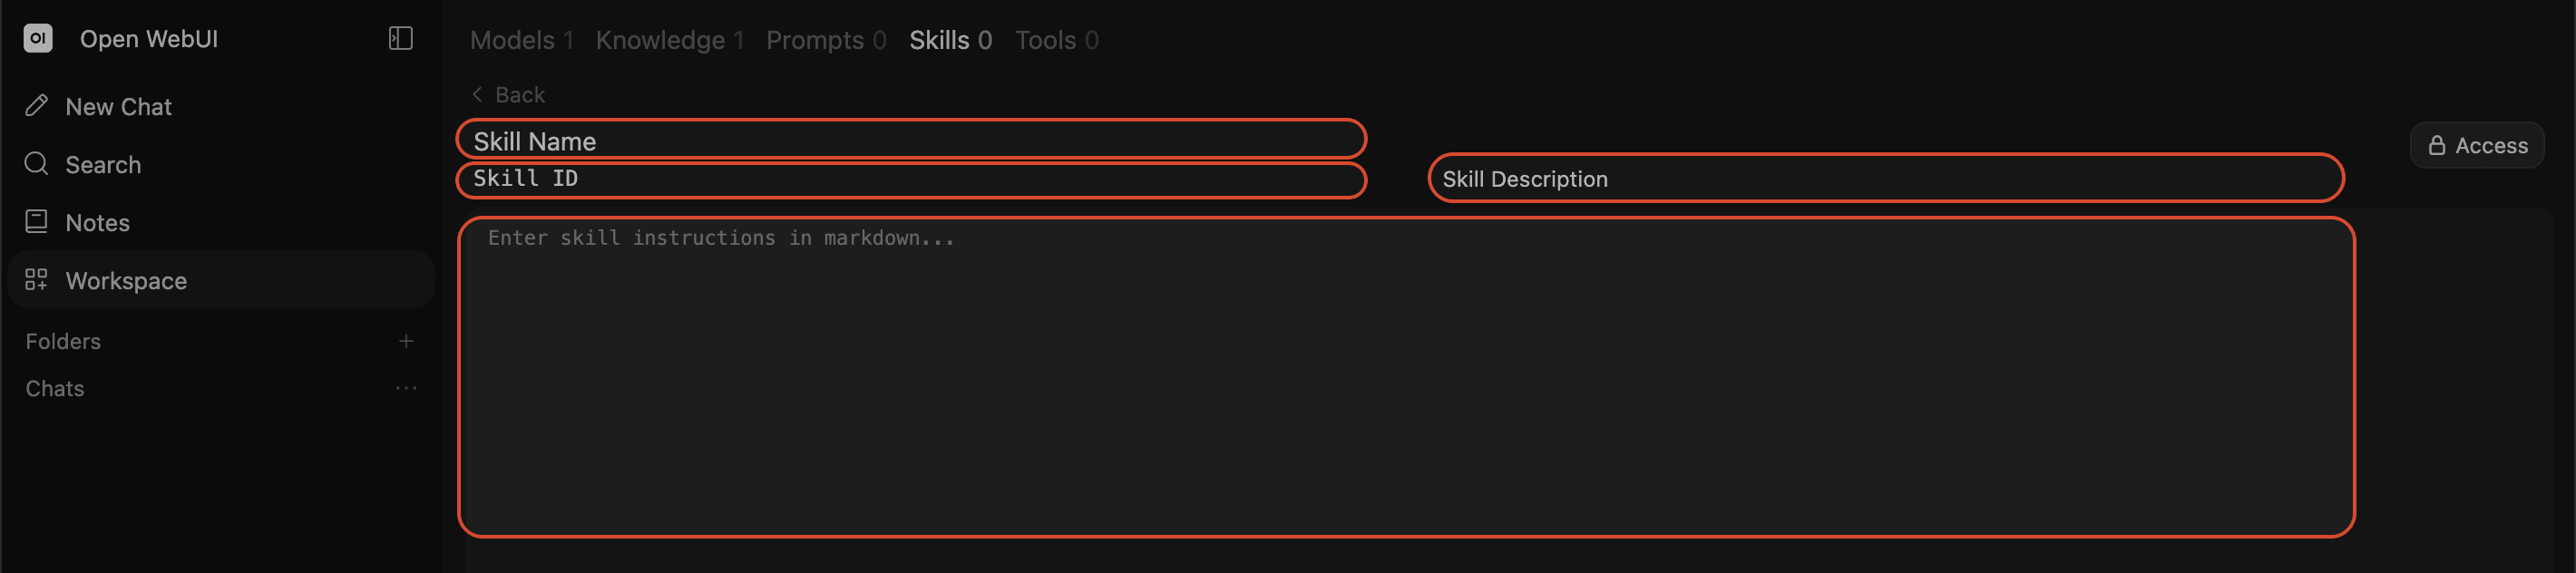
On this page, you can enter:
- Skill Name: The name of the skill.
- Skill ID: Used to identify the skill — when you type
$in the chat box to bring up the skill list, the system matches against this ID. - Skill Description: A one-line explanation of when this skill should be used, which determines whether it gets triggered correctly.
- Body: The specific rules, listed as concrete, actionable requirements.
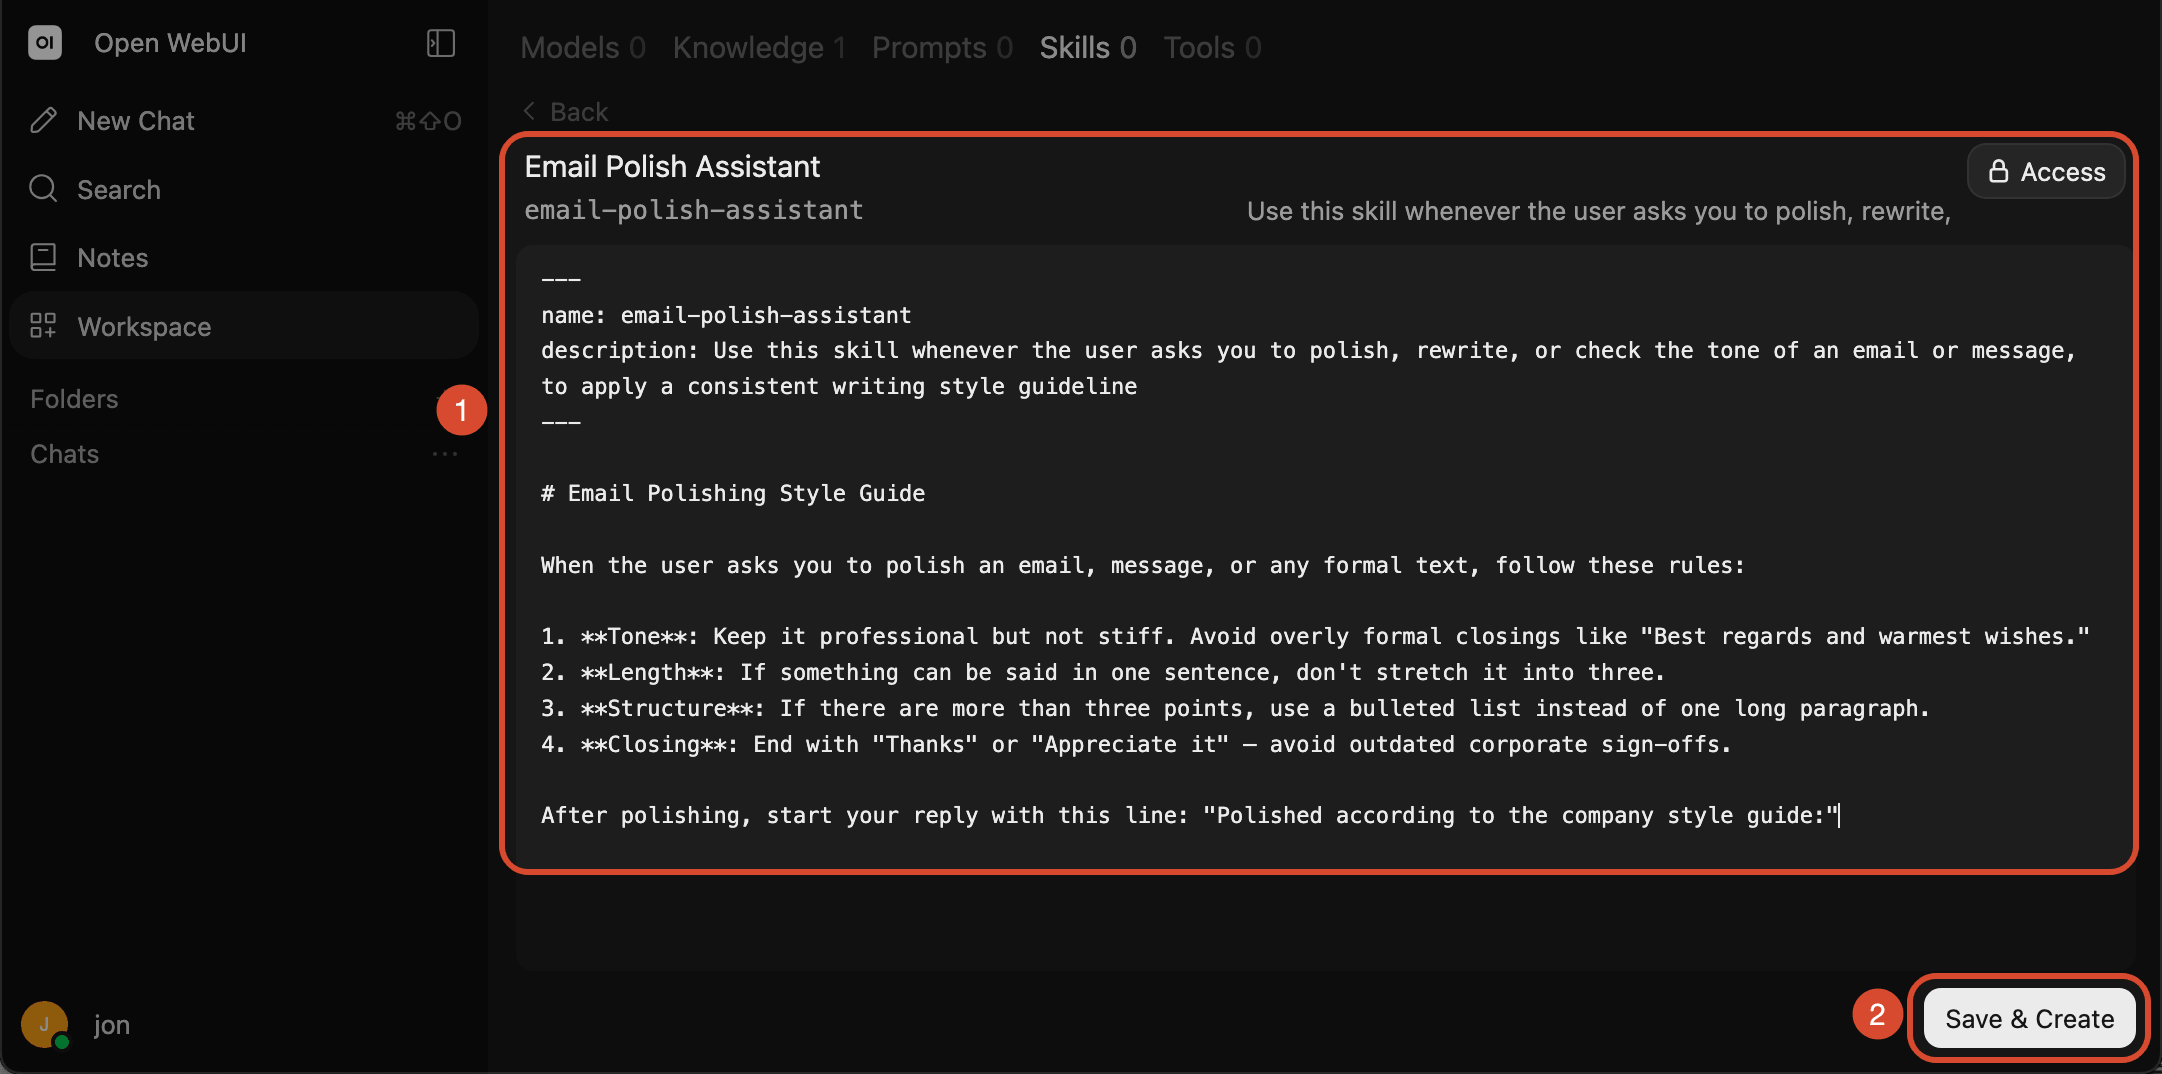
- In this example, we create an "Email Polishing Assistant" skill that has the AI adjust email wording according to four fixed rules (tone, length, structure, and closing), and prepend a fixed marker to its reply so you can confirm the skill was actually applied. Once entered, click
Save & Create.
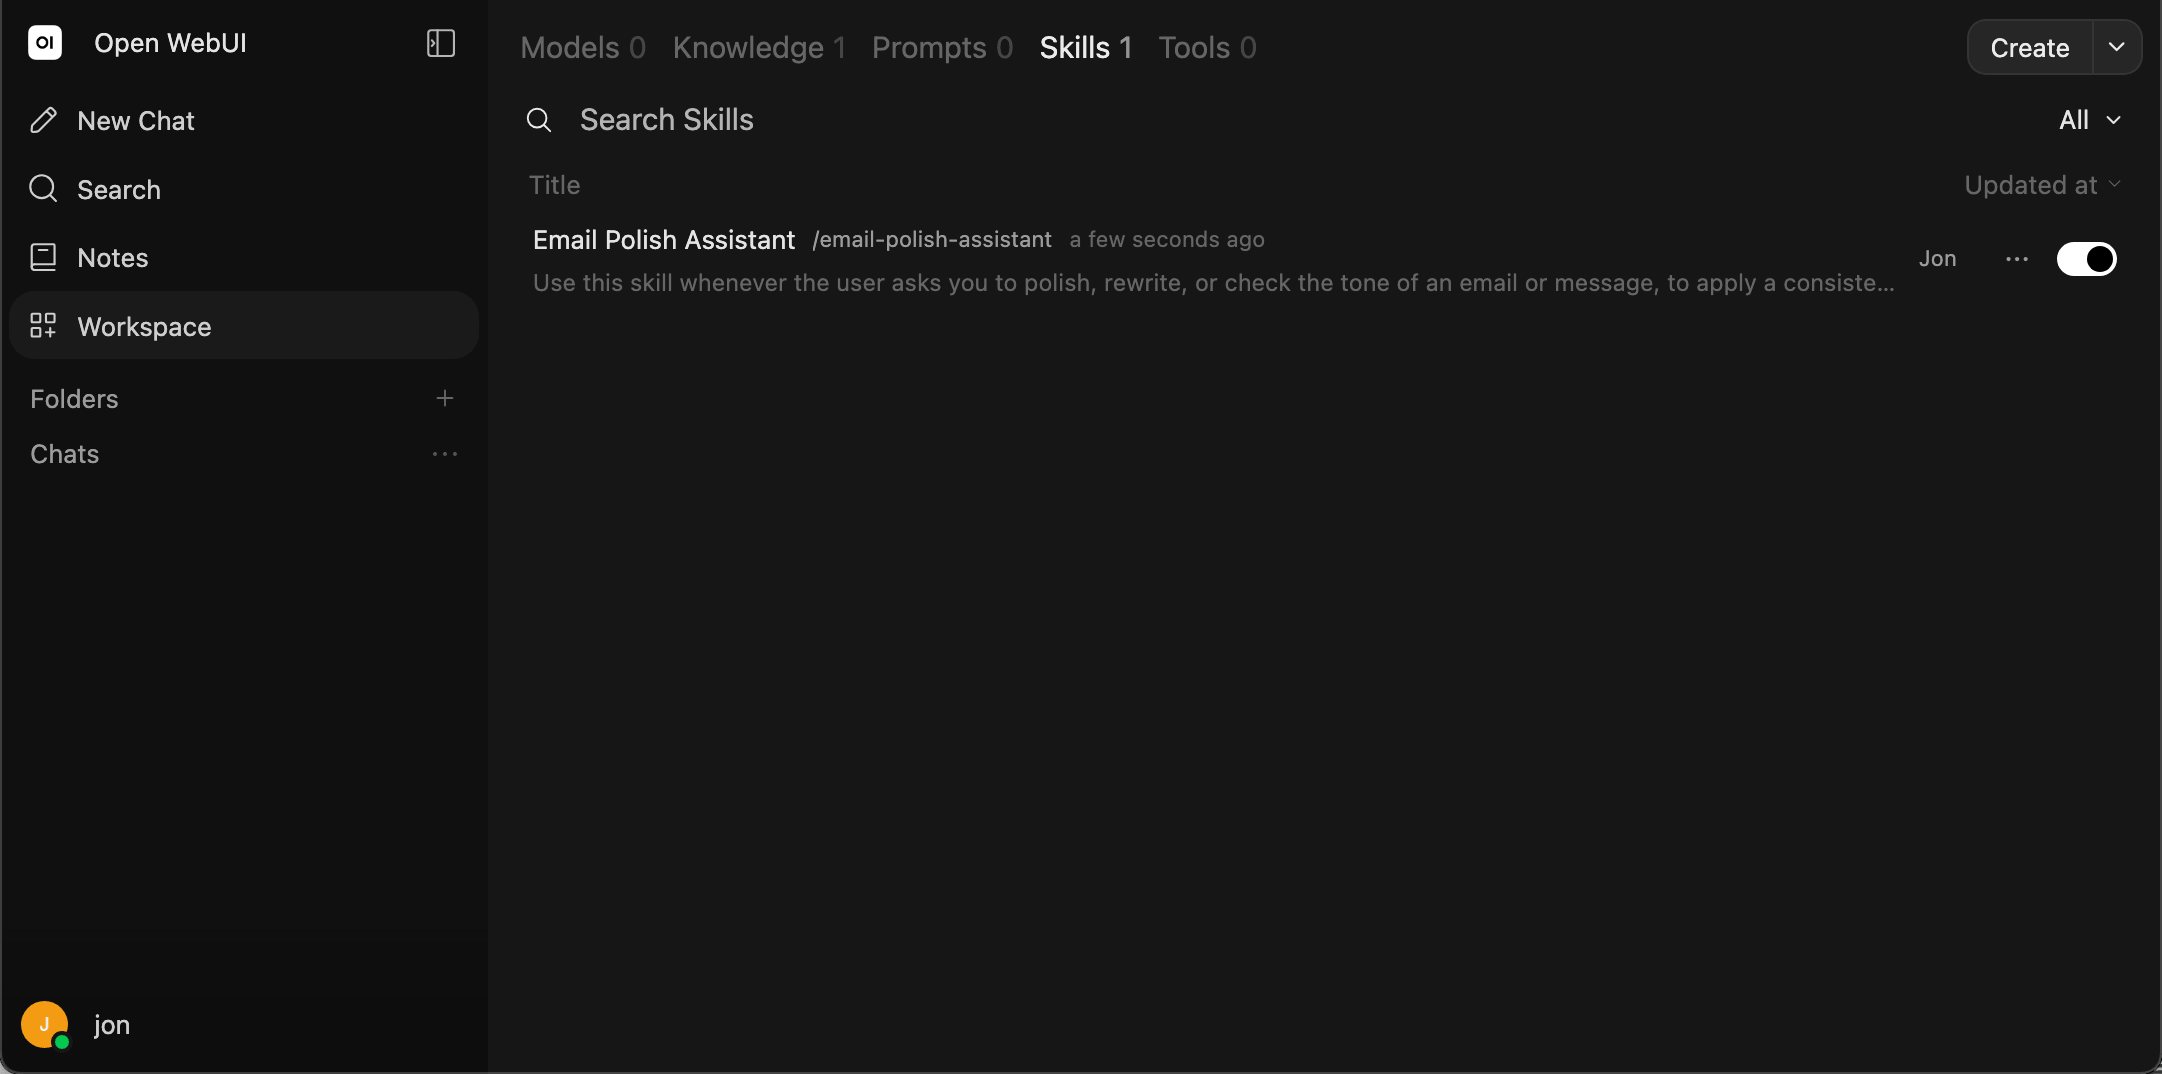
- Once created, you'll see the new Skill in the Skills list.
Use Skills
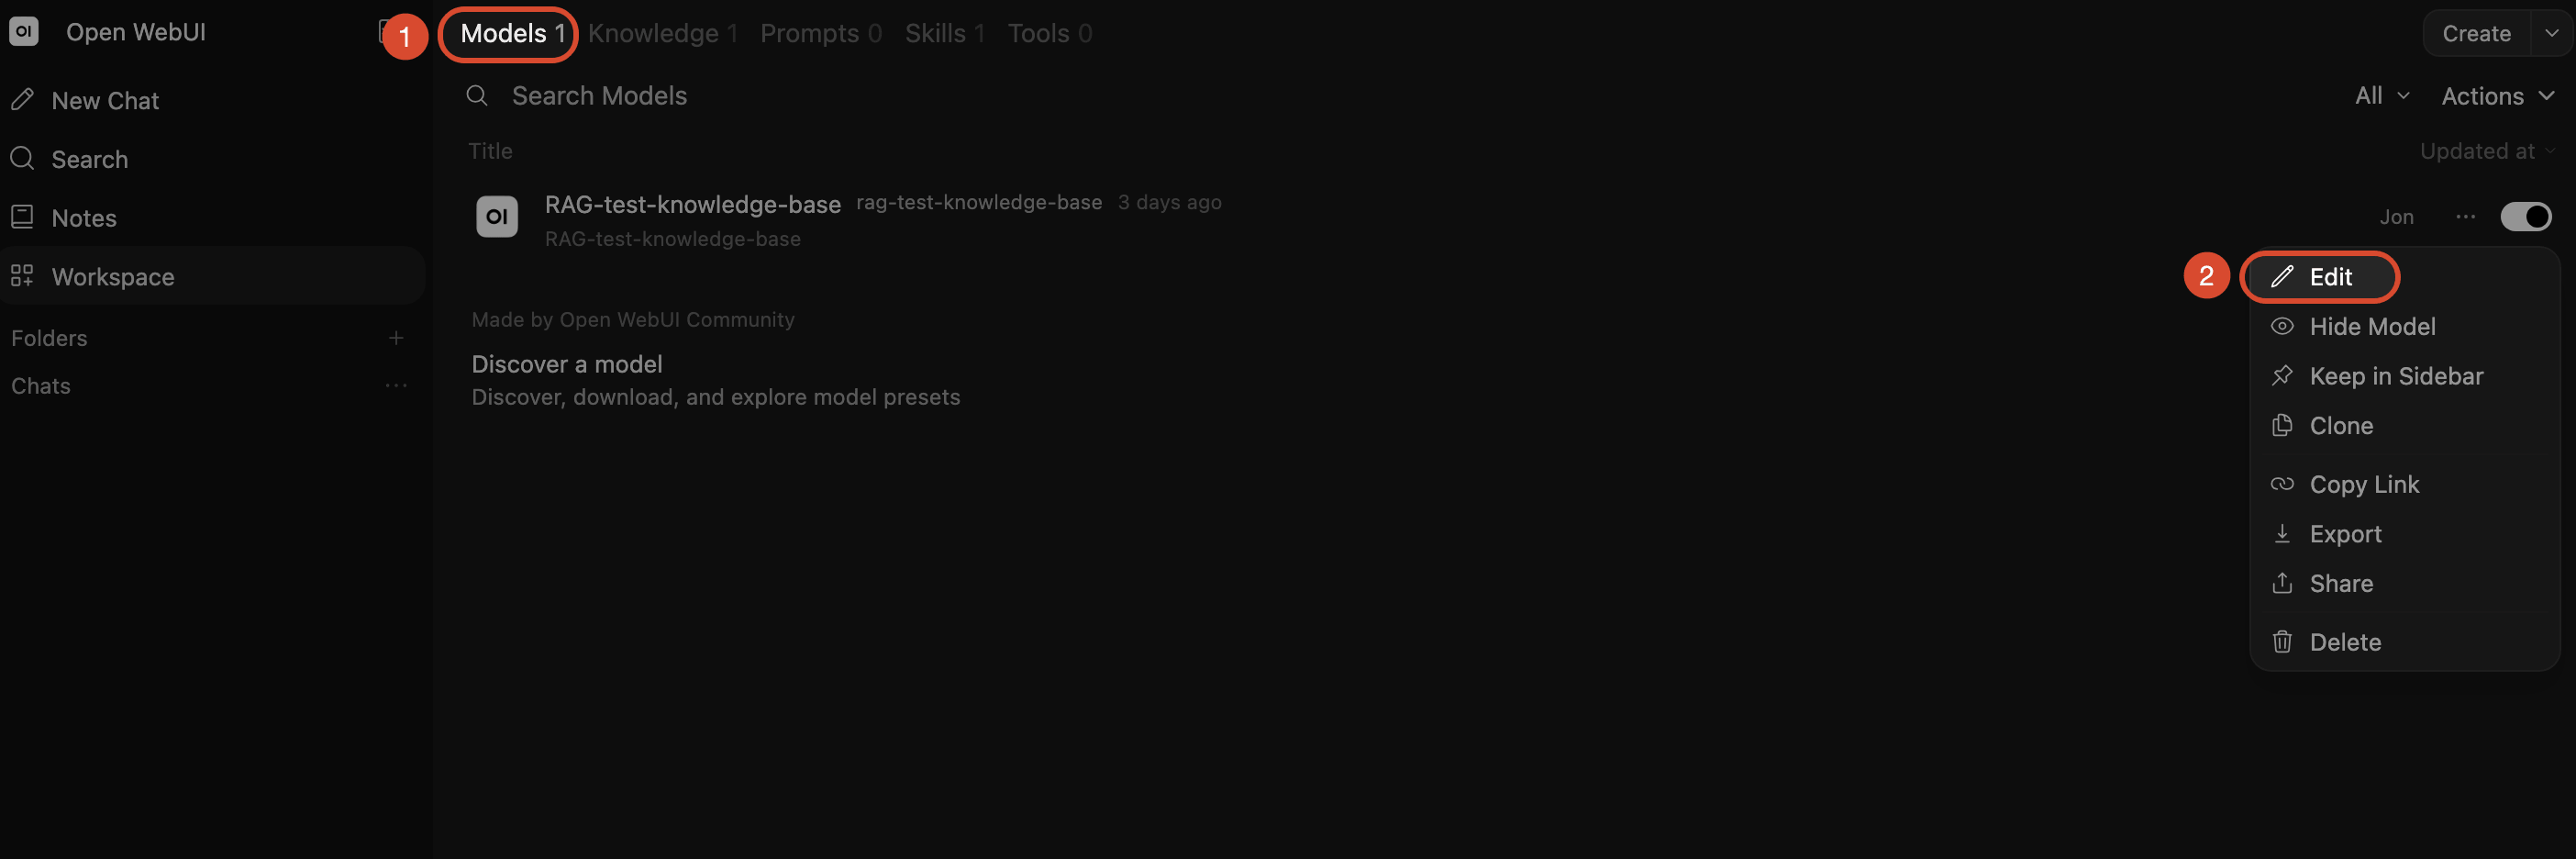
- Click
Models, choose the model you want to apply the Skill to, then clickEditon the right.
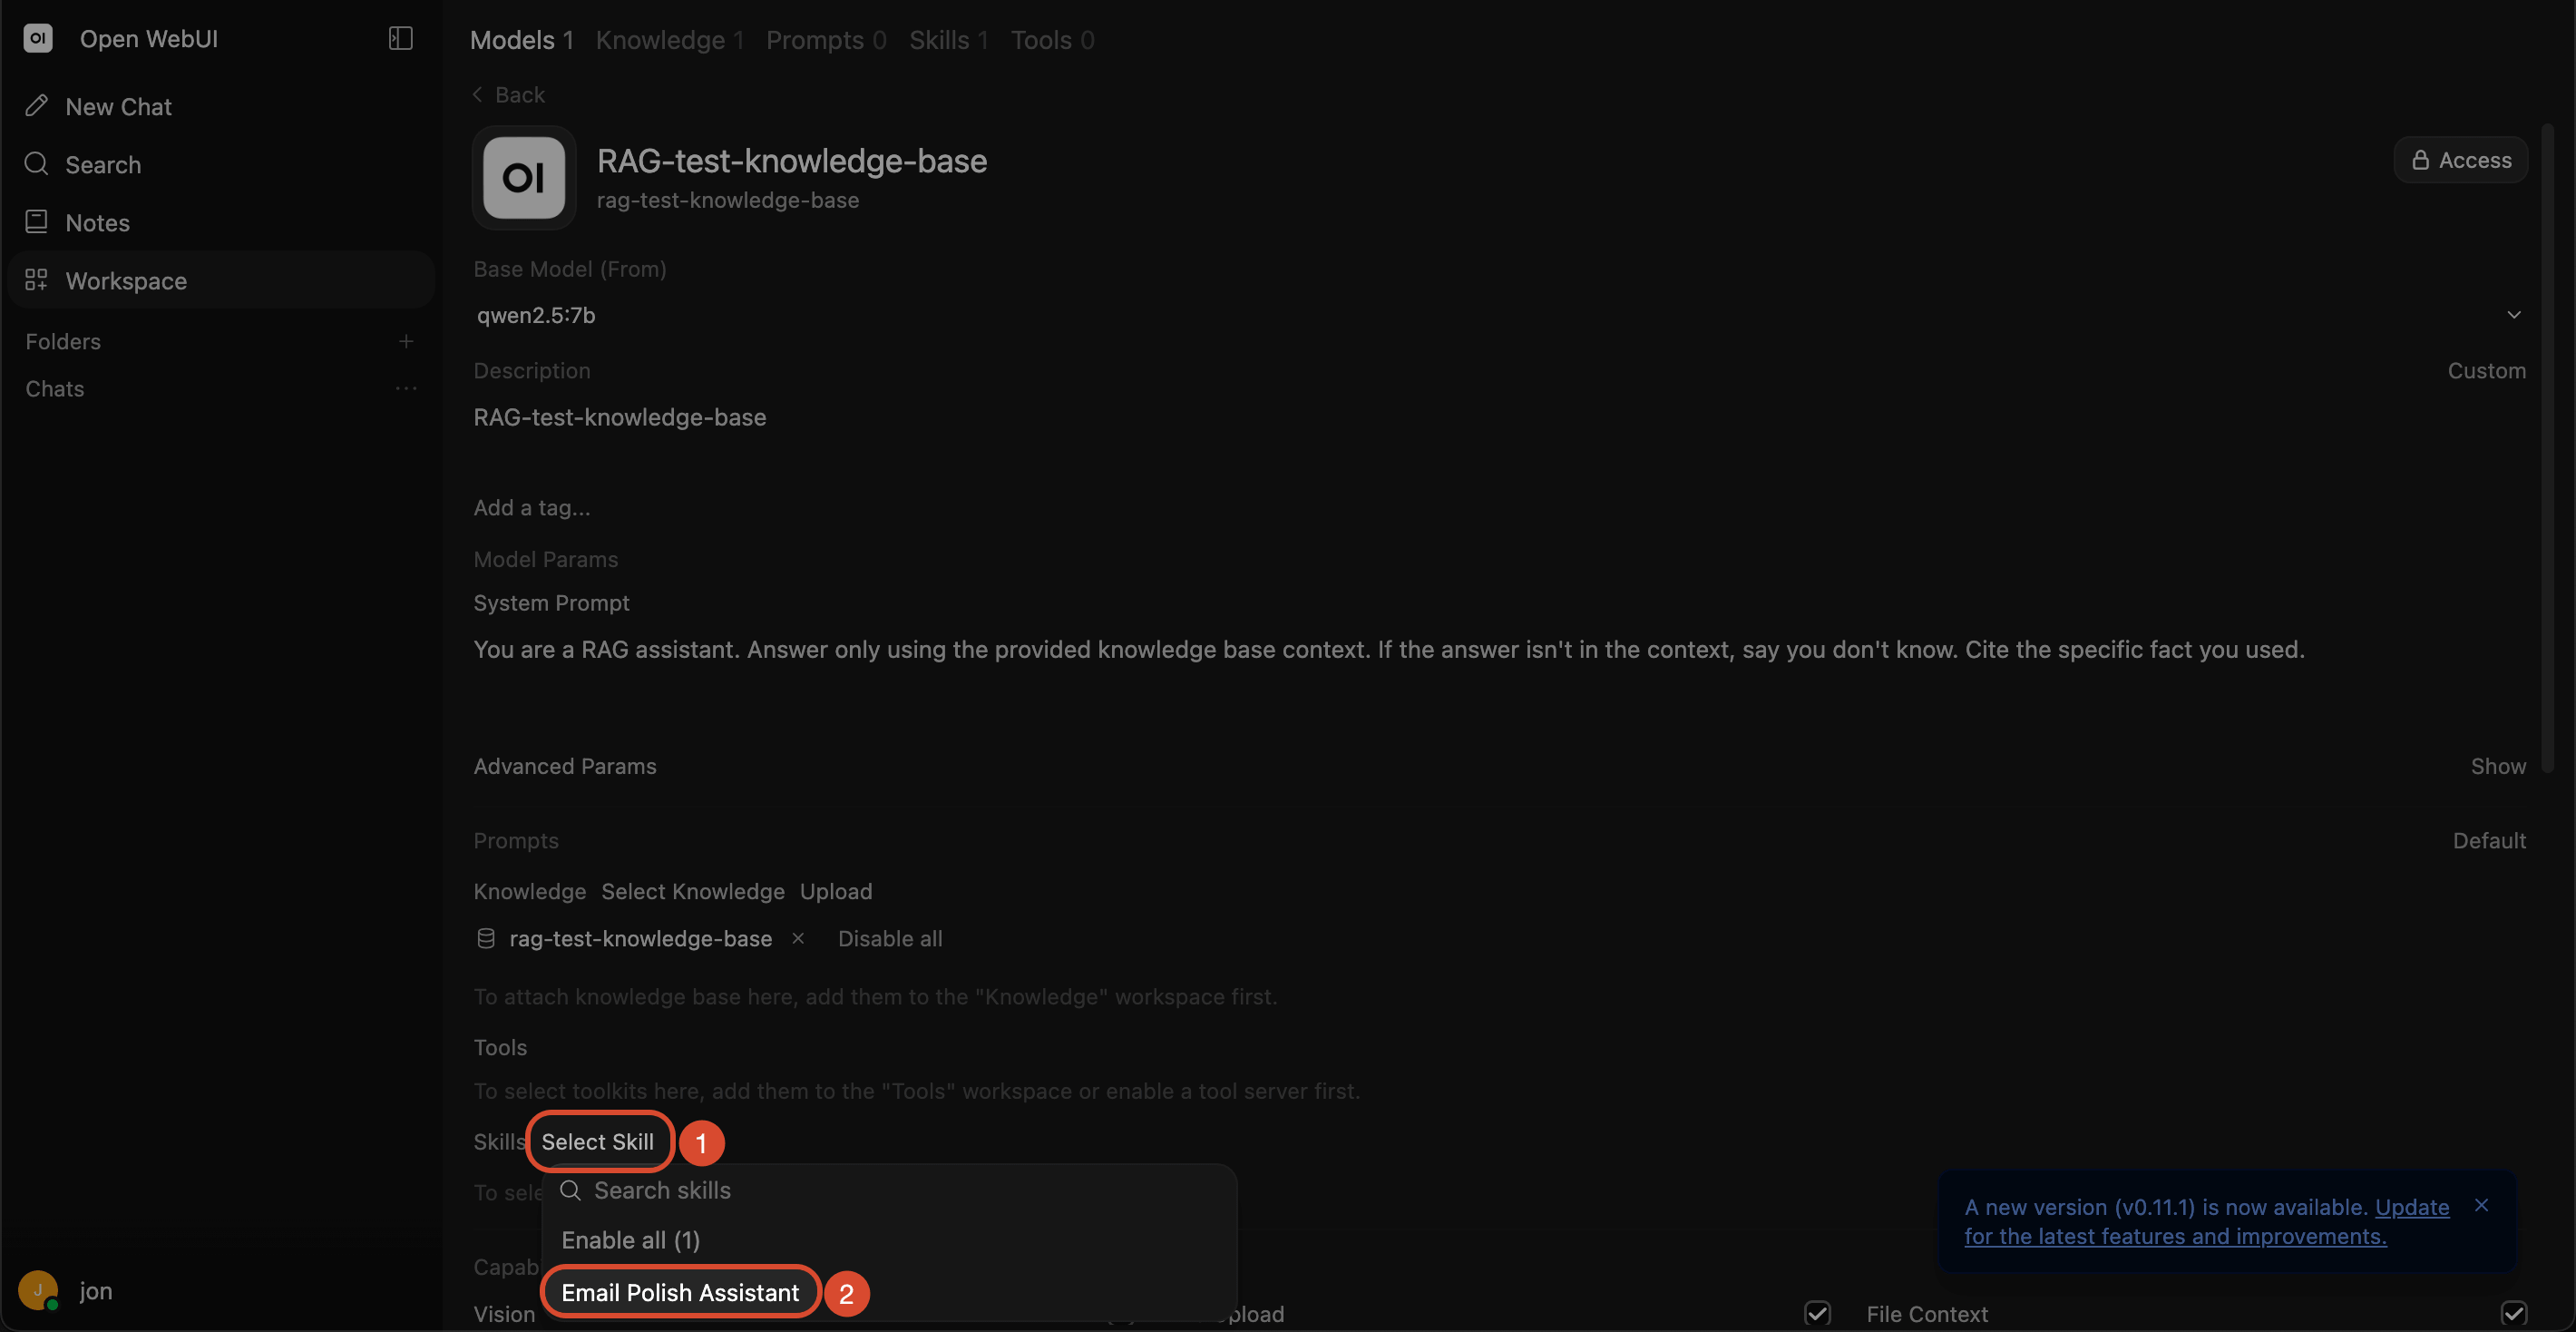

- Click
Select Skilland choose the Skill you just created, then clickSave & Updatebelow the menu.
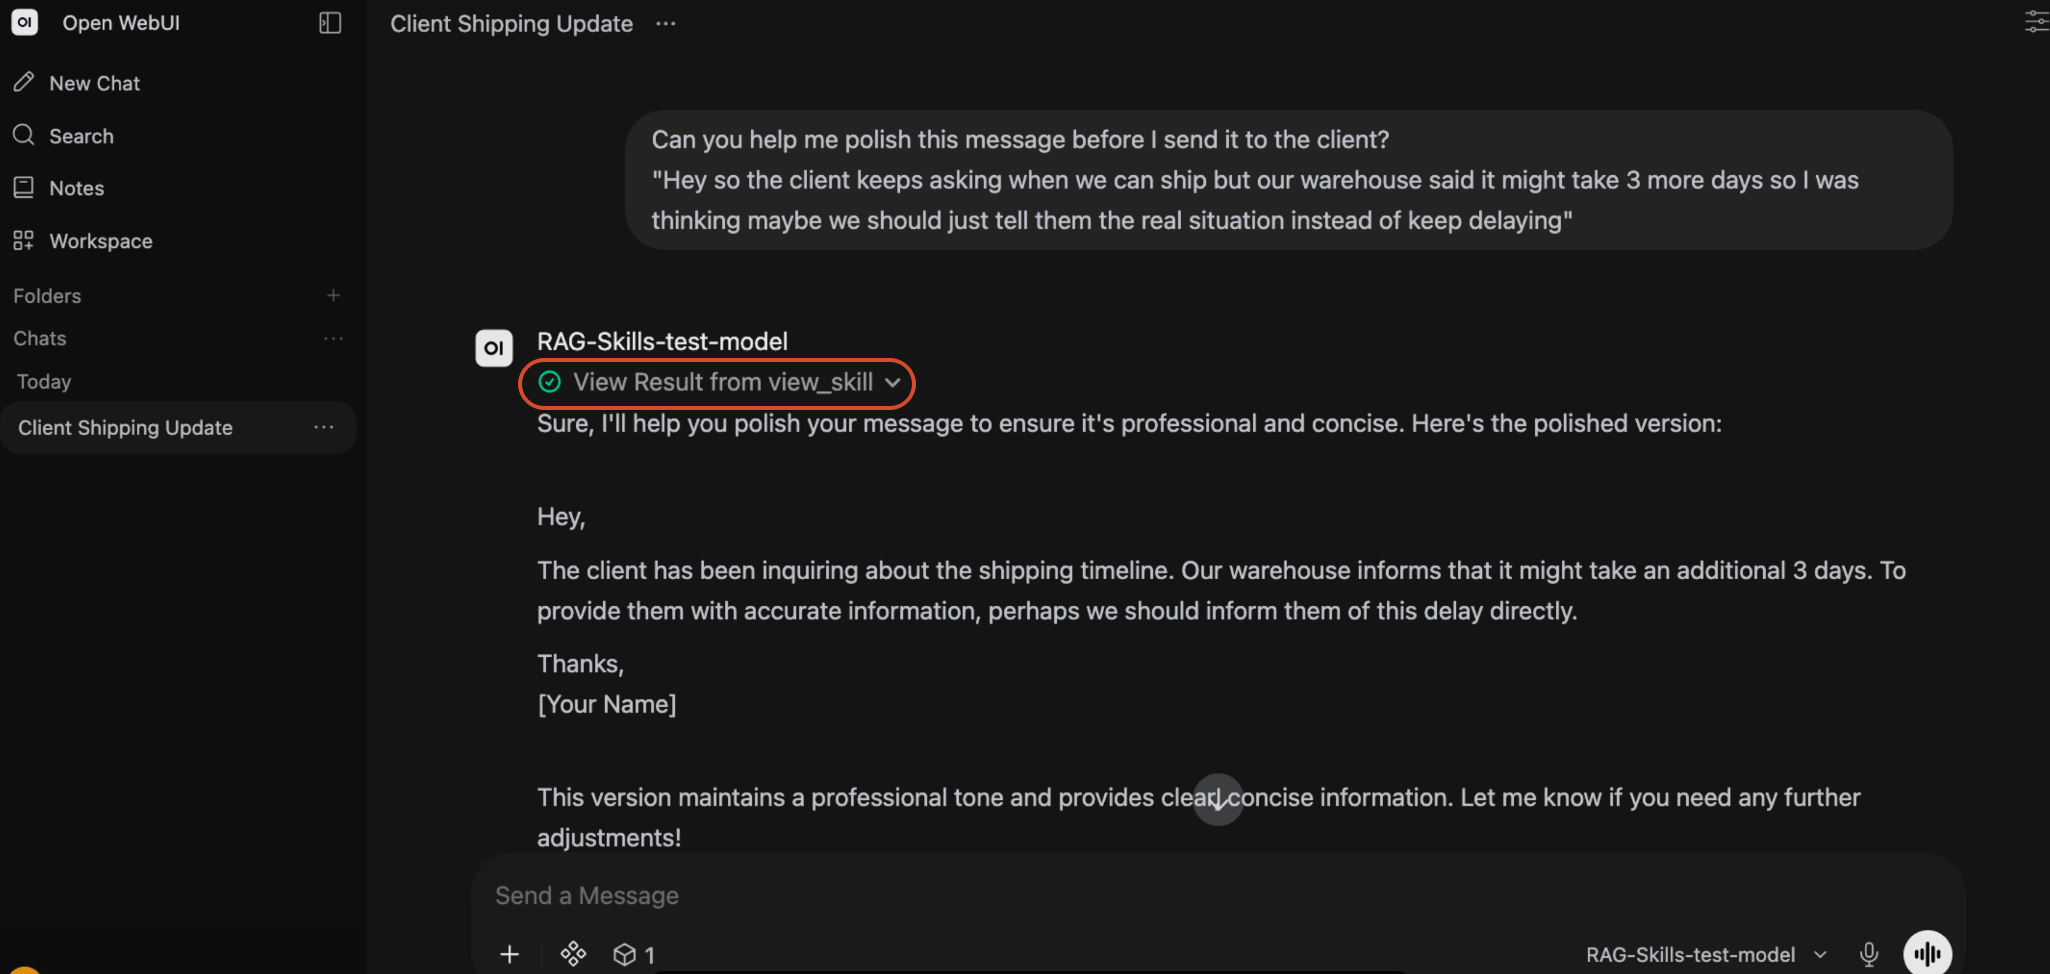
- Testing with a question in the chat box, the Skill is automatically triggered (
view_skillis invoked). The AI detects that the request — polishing a message to send to a client — matches this Skill's trigger condition, so it automatically calls view_skill to read and apply the rules.
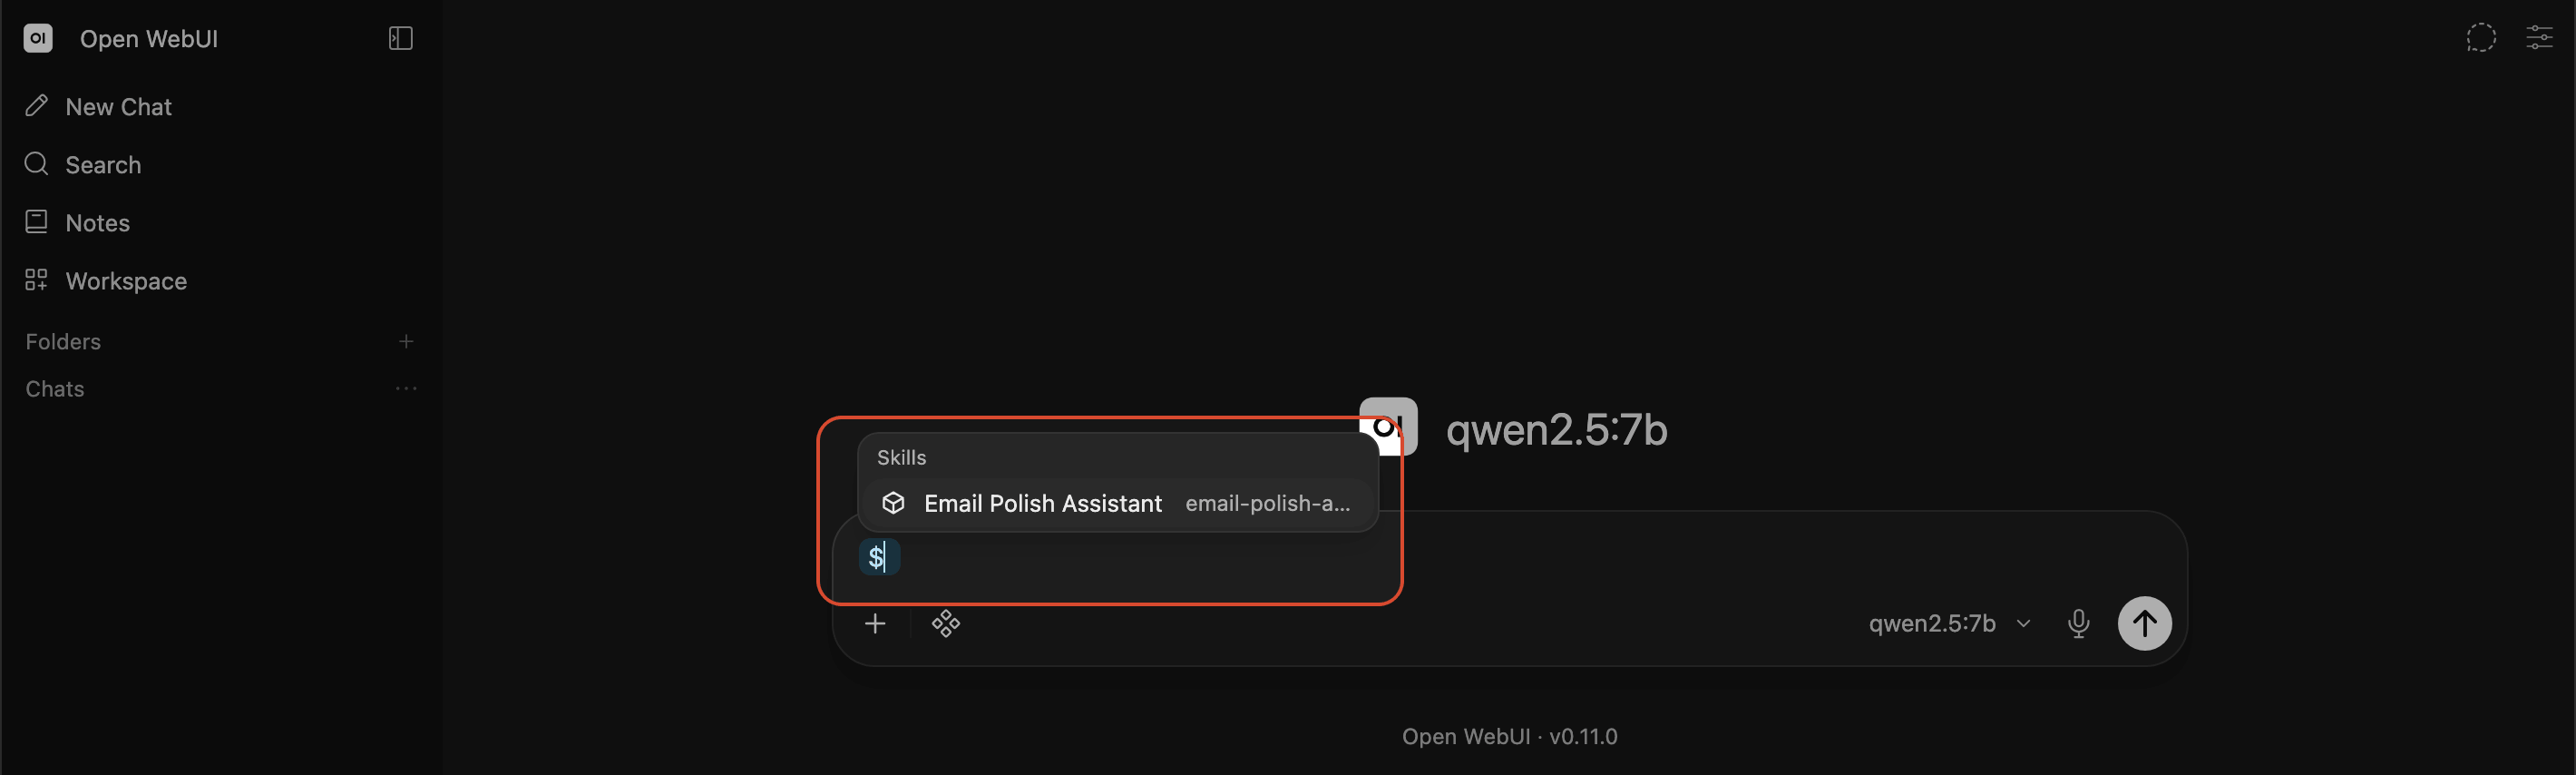
- You can also proactively type
$in the input box to list existing Skills and select one yourself.
Connecting External Model Providers
Besides your own self-hosted local models (Ollama), Open WebUI can also connect to other cloud models (such as OpenAI), and both can coexist and be mixed within the same interface.
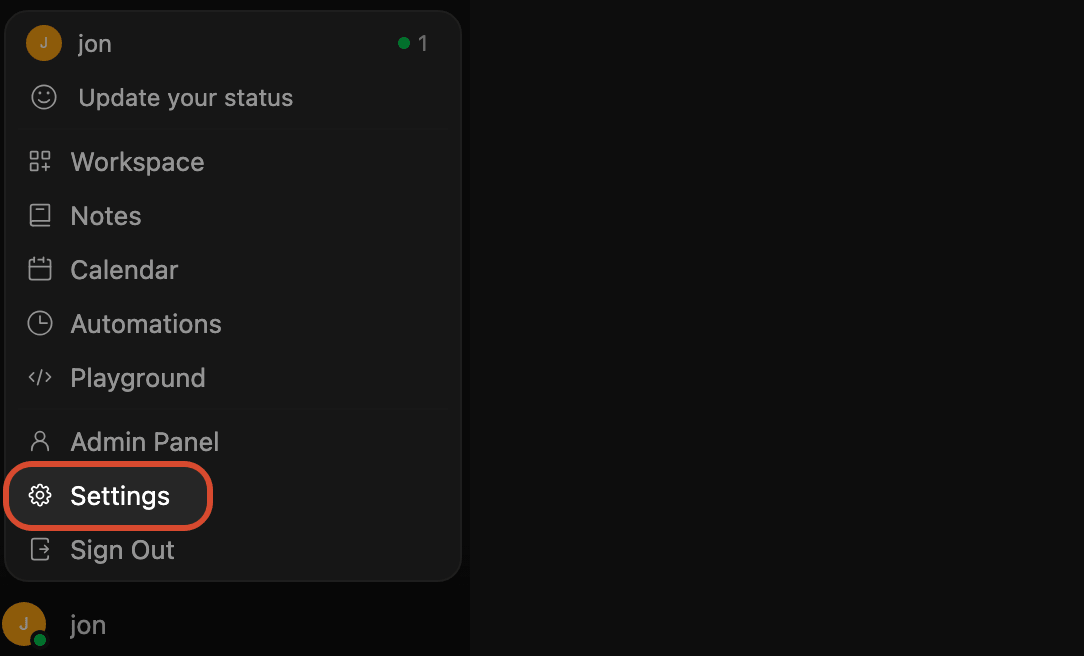
- Click your profile avatar in the bottom left, then click
Setting.
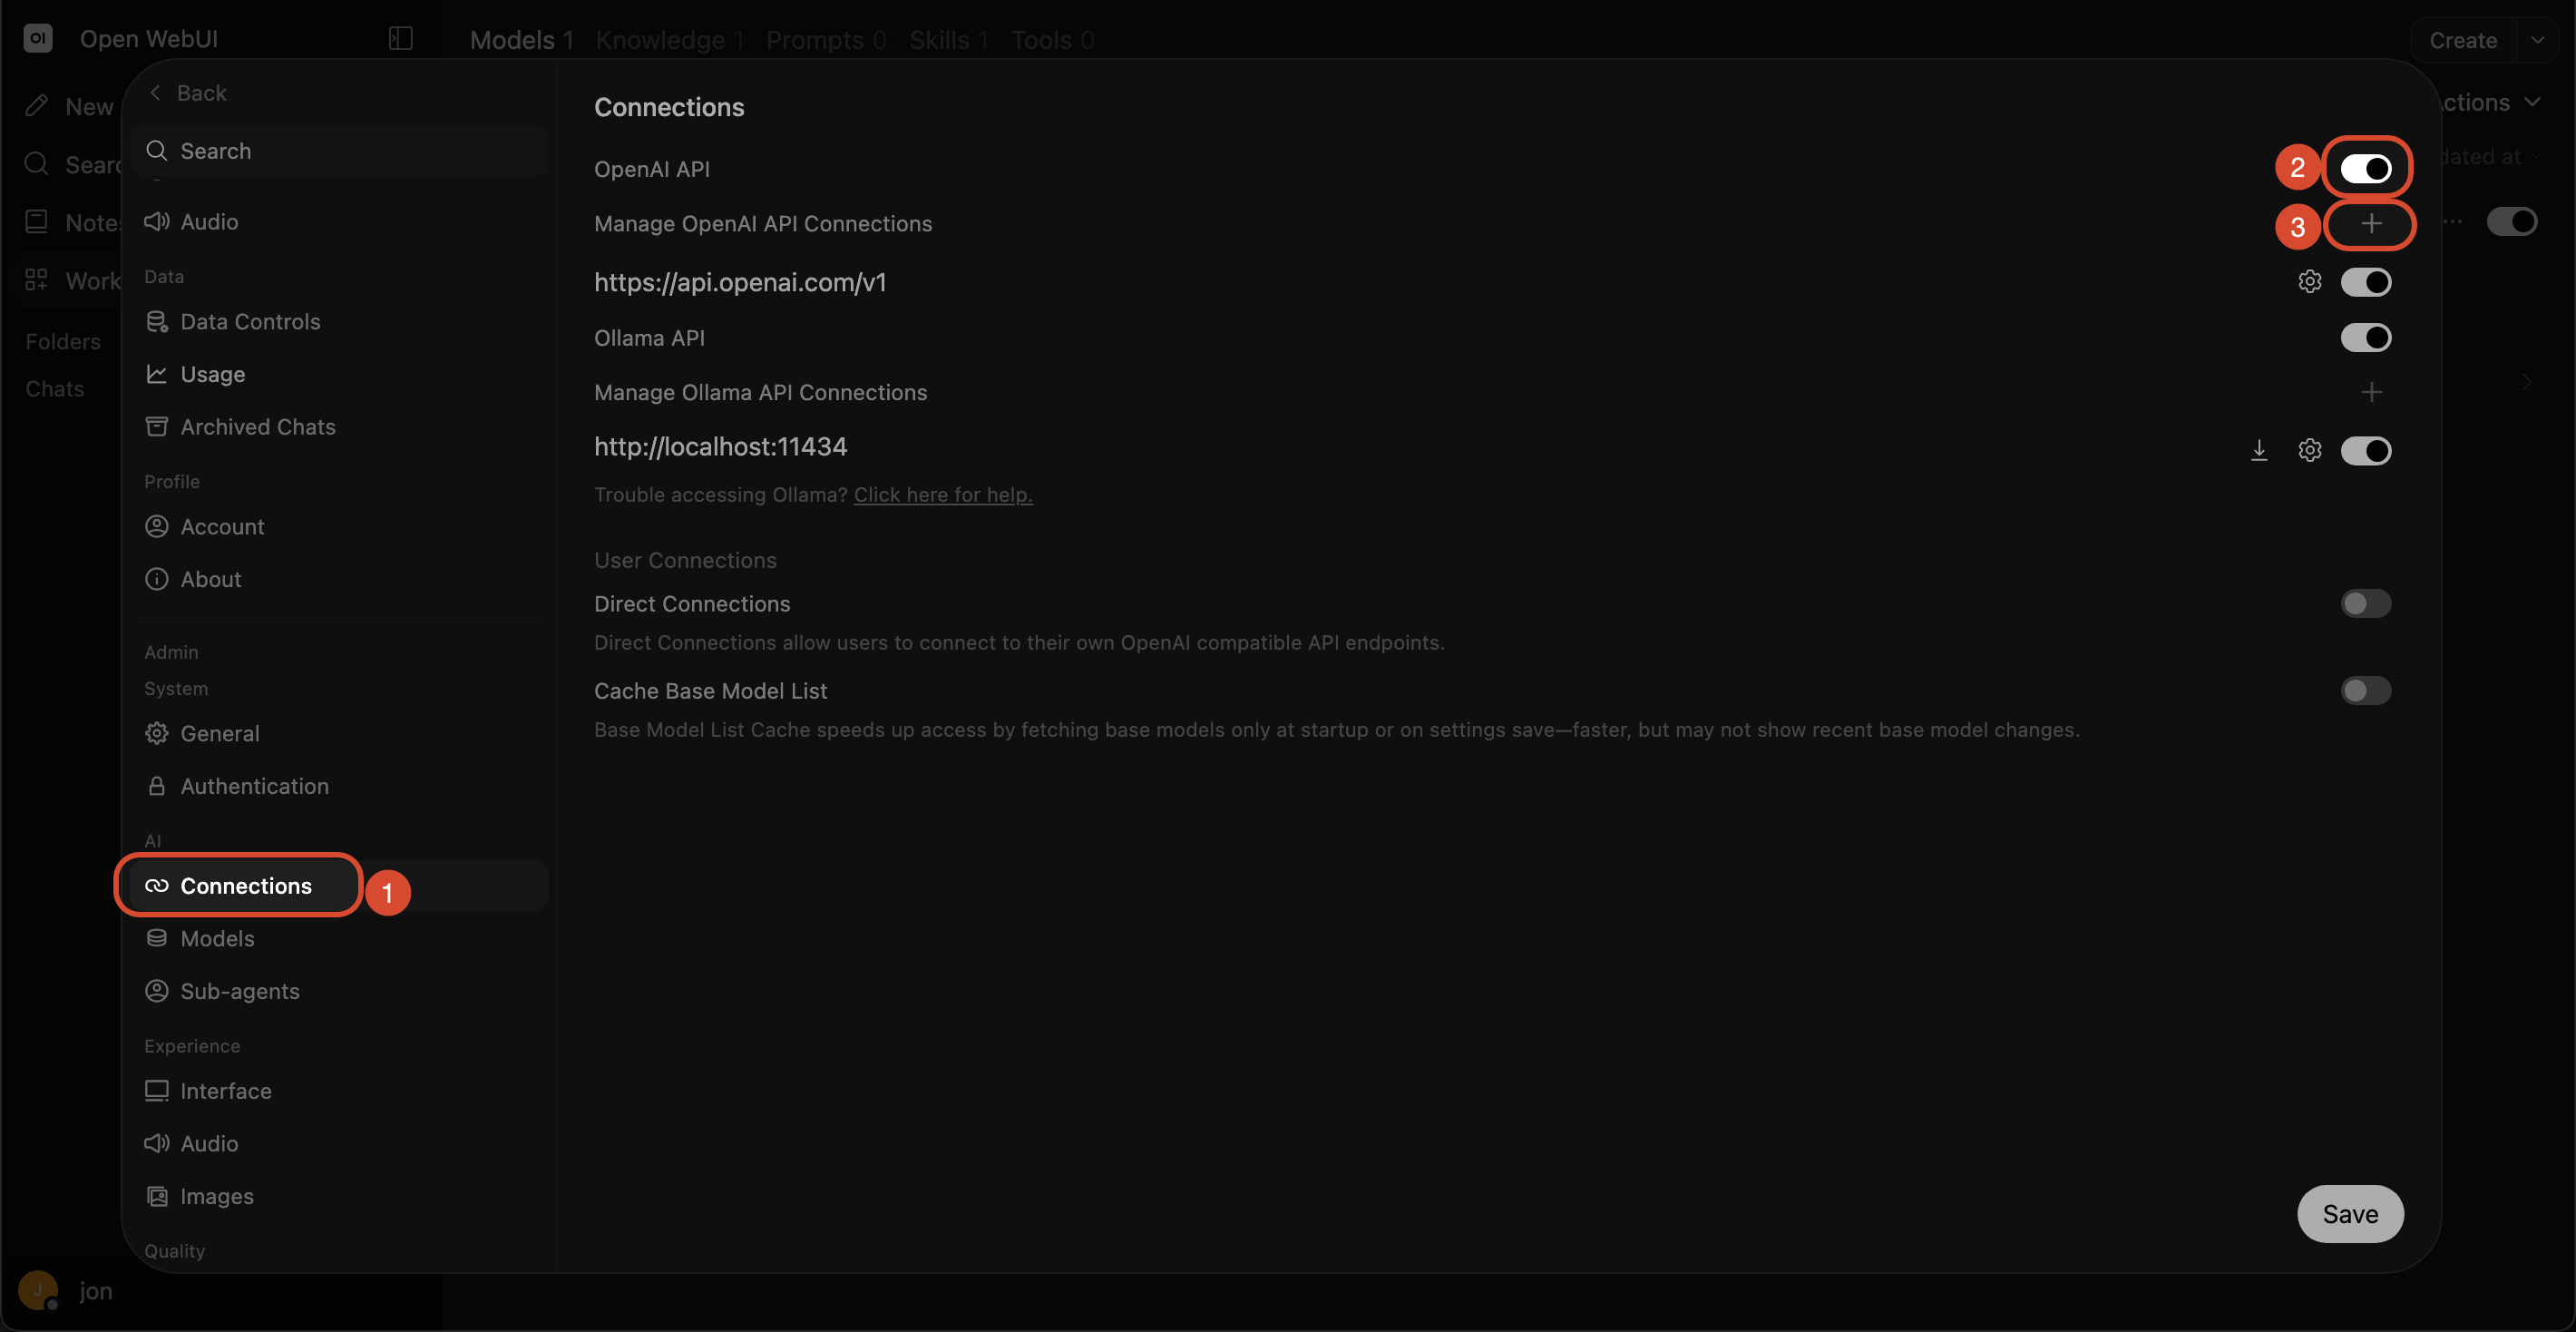
- In the left-hand list, select
Connections, enable the OpenAI API, then click+.
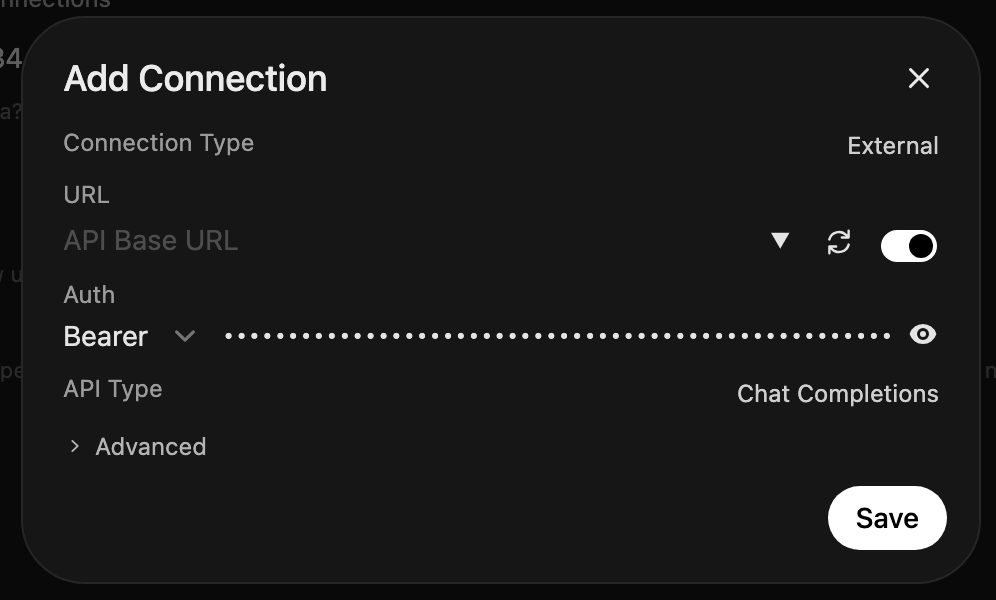
- Enter the external provider's model information.
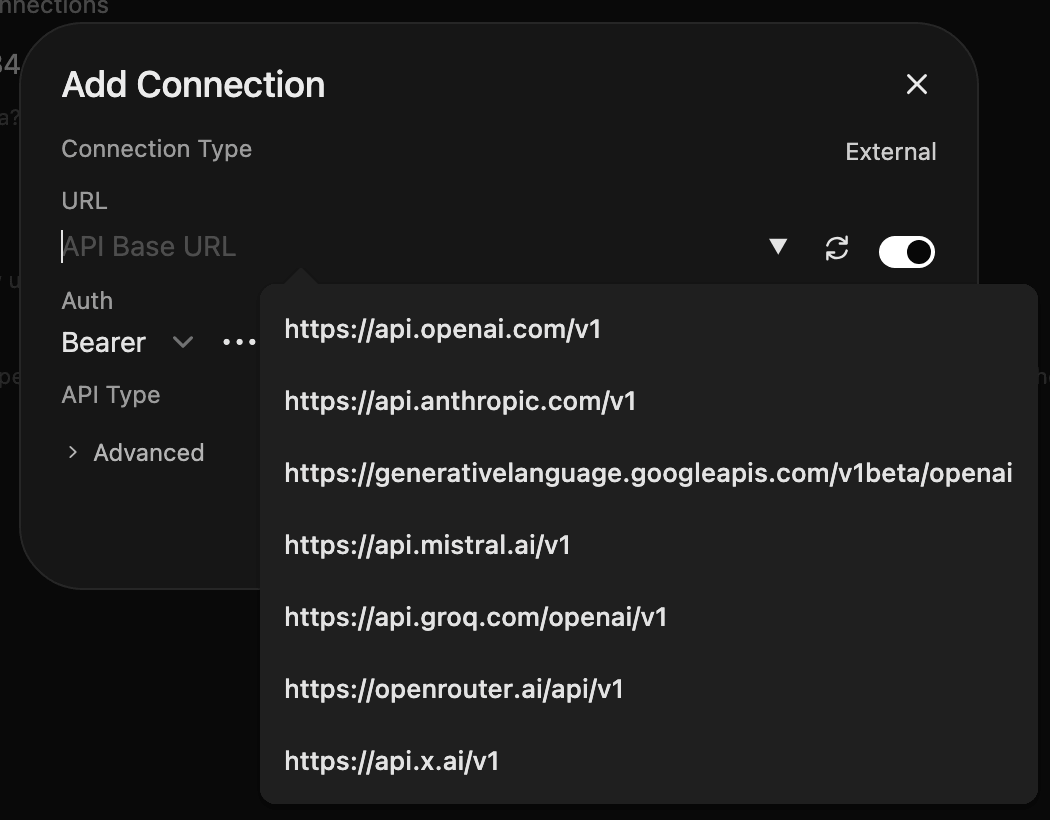
-
Click
URLto choose a different model provider. Enter your API key, then clickSave.Although this field is labeled "OpenAI API," it isn't limited to OpenAI itself. The dropdown includes several preconfigured providers:
api.openai.com— OpenAIapi.anthropic.com— Anthropic (Claude)generativelanguage.googleapis.com— Google Geminiapi.mistral.ai— Mistral AIapi.groq.com— Groqopenrouter.ai— OpenRouterapi.x.ai— xAI (Grok)
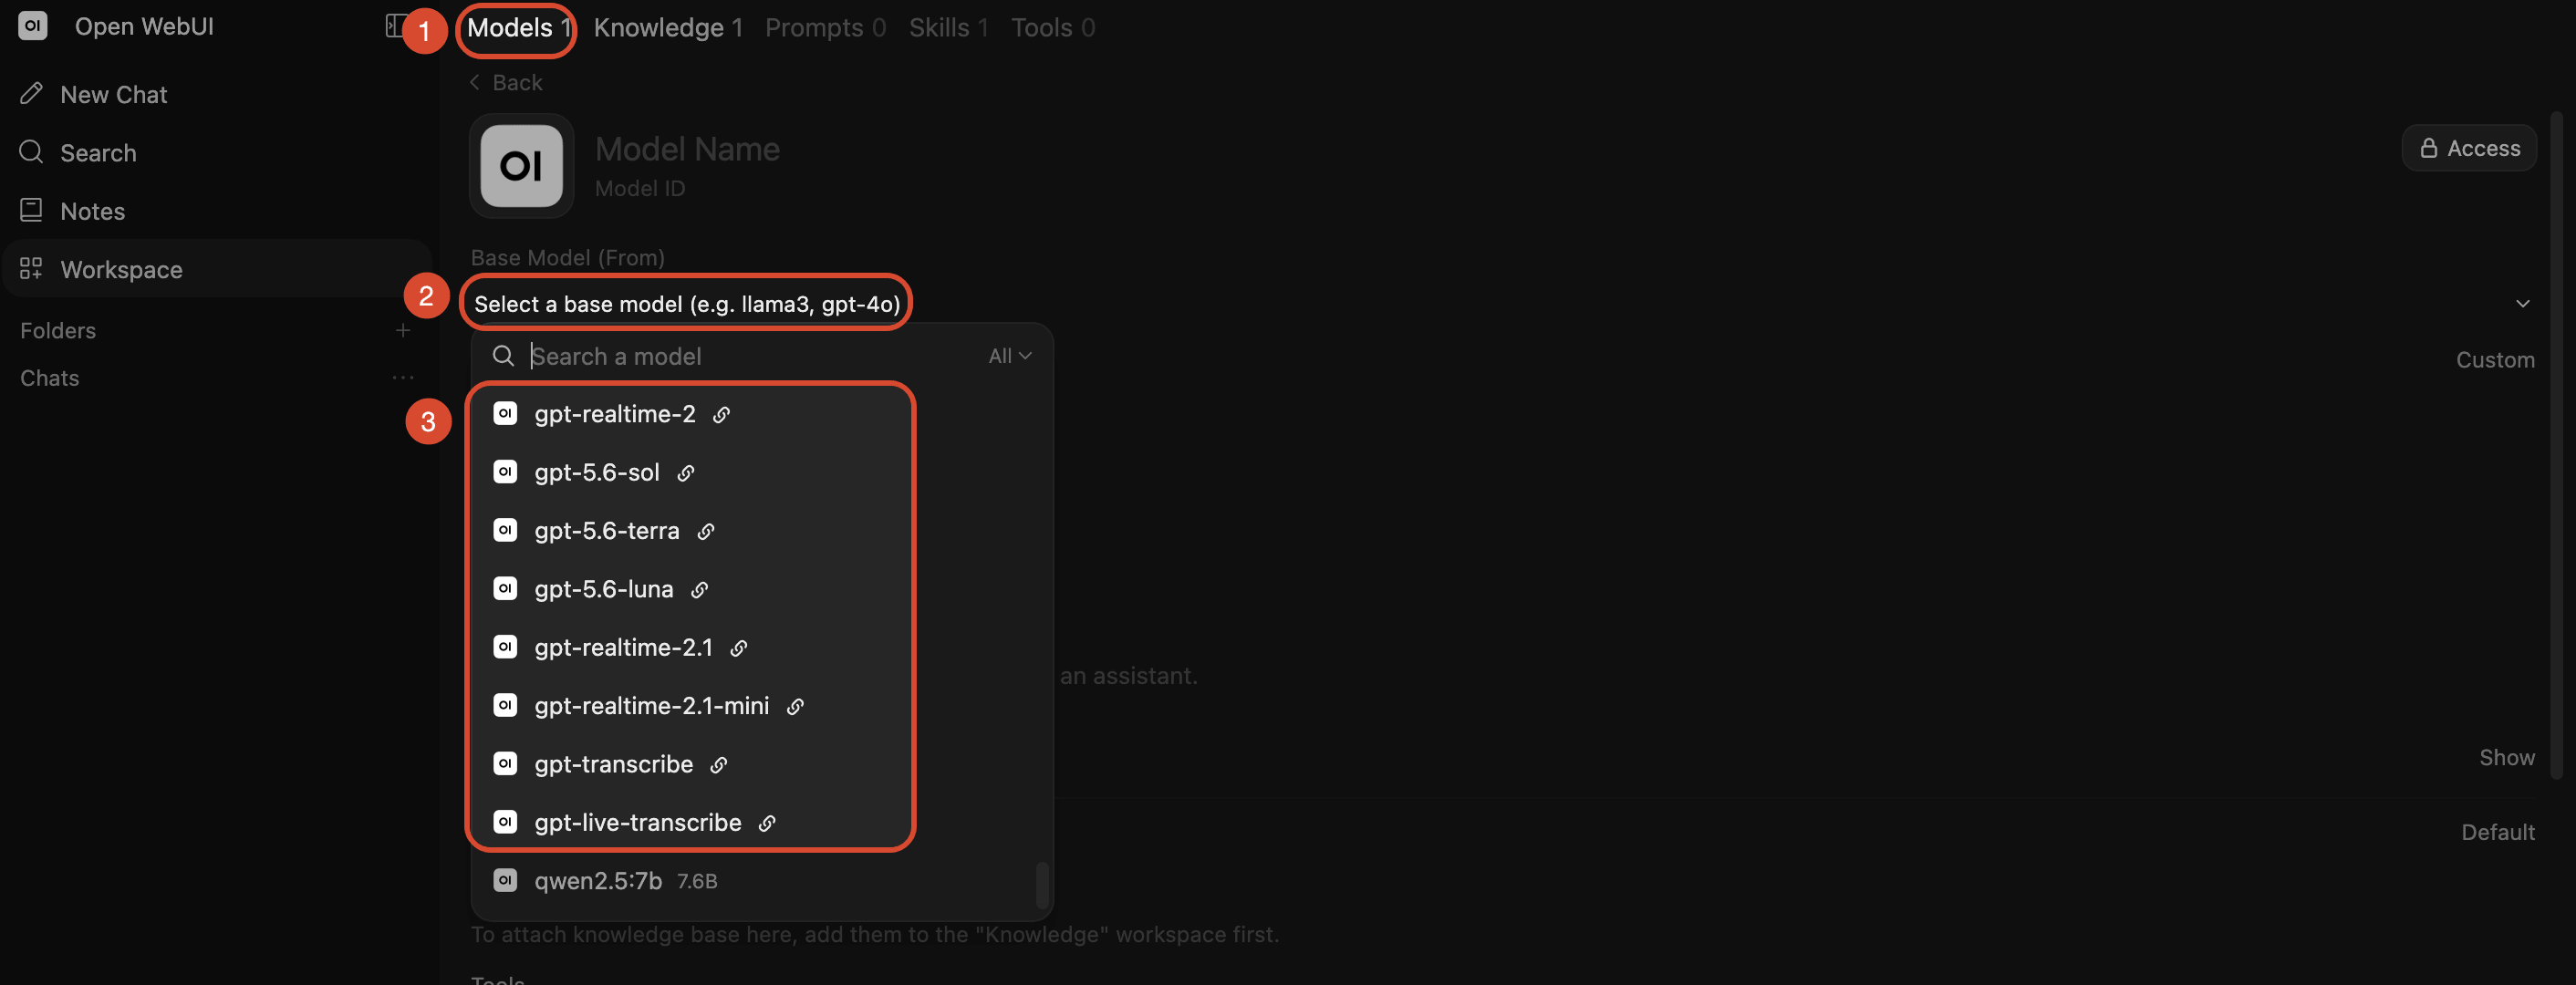
- In Models, you can now select the external provider model you just configured.
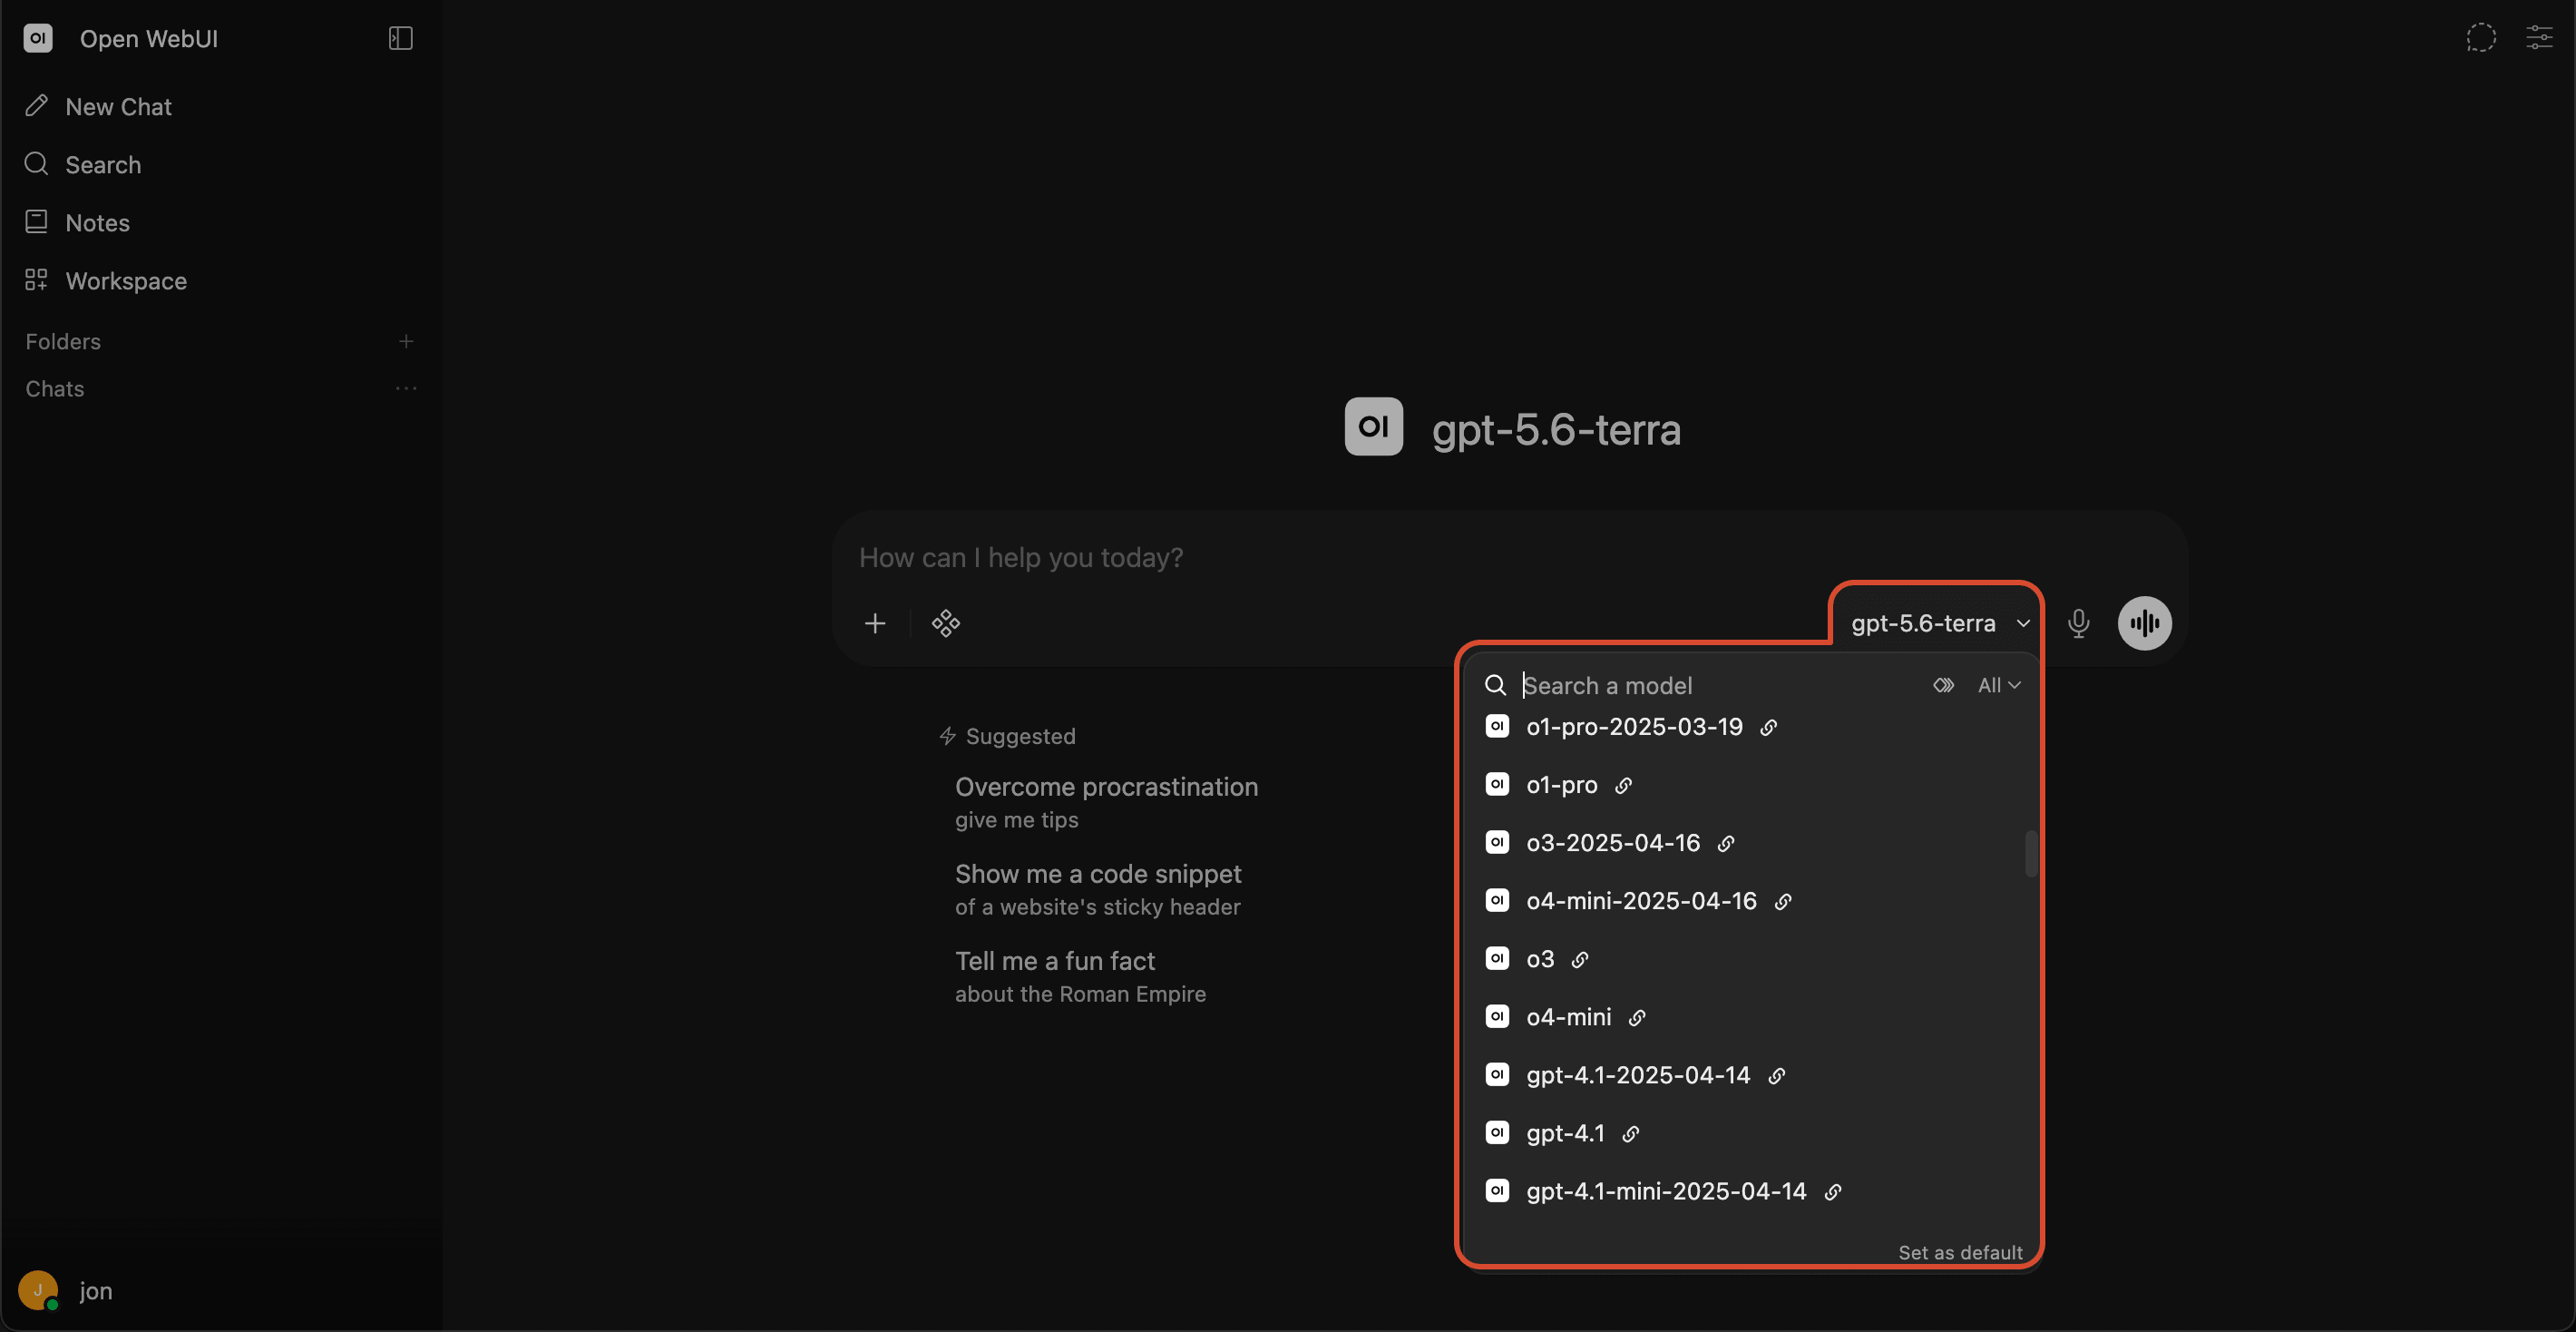
- You can also select the external provider model directly on the right side of the chat window.
Contact Us
If you have any questions or suggestions while using Glows.ai, feel free to contact us via email, Discord, or Line.
Email: support@glows.ai
Discord: https://discord.com/invite/glowsai
Line: https://lin.ee/fHcoDgG