
How to Use Git Bash and SSH Keys to Connect to Glows.ai
This tutorial walks you through installing Git Bash on Windows and connecting to a GPU instance on Glows.ai using an SSH key.
This tutorial covers:
- Installing Git Bash
- Creating an SSH key
- Getting your public key and uploading it to Glows.ai
- Connecting to your Glows.ai instance with the SSH key
Git Bash is a terminal tool for Windows that bundles the Git version control tool with an SSH client, letting users who are used to Linux/Mac command-line workflows run the same familiar commands for version control and SSH on Windows.
On Glows.ai, the SSH Command an instance provides by default uses password login, which means pasting in a password every time you connect. Setting up an SSH key as shown in this tutorial switches authentication to a key pair instead, so you never need to type a password again — and it's more secure.
Let's walk through the setup on Glows.ai step by step.
Install Git Bash
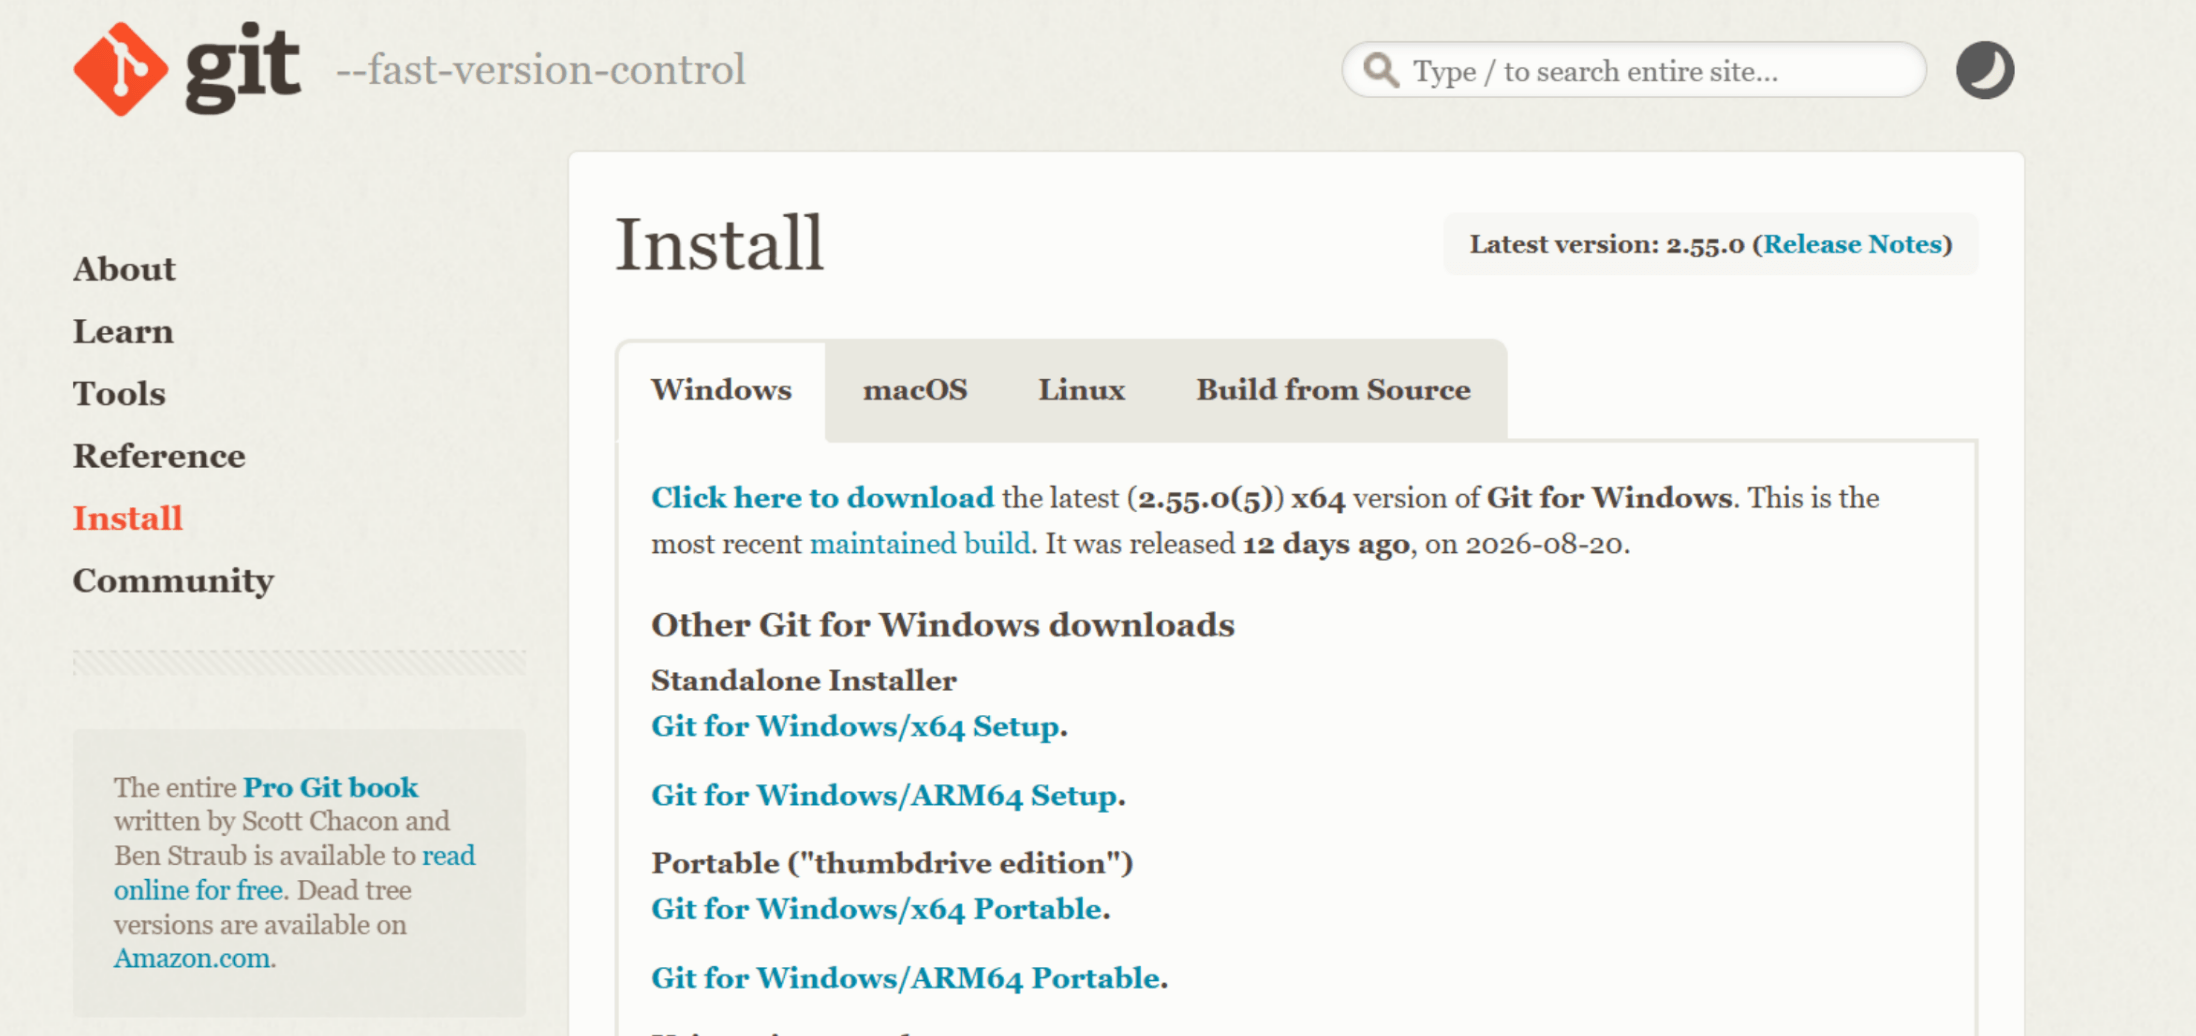
- Go to the official Git download page at
git-scm.com/install/windowsand download the Git for Windows installer. Run the installer once it finishes downloading. After installation, search for Git Bash in the Start menu and open it.
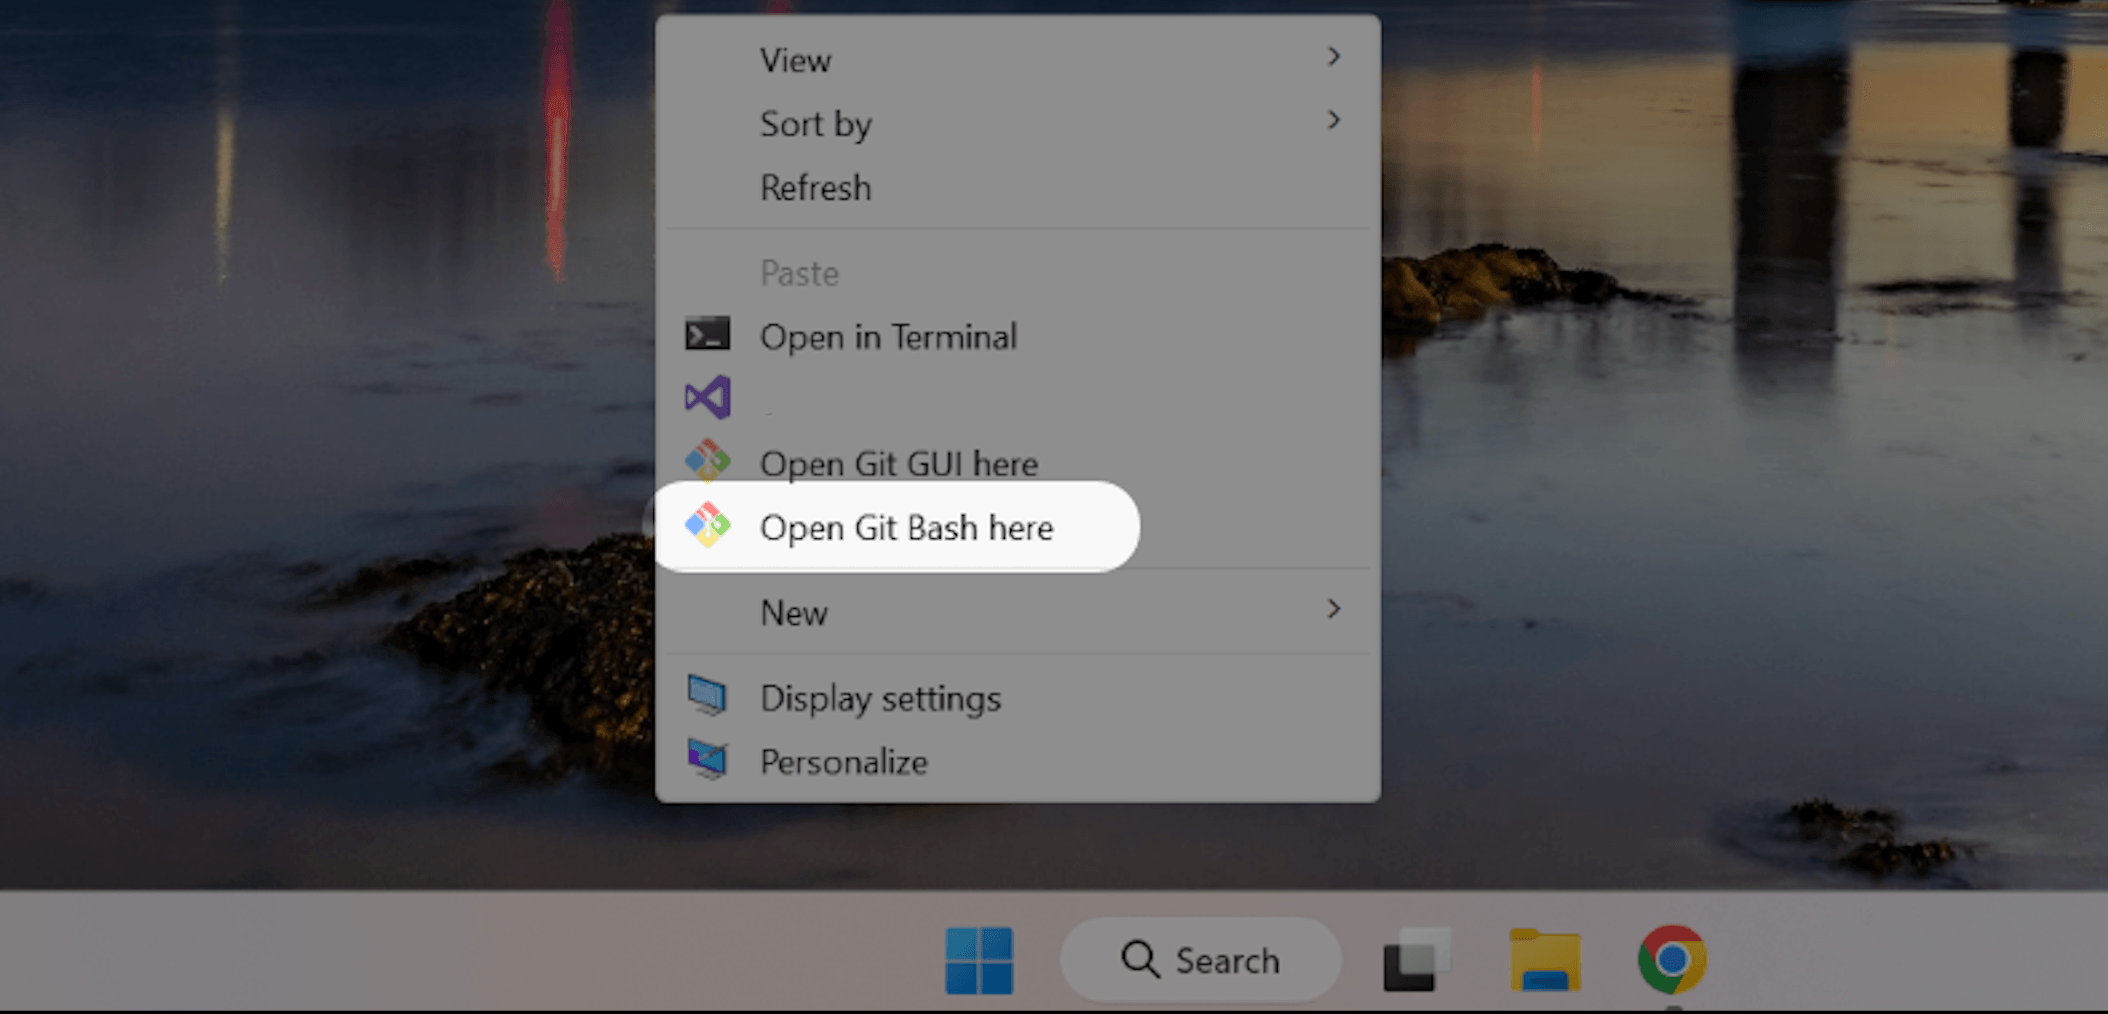
- Alternatively, right-click on the desktop and select Git Bash to open the app.
Create an SSH Key
- Open Git Bash and run the following command to generate an SSH key pair (use your own email address after
-Cto label the key):
ssh-keygen -t ed25519 -C "your_email@example.com"

- You'll be asked where to save the key. Press Enter to use the default path (
~/.ssh/id_ed25519).

-
You'll be asked whether to set a passphrase. Press Enter to skip it.
-
You'll be asked to confirm the passphrase. Since we didn't set one in the previous step, press Enter again to continue. If you did enter a custom passphrase, confirm it here.

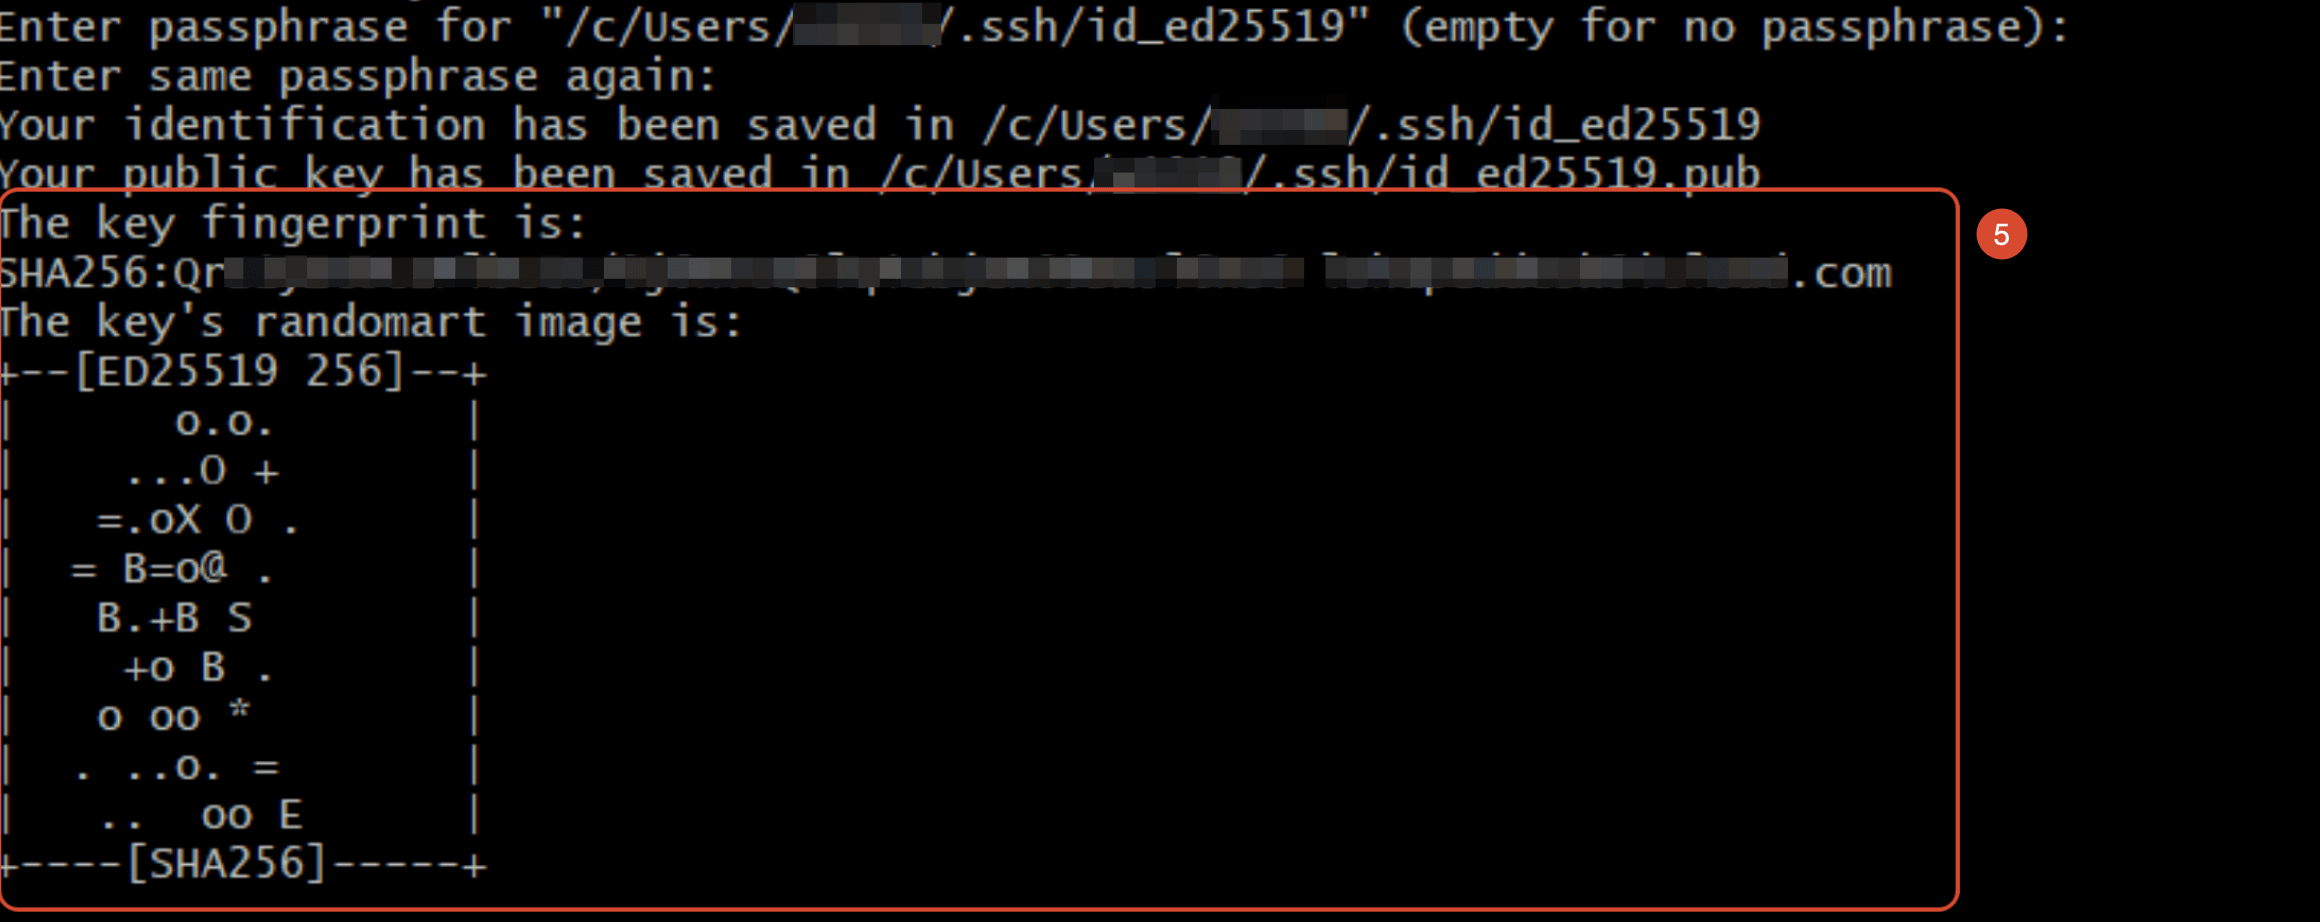
- Once finished, you'll see the paths where the keys were saved (
id_ed25519is the private key,id_ed25519.pubis the public key) along with the key's fingerprint — confirming the SSH key pair was created successfully. Next, we'll grab the public key and upload it to Glows.ai.
Common Issue When Creating an SSH Key
Path error when your Windows username contains Chinese characters or other special characters:
After running ssh-keygen -t ed25519 -C "your_email@example.com" to generate the key, the system asks where to save it, and pressing Enter to accept the default path can fail.

You'll see an error like Could not create directory '/c/Users/xxx/.ssh' or Saving key ... failed: No such file or directory. This happens because Git Bash can fail to resolve the ~/.ssh path due to encoding issues — a known limitation when Git Bash handles non-ASCII paths.

Fix: When ssh-keygen prompts Enter file in which to save the key, don't just press Enter — type a plain-ASCII path manually instead, for example:
/c/ssh/id_ed25519
Get Your Public Key and Upload It to Glows.ai
- In Git Bash, run:
cat ~/.ssh/id_ed25519.pub
This prints your public key. Copy the entire output.

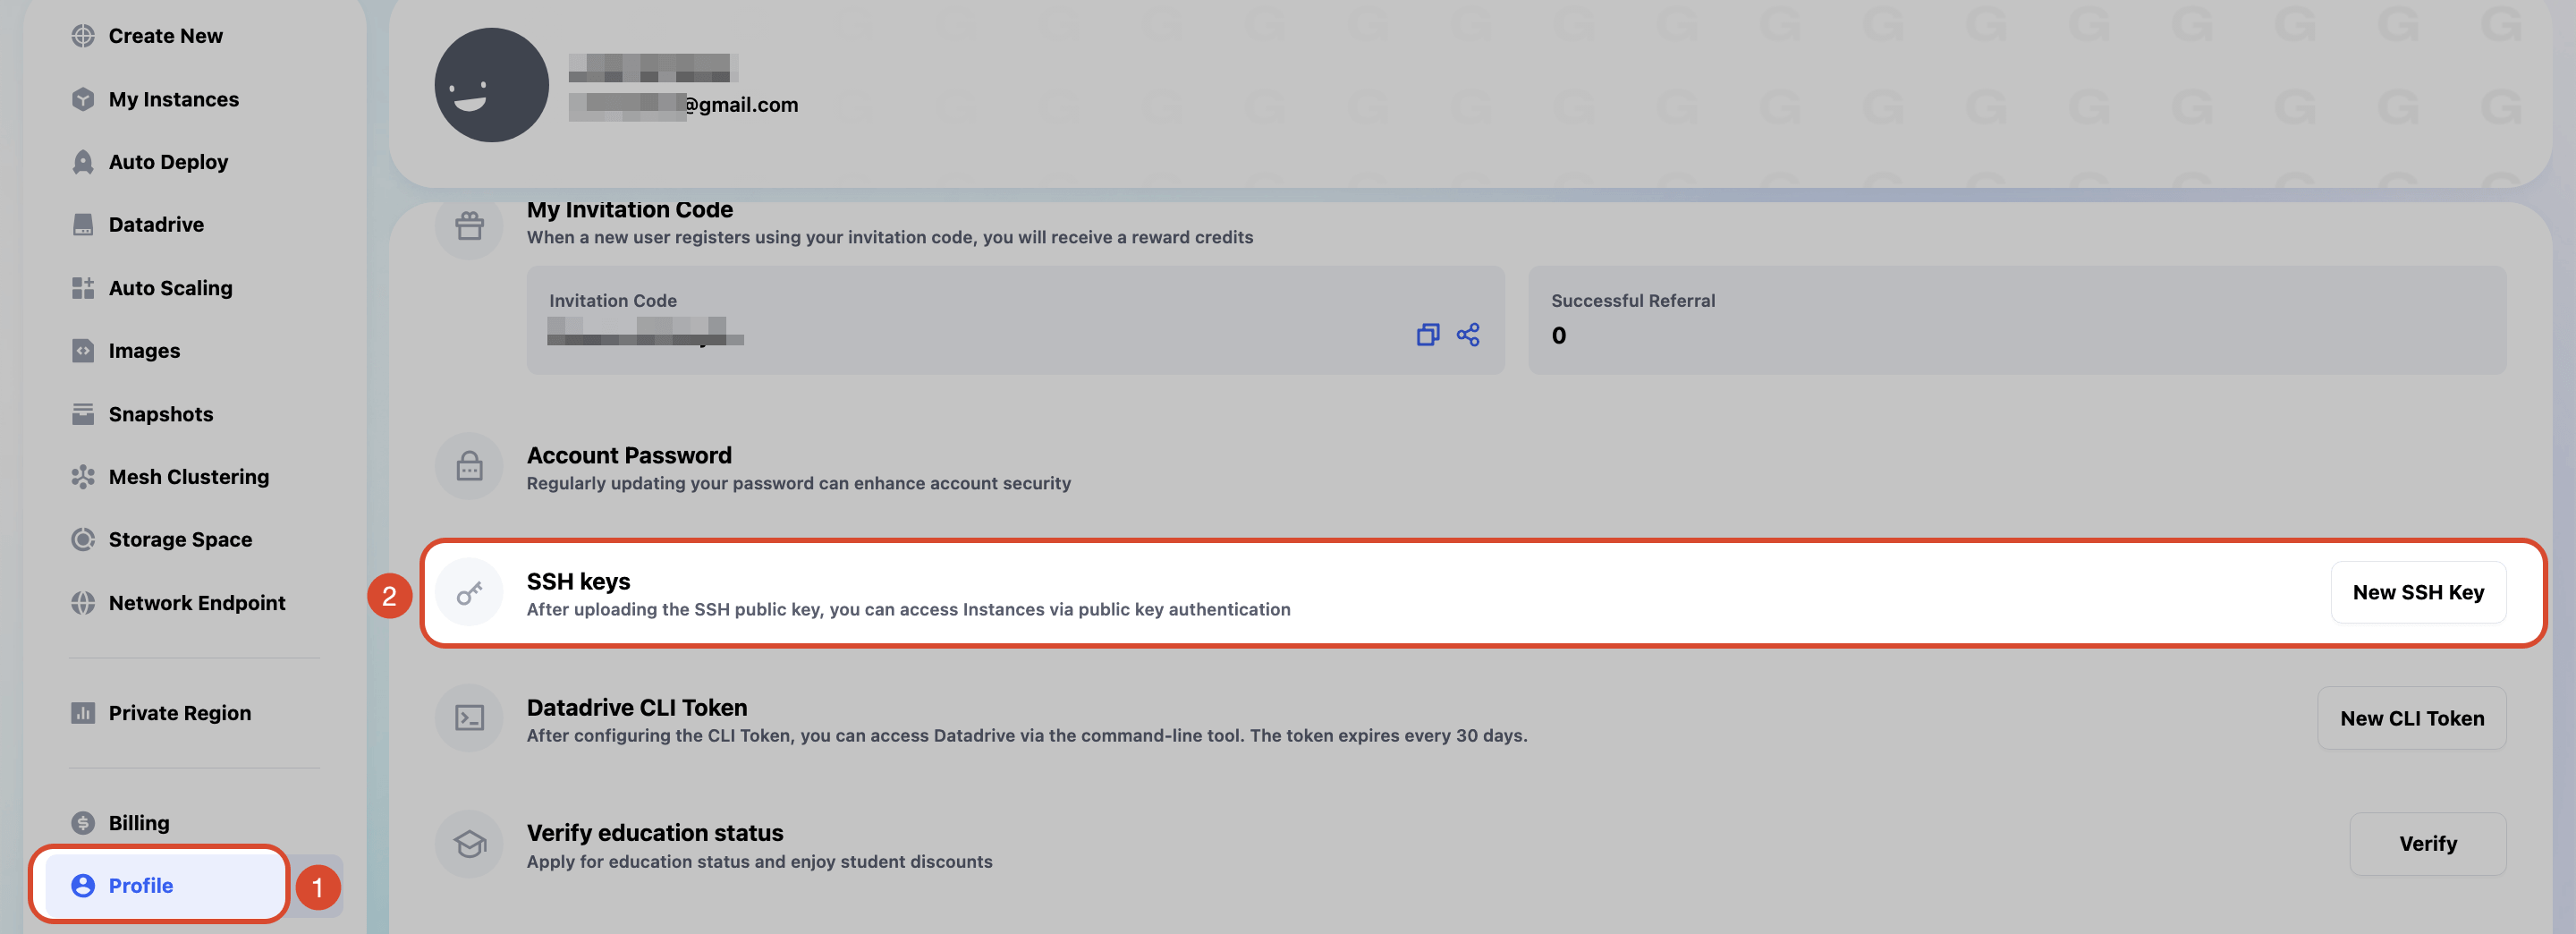
- On the Glows.ai dashboard, click
Profilein the left sidebar, thenSSH keys, thenNew SSH Key.
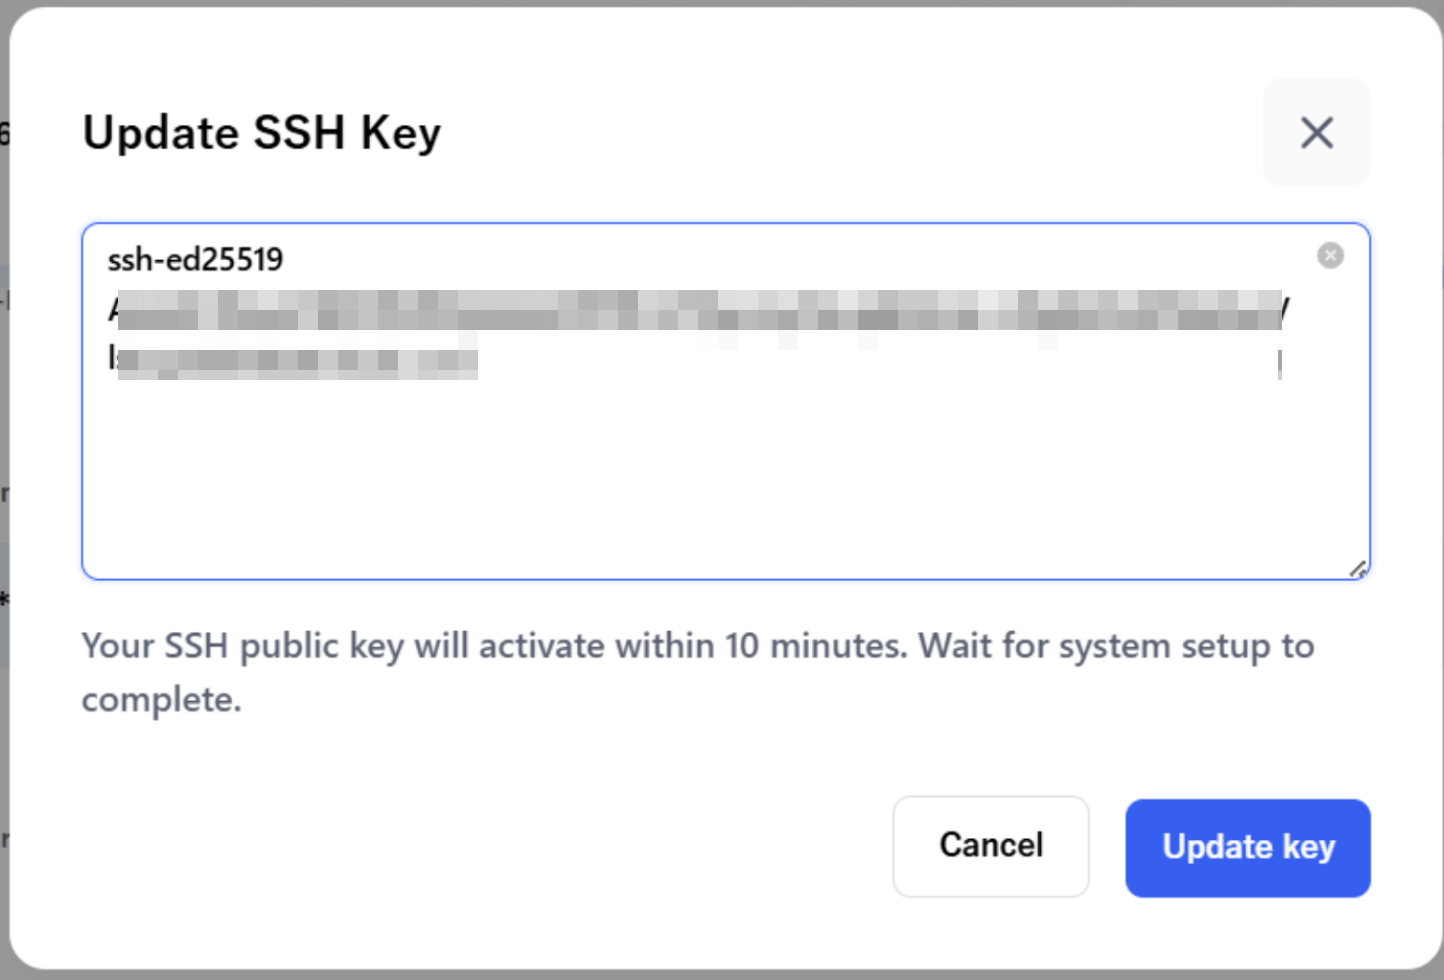
- Paste the public key you copied into the field, then click
Update keyto save it. It may take a few minutes to take effect.
Connect to Your Instance via Git Bash and the SSH Key
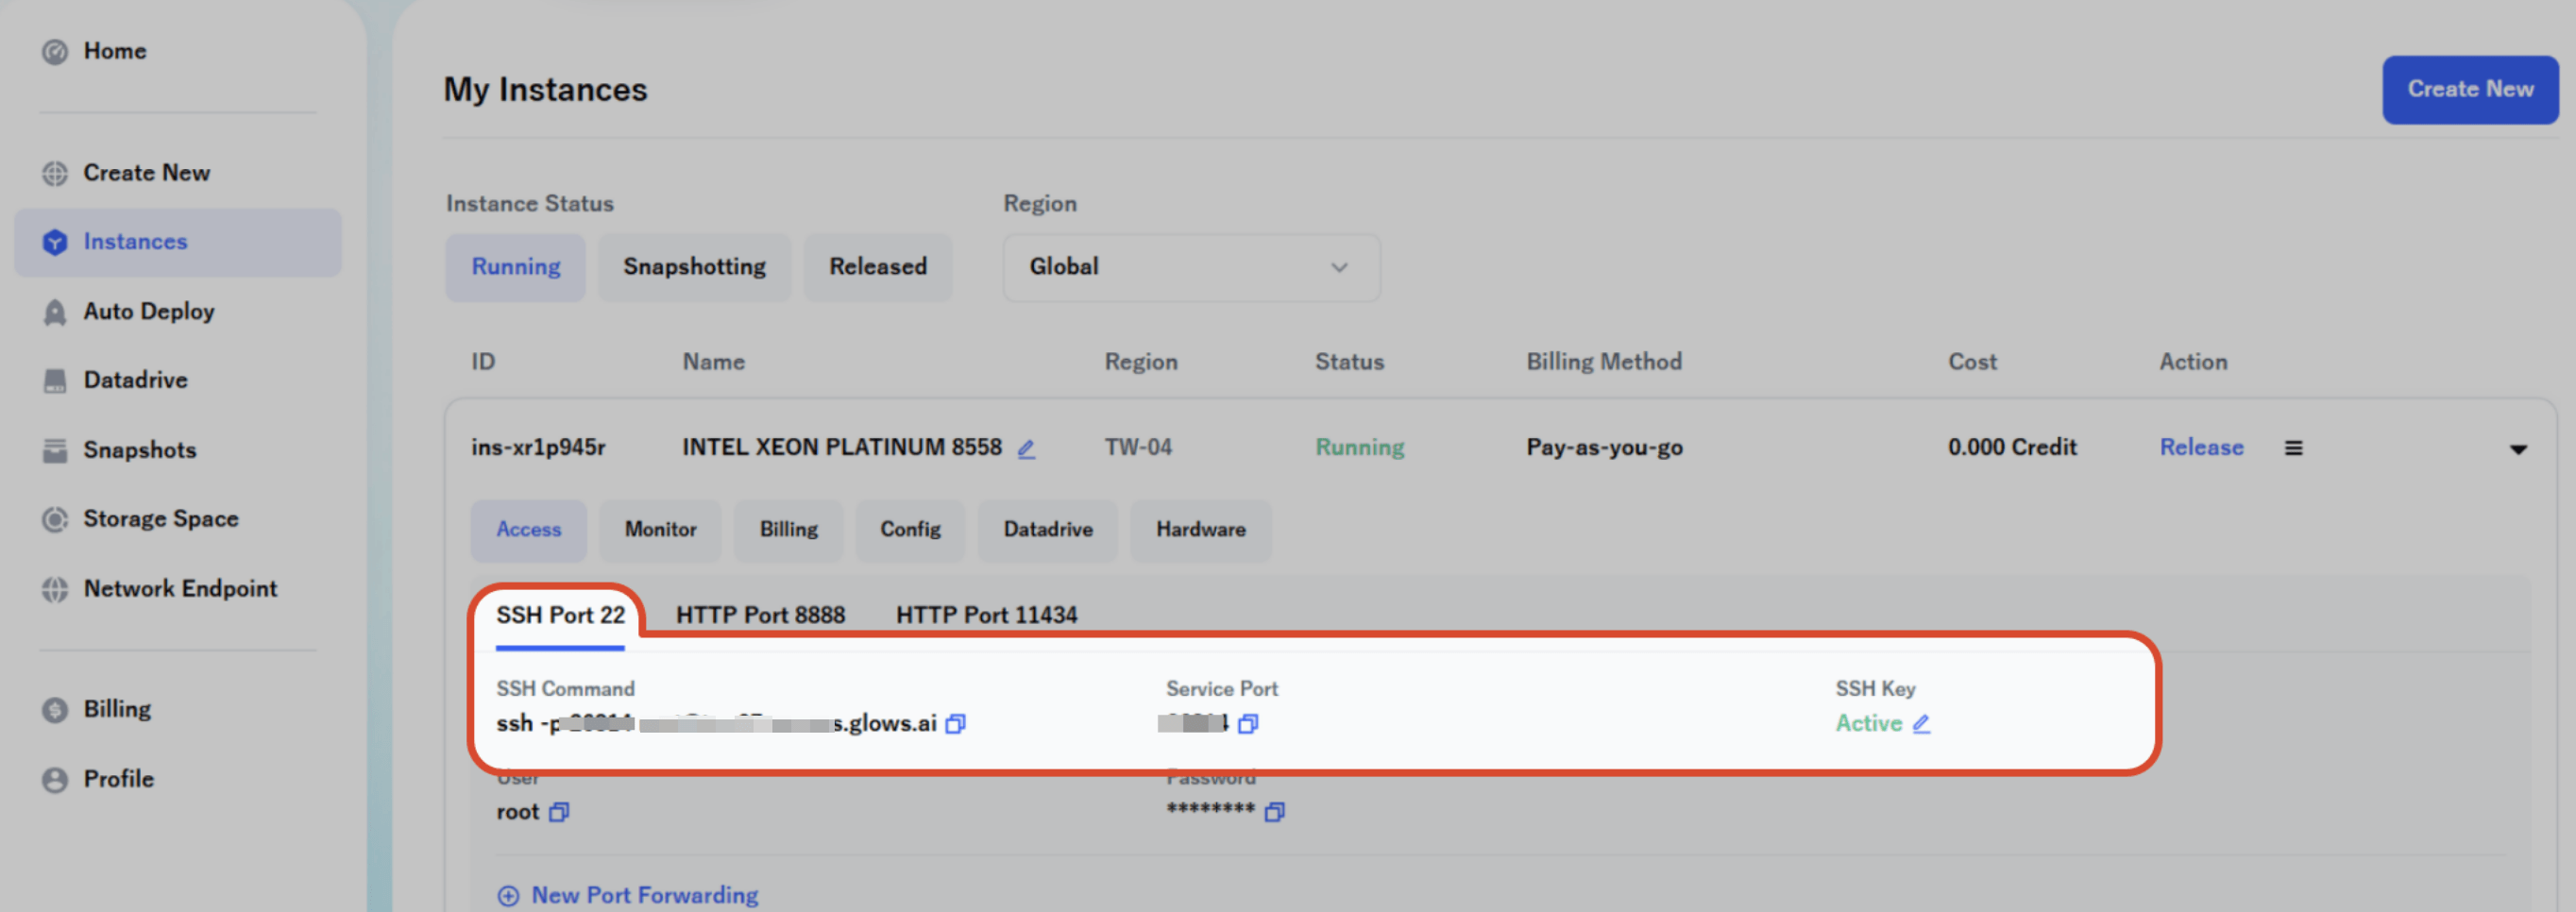
- After completing the previous step, launch your instance and click
SSH port22— the SSH Key field should change toActive(it may take a few minutes to switch fromInactivetoActive). Once it does, you're ready to log in.
- Open Git Bash and run the connection command:
ssh -p <Service Port> -i <path to private key> root@<Access URL>
If you used the default path in this tutorial, <path to private key> is ~/.ssh/id_ed25519.

- The first time you connect to this host, Git Bash will show a prompt asking whether to trust the host's key fingerprint (an SSH safeguard against connecting to a spoofed server). Type
yesand press Enter to continue. This host's information is then remembered, so you won't see this prompt again when connecting to the same instance.

- Connected successfully.

Contact Us
If you have any questions or suggestions while using Glows.ai, feel free to contact us via email, Discord, or Line.
Email: support@glows.ai
Discord: https://discord.com/invite/glowsai
Line: https://lin.ee/fHcoDgG